


BEFORE
YOU
BEGIN
1
INTRODUCTION
IMPORT
ANT
PRECAUTIONS
ASSEMBL
Y
BEFORE
YOU
BEGIN
TREADMILL
OPERA
TION
LIMITED
W
ARRANTY
TROUBLESHOOTING
&
MAINTENANCE
CONDITIONING
GUIDELINES
ASSEMBL
Y
TREADMILL
OPERA
TION
BEFORE YOU
BEGIN
ASSEMBL
Y
ASSEMBL
Y
1
INTRODUCTION
IMPORT
ANT
PRECAUTIONS
TREADMILL OPERA
TION
CONDITIONING GUIDELINES
TROUBLESHOOTING &
MAINTENANCE
LIMITED WARRANTY
TREADMILL OPERA
TION
ASSEMBL
Y
IMPORT
ANT
PRECAUTIONS
BEFORE YOU
BEGIN
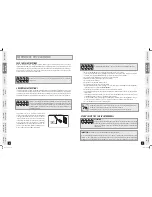
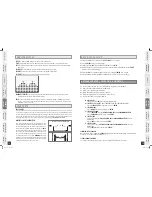
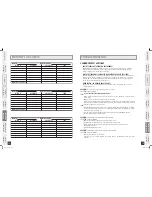
SPEED
•
Shown as MPH. Indicates the speed of the treadmill belt.
TIME •
Shown as Minutes:Seconds. Indicates the time remaining or the time elapsed in your workout.
PULSE
• Shown as Beats Per Minute. Indicates your heart rate (displayed when contact is made with both
pulse grips).
DISTANCE •
Shown as Miles. Indicates distance traveled during your workout.
INCLINE •
Shown as Percent. Indicates the incline of the treadmill deck surface.
CALORIES •
Indicates total Calories burned during your workout.
WORKOUT PROFILES •
Represents the profile of the workout being used (speed during speed based
workouts and incline during incline based workouts).
PACE •
Indicates how many minutes it takes to complete a mile while running or walking at your current
speed. For example: If at your current speed it will take you 10 minutes to complete a mile, the treadmill
will display ‘10.0’ as your pace.
MONITOR DISPLAY
GETTING STARTED / SELECTING A WORKOUT
DATE & CLOCK SETUP
Enter Setup Mode: Press and hold
1
and
2
BUTTONS
for 3-5 seconds.
Use the
ENTER
button to confirm settings.
Settings include: MONTH, DAY, YEAR, HOUR, MINUTE, and AM/PM.
Review Settings: You can review your settings at any time while in Setup Mode. Use the
ENTER
button to scroll through settings.
Exit Setup Mode: To confirm the Date and Time, press and hold
ENTER
for 3 seconds.
To Reset: Simply reenter Setup Mode and adjust Date and Time to the correct setting.
1)
2)
3)
4)
5)
)
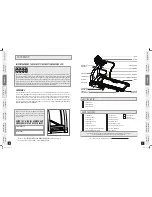
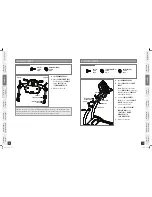
Check to make sure nothing is on or will hinder the movement of the treadmill.
Plug in the power cord and turn the treadmill ON.
Stand on the side rails of the treadmill.
Attach the safety key clip to part of your clothing.
Insert the safety key into the safety keyhole in the console.
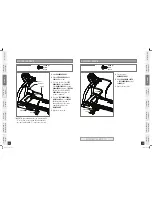
You have two options to start your workout:
QUICK START
Simply press the
START
key to begin working out. OR...
SELECT A USER
or
GUEST
(GUEST WORKOUTS ARE NOT TRACKED IN proFILE
™
)
Once a
USER OR GUEST
has been chosen, press
ENTER
.
SELECT WEIGHT.
Once a
WEIGHT
has been selected, press
ENTER
.
SELECT A PROGRAM
Select a
PROGRAM
using the
KEYPAD, ARROW KEYS
or
PROGRAMMING BUTTON.
Once a
PROGRAM
has been chosen, press
ENTER
.
SELECT A TIME
Select a Time using the
KEYPAD, ARROW KEYS, PROGRAMMING BUTTON
or use the
default time.
Once a
TIME
has been chosen, press
ENTER.
SELECT A LEVEL
Select a Level using the
KEYPAD, ARROW KEYS, PROGRAMMING BUTTON
or use the
default time.
Once a
LEVEL
has been chosen, press
ENTER.
FINISHING YOUR PROGRAM
When your workout is complete, the
CONSOLE
will beep. Your workout information will stay displayed
on the console for 30 seconds and then reset.
CLEAR CURRENT SELECTION
To clear the current workout selection or screen, hold the STOP button for 3 seconds.
1)
2)
3)
4)
5)
)
A)
B)
C)
D)
E)
F)
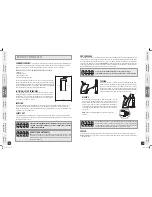
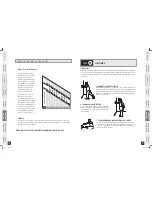
HEART RATE
PULSE GRIPS
Place the palm of your hands directly on the grip pulse handlebars. Both hands must grip the bars for your heart
rate to register. It takes 5 consecutive heart beats (15-20 seconds) for your heart rate to register. When gripping
the pulse handlebars, do not grip tightly. Holding the grips tightly may elevate your blood pressure. Keep a loose,
cupping hold. You may experience an erratic readout if consistently holding the grip pulse handlebars. Make sure
to clean the pulse sensors to ensure proper contact can be maintained. See MAINTENANCE SECTION.
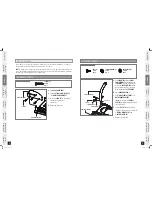
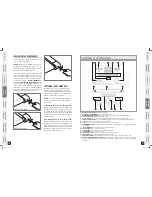
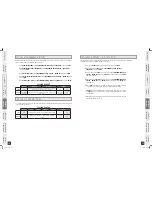
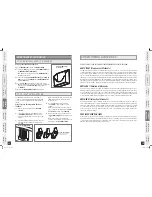
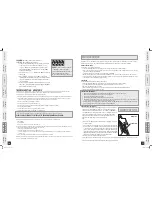
WIRELESS CHEST TRANSMITTER
Prior to wearing the wireless chest transmitter on your
chest, moisten the two rubber electrodes with water. Center
the chest strap just below the breast or pectoral muscles,
directly over your sternum, with the logo facing out.
NOTE:
The chest strap must be tight and properly placed to receive
an accurate and consistent readout. If the chest strap is too
loose, or positioned improperly, you may receive an erratic
or inconsistent heart rate readout.
WARNING!
The heart
rate function is not a medical device. Various factors may
affect the accuracy of your heart rate reading. The heart rate
reading is intended only as an exercise aid.
BACKSIDE OF CHEST TRANSMITTER
APPLY MOISTURE HERE
5.0AT_Rev.1.7.indd 18-19
4/28/08 2:03:55 PM