20
Using Aero-hawk Maps
Watch the Video
►
https://www.youtube.com/watch?v=K9OW6jiX6SA
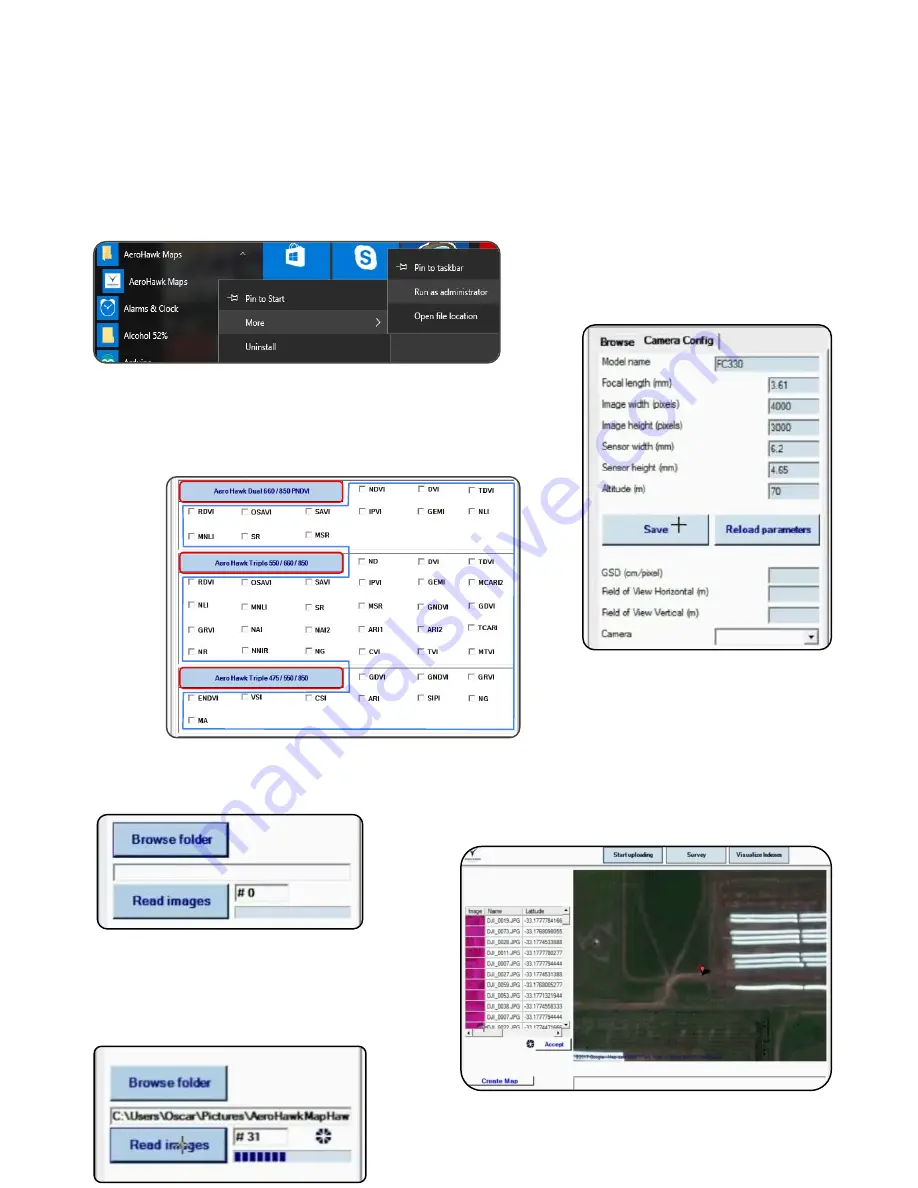
1.Download the latest Aerohawk maps application from
Aero-Hawk.com. Locate Aero Hawk Maps in the start menu, right
click and open as administrator. After the initial setup you will not
have to open as admin.
3. Select Browse folder and find the pictures you
would like to analyze by selecting the camera
folder, and then selecting the mission.
4. Select Read images. If you are using a
different camera to take pictures you will be
directed to the camera config tab. However if
you are using an aero-hawk camera array you
may not have to go to camera config.
2. Select the
group
or
individual indexes
you would like to view
depending on the camera you uploaded pics from. For more
information on what each index of the camera’s go to
https://aero-hawk.com/software/
NDVI
RBP
BBP
5. In the camera
config table you can
browse for the
camera you are using
or you can enter the
parameters and save
it for future use.
6. Select Survey to view the photos. If
you find a photo that is black, or one
you don’t want to use, you can move the
slider to the right and deselect it. Then
press accept and select create map.
Wait time depends on the amount of
images and computer capabilities.


