


AEM Performance Electronics
Phone (8am-5pm M-F PST): 310-484-2322
2205 W 126
th
Street, Unit A
Fax: 310-484-0152
Hawthorne, CA 90250
AEMCal will present a similar window to the one shown
at left. A scroll bar will indicate connection progress as
AEMCal retrieves calibration data from your VCU. If you
do not see this progress bar at first, click Abort and:
1. Make sure there are no other devices connected
or applications running that may be using your PC
USB ports.
2. Double check the pinout of the harness DB9
interface connector.
3. Disconnect the CAN to USB adapter from your PC
then plug it back in.
4. Try restarting AEMCal and repeating the process.
If you got this far, congratulations! Your VCU is powered
up and communicating with AEMCal.
Basic VCU Function Check & AEMCal Work Space Tour
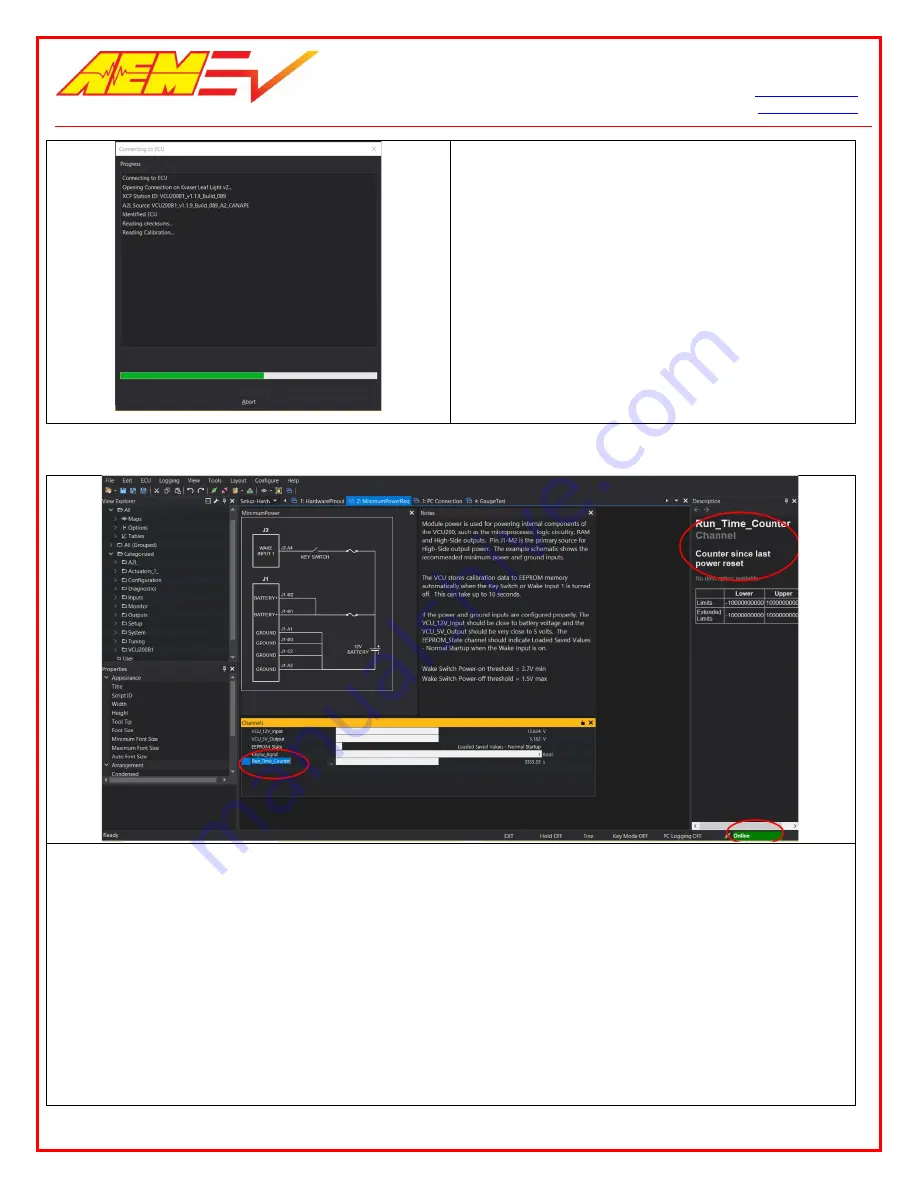
1. Within AEMCal, navigate to the Setup-Hardware group and select the MinimumPowerReq tab.
2. Live data from the VCU will be presented in the Channels list. Note the green Online indication in the lower
right. Note the Description Pane. If you do not see the Description Pane, go to View | Descriptions or hit
Cntrl+D.
3. Ensure that:
a. The VCU_12V_Input internal measurement matches (approximately) the output from your power
supply.
b. The VCU_5V_Output internal measurement is close to 5 volts.
c. The Run_Time_Counter is incrementing.
d. The EEPROM_State indicates Loaded Saved Values – Normal Startup.
Congratulations! Another milestone passed.
6/3/2020, Revision C
AEM EV VCU200 User Guide
Page
8
of
15


