43
ENGLISH
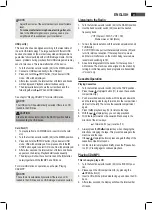
NOTE:
• Adjust the volume of the external device to a comfortable
level.
•
To connect external microphone, electric guitar, etc.:
Due to the different signal levels, you may need a pre-
amplifier which is available at your local dealer.
USB port (6)
This device has been designed according to the latest state of
the art in USB technology. The large number of different USB
devices of all kinds on the market today makes it impossible to
guarantee full compatibility with all USB storage media. For this
reason, problems during playback from USB storage media may
occur in rare cases. This is
no
malfunction of the device.
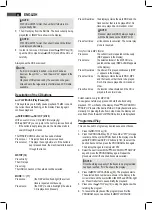
1. Turn the function selector switch (24) to the MEDIA position.
2. Connect a USB device directly to the USB port.
3. Press and hold the STOP button (16) and select USB
mode. USb will be displayed.
4. After a few seconds, the total number of folders and tracks
will be displayed. Playback will start subsequently.
5. The display alternately shows the current track and the
folder together with MP3 and USB indicators.
See chapter “Playing CDs/MP3” for more information.
NOTE:
The USB port will be automatically selected if there is no CD
loaded in the CD drive.
CAUTION:
Slide the function selector (24) to the RADIO position before
disconnecting the USB device.
Card Slot (7)
1. To play data from an SD/MMC card, insert it into the card
slot.
2. Turn the function selector switch (24) to the MEDIA position.
3. Press and hold the STOP button (16) and select USB
mode. USb will be displayed. Now press and hold the
STOP button again to select SD mode. Sd will be displayed.
4. After a few seconds, the total number of folders and tracks
appears on the display. Playback starts subsequently.
5. The display will show the current track and the folder alter
-
nately together with the
u
MP3 and SD icons.
For more information on operation, see chapter “Playing
CDs/MP3”.
NOTE:
The card slot is automatically selected if there are no CD
loaded in the CD drive and no USB storage media connected.
Listening to the Radio
1. Turn the function selector switch (24) to the RADIO position.
2. Use the band selector switch (22) to select the desired
frequency band.
VHF (Stereo) = FM ST., VHF = FM,
Medium wave = AM (Mono)
3. Tune in the desired station with the station adjustment knob
TUNING (4).
4. For VHF/FM mode pull out the telescopic antenna (30) and
turn it to improve reception. If the reception is too weak
and there is interference on the station being received, we
recommend switching to FM.
5. An aerial is integrated into the device for the reception of
AM stations. The machine can be aligned to the station by
turning it. In this frequency band programs are transmitted
in “mono” only.
Cassette Operation
Playing Cassettes
1. Turn the function selector switch (24) to the TAPE position.
2. Press the / stop/eject button (11) to open the cassette
compartment (9).
3. Push a recorded audio cassette, with the tape downwards
and the listening side facing forwards, into the compartment
(full reel to the left). Then close the cassette compartment
again.
4. Press the
u
playback key (14) to listen to the tape.
5. With the / stop/eject key you can stop playback.
6. Wind the tape forwards or backwards if necessary in the
direction of the arrow keys
= forwards (12), = reverse (13).
7. Always press the / stop/eject key when changing the
direction or stopping the tape. This prevents damage to the
machine and the tape.
8. If the / stop/eject button is pressed again the flap of the
cassette compartment opens.
9. In order to interrupt playback briefly, press the pause but
-
ton (10). Pressing again continues playback.
Playing CDs/MP3
This is how you play a CD
1. Turn the function selector switch (24) to the “MEDIA” posi
-
tion.
2. Please open the CD compartment (3) by pressing the
p
OPEN button (2).
3. Insert a CD with the printed side facing up and close the CD
deck.
4. After a few seconds, the display will show the total number
of tracks.

