background image

17

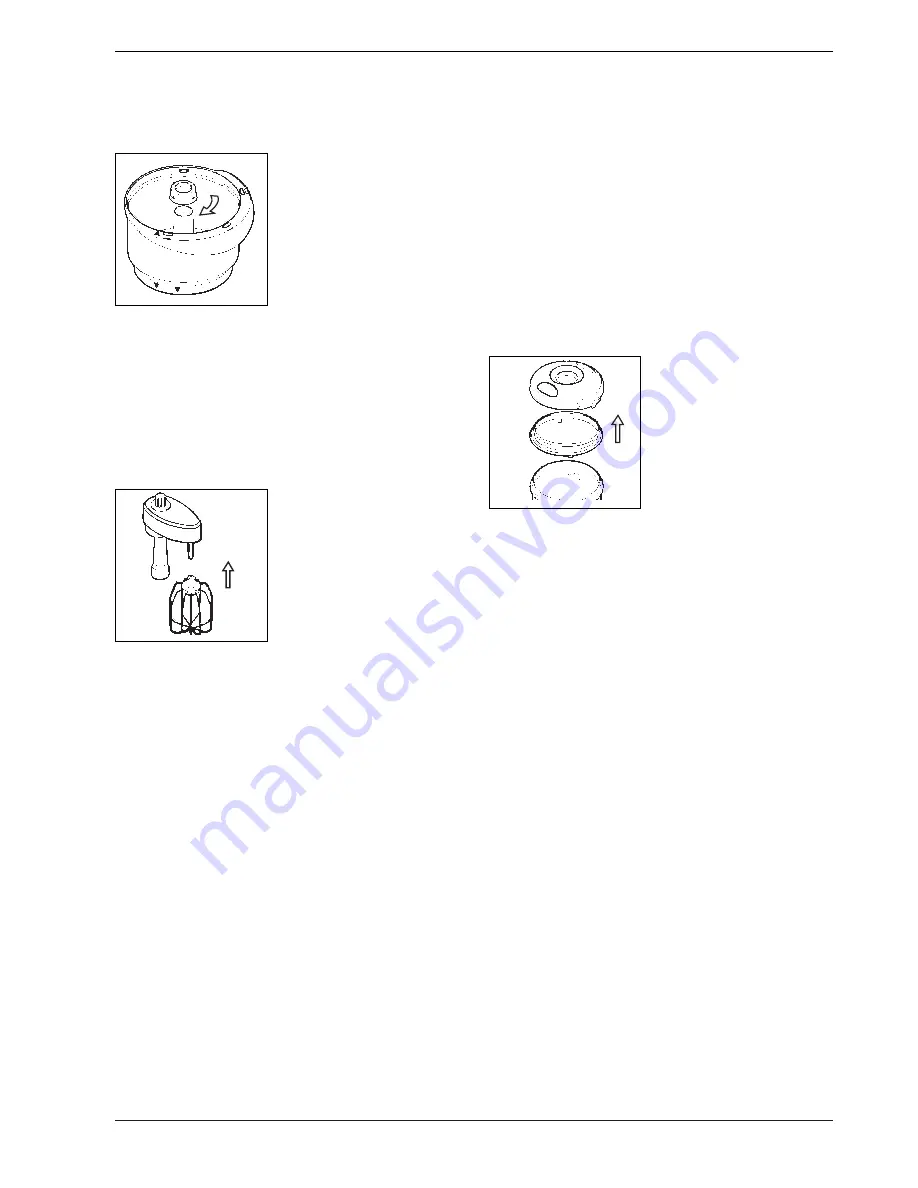
Place the sealing ring (Figure 3 D) onto the
opening in the middle of the bowl and twist in
a clockwise direction until it stops.

Using the kneading hook

(Figure 3E) 

or

beater element 

(Figure 3F)

Place the kneading hook into the stirring bowl.
If the stirring element is used then it (Figure
3F) has to be locked onto the beater insert
(Figure 3 G) first.

Attaching and Locking the Cover

Cf. section on "Attaching and locking the cover"
for the all purpose bowl.

After the cover is locked the operation indicator
switches from red to green. 
The number "1" then appears in the speed display
(Figure 1 B).

If the stirring bowl and kneading or stirring ele-
ment is used then you have the option, depen-
ding on the type and quantity of material to be
processed, of freely selecting from speeds 1 - 6.
The speed may also be changed during operation.

Use of the Mixer

(Figure 4)

The mixer is used to prepare liquids and other
things such as sauces, mixed drinks, dressings,
mayonnaise and for fine-cutting of smaller
quantities.

Attaching the Mixer Beaker

(Figure 4A)

Cf. section on " Attaching the All Purpose
Bowl "

Attaching and locking the cover

Position the cover so that the marking (

/OPEN)

on the cover matches the marking (

) on the

mixer and turn the cover in a counterclock-
wise direction until it stops and the symbol

/CLOSED is positioned above the marking 

on

the mixer.

NOTE: Make certain that the sealing ring (Figure
4 B) is properly inserted in the cover.

After the cover is locked the operation indicator
(Figure 1A) switches from red to green.  The num-
ber "10" then appears in the speed display (Figure
1 B).
When using the mixer you have the option,
depending on the material to be processed or
recipe recommendations, of freely selecting from
speeds 1 - 12 by using the buttons for adjusting
the level of speed. The speeds may also be
changed during operation.
Afterwards, re-insert the cover beaker (Figure 4
D) in the cover opening.

Maintenance and Cleaning

The basis unit, kneading hook and beater insert
should only be wiped off using a moist cloth!

Make certain that the locking slots (Figure 1) for
the safety latching are always clean. If necessary,
use a dry brush to clean them. The following parts
may be placed into the upper section of a dish-
washer and cleaned at 60° C:

– all purpose bowl and stirring bowl with cover

and measuring beaker

– plates and plate retainers

– spatula

– stirring elements

Содержание KM 2000

Страница 1: ...KM 2000 Kompakt Küchenmaschine Multiple Use Appliance Gebrauchsanweisung Operating Instructions AUS ERFAHRUNG GUT ...

Страница 2: ...12 1 AUTOMATIC PULSE BUTTON ON OFF SWITCH TURBO G C A F E D B A B C F E D J K G H I E D F G A B C A B C D K I H 4 3 2 ...

Страница 3: ...Figure 1 A Operation indicator B Speed display C ON OFF switch D Buttons for setting the speed E Pulse button F Automatic pulse button G Turbo button H Cable storage compartment I Latching slot K Rating plate 2 Accessory parts for cutting grating etc Figure 2 A All purpose bowl B Cover with latching lug C Stopper measuring beaker D Blade protection E Metal blades F Cutting disk fine rough I G Grat...

Страница 4: ... time If the unit is not in use over longer periods then the mains plug should be removed Never block or cover the ventilation slots when the unit is in ope ration Do not bend the connecting cable From time to time inspect for damage Have the cable replace immediately in the event of damage It may only be replaced by an authorized repair shop or an AEG customer service department as special purpos...

Страница 5: ...ion Place the unit on a dry and level work surface The cable storage compartment Figure 1 H is located at the rear of the basic unit Unused cable may be stored here if the lead to the socket outlet is too long Connect the unit to the mains supply The ope rating display Figure 1 A is red A 0 appears in the speed display Figure 1 B Selected the accessories and operating tool suitable for the work in...

Страница 6: ...selected onto the bayonet lock of the plate retainer Figure 2K Turn the pate retainer in a counterclockwise direction until it stops Caution Please do not touch the cutting edge Danger of injury Now place the plate retainer into the already prepared all purpose bowl Cutting plate Grating plate fine rough Figure 2F Figure 2G Both sides of the Use speeds 10 12 plate may be used for grating Use speed...

Страница 7: ...Bowl Attaching and locking the cover Position the cover so that the marking OPEN on the cover matches the marking on the mixer and turn the cover in a counterclock wise direction until it stops and the symbol CLOSED is positioned above the marking on the mixer NOTE Make certain that the sealing ring Figure 4 B is properly inserted in the cover After the cover is locked the operation indicator Figu...

Страница 8: ...o thoroughly dry For the Sake of the Environment Do not simply throw away packaging materials The packaging carton may be brought to a paper recycling facility or the responsible dis posal site The plastic sacks made of polyethylene PE may be brought to polyethylene collection points for recycling Polyester parts made from foamed polystyrene PS are free of CFC Please contact your municipal authori...

Страница 9: ...e all 3 10 12 30 sec until oil 4 eggs other ingredients in a foamy state 3 12 is thoroughly Add one drop of oil at a time stirred in 2 Plates Food Plate NOTE Speed Carrots Cutting plate I Finely cut or rasp raw food or vegetables 1 6 Grating plate II Clean grating plate after about 500 g 10 12 Rasping plate III 6 12 Cabbage Cutting plate I Rough cut to cook 1 6 Rasping plate II 6 12 Kohlrabi Cutti...

Страница 10: ...r 3 4 6 30 seconds Sponge mixture made from Add soft margarine and sugar 3 4 6 4 minutes 500 g Margarine Add eggs Add flour 3 4 6 2 minutes 3 1 up to 60 sec Mixer Food Maximum Preparation Mode of Speed Processing processing operation time time 1 Mixing Fruit cocktail 1 l 0 5 to 0 75 l Chop fruit 2 10 12 5 10 times Milk and fruits Add milk and mix 3 12 20 seconds Mayonnaise 1 l Stir eggs and lemon ...

Страница 11: ...arantietermijn voor zover de defecten zijn terug te voeren op materiaal en of constructiefouten de ko sten op zich voor materiaal en arbeidsloon De garantie bedraagt 12 maanden en gaat in op de dag van aankoop Wanneer garantie wordt verlangd dient de faktuur can aanko op te worden overlegd De garantietermijn wordt door reparaties niet verlengd Buiten elke garantieverplichting vallen losse onder de...

Отзывы: