


10
aee.com
DE
EN
ES
PT
IT
EL
FR
NL
PL
CS
HU
SV
FI
NO
RU
DA
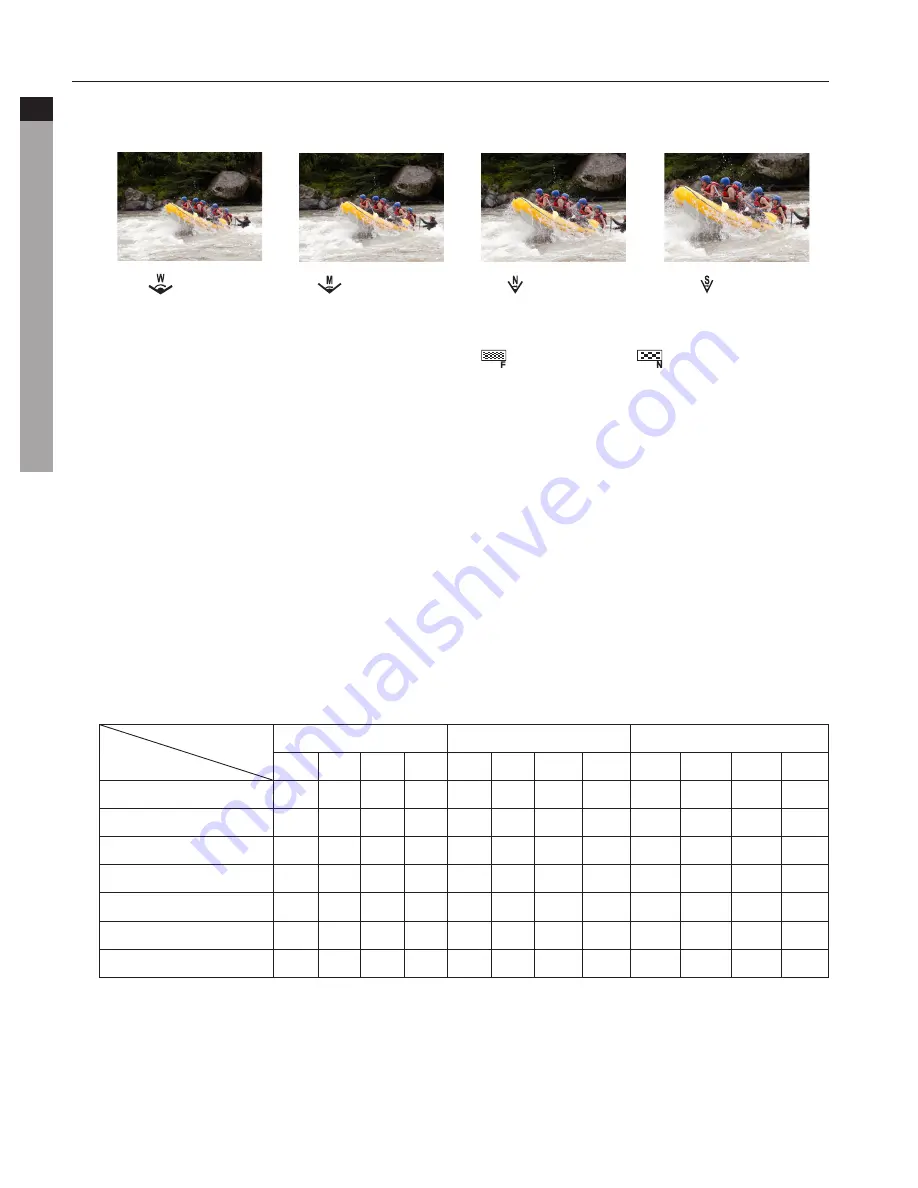
• View Angle
Optional view angle: Wide, Medium, Narrow, Small.
: Wide
: Medium
: Narrow
: Small
• Bitrate
This unit provides two bit rate options: high "
" and normal "
". (If high bit rate is
selected, you will get clearer picture with increased file size).
• Video Content Loop
You can activate or deactivate loop recording function. If ON, video file will be
automatically stored in segment of 10 minutes; If OFF, video file will be stored in segment
of 15 minutes.
• 180° Photo Rollover
When this function is activated, upright video file can be obtained when using video
camera to shoot video upside down.
• Display Time
You can choose to display or not display the video recording time at the bottom right
corner of the photo.
• Available functions under different resolutions (
●
) :
Resolution
Function
1080P
720P
WVGA
25f 30f 50f 60f 50f 60f 100f 120f 100f 120f 200f 240f
Time Lapse
●
●
●
●
●
●
-
-
-
-
-
-
Auto Video
●
●
●
●
●
●
●
●
●
●
●
●
View Angle
●
●
●
●
●
●
-
-
-
-
-
-
Bitrate
●
●
●
●
●
●
●
●
●
●
●
●
Video Content Loop
●
●
●
●
●
●
●
●
●
●
●
●
180° Photo Rollover
●
●
●
●
-
-
-
-
-
-
-
-
Display Time
●
●
●
●
●
●
-
-
-
-
-
-


