


PWS-8101M User Manual
4
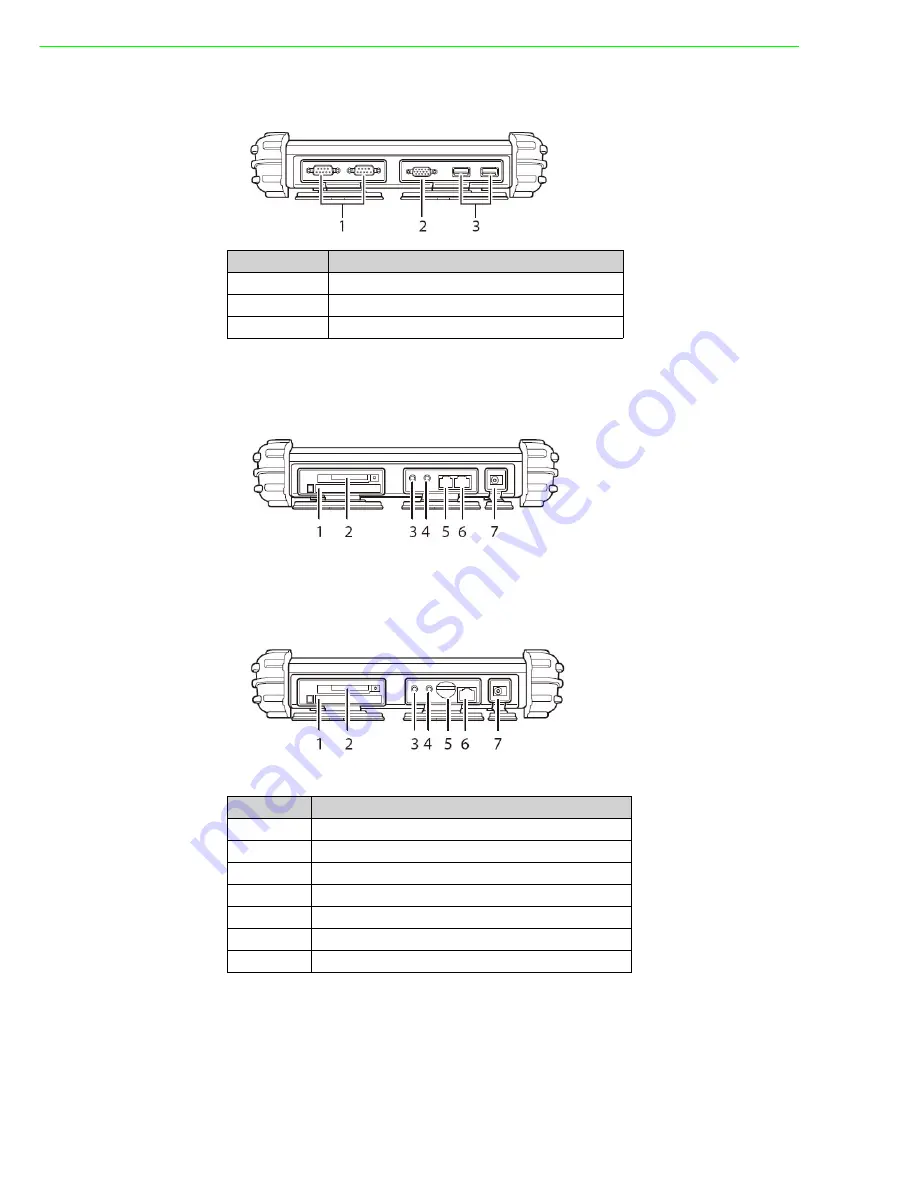
1.2.2
Right View
1.2.3
Left View with Telephone Jack
1.2.4
Left View with 3G SIM Card Slot (optional)
No.
Component
1
Serial ports
2
VGA port
3
USB ports
No.
Component
1
PC card slot (PCMCIA)
2
CompactFlash card slot
3
Headphone jack
4
Microphone jack
5
Telephone line jack/3G SIM card slot (optional)
6
RJ45 jack (for network cables)
7
DC-in jack
Содержание PWS-8101M
Страница 1: ...User Manual PWS 8101M 10 4 XGA TFT LCD Intel Core 2 Duo Ultra Rugged Mobile Computer with Wi Fi...
Страница 6: ...PWS 8101M User Manual vi...
Страница 7: ...Chapter 1 1 General Information...
Страница 27: ...Chapter 2 2 Installation...
Страница 34: ...PWS 8101M User Manual 28...
Страница 35: ...Chapter 3 3 Operating the LCD Display...
Страница 38: ...PWS 8101M User Manual 32...
Страница 39: ...Appendix A A Accessories...
Страница 47: ...41 PWS 8101M User Manual Appendix A Accessories...


