


MIC-7900 User Manual
16
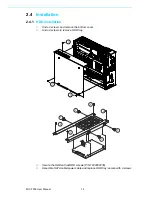
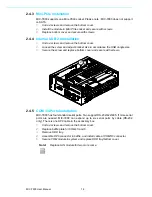
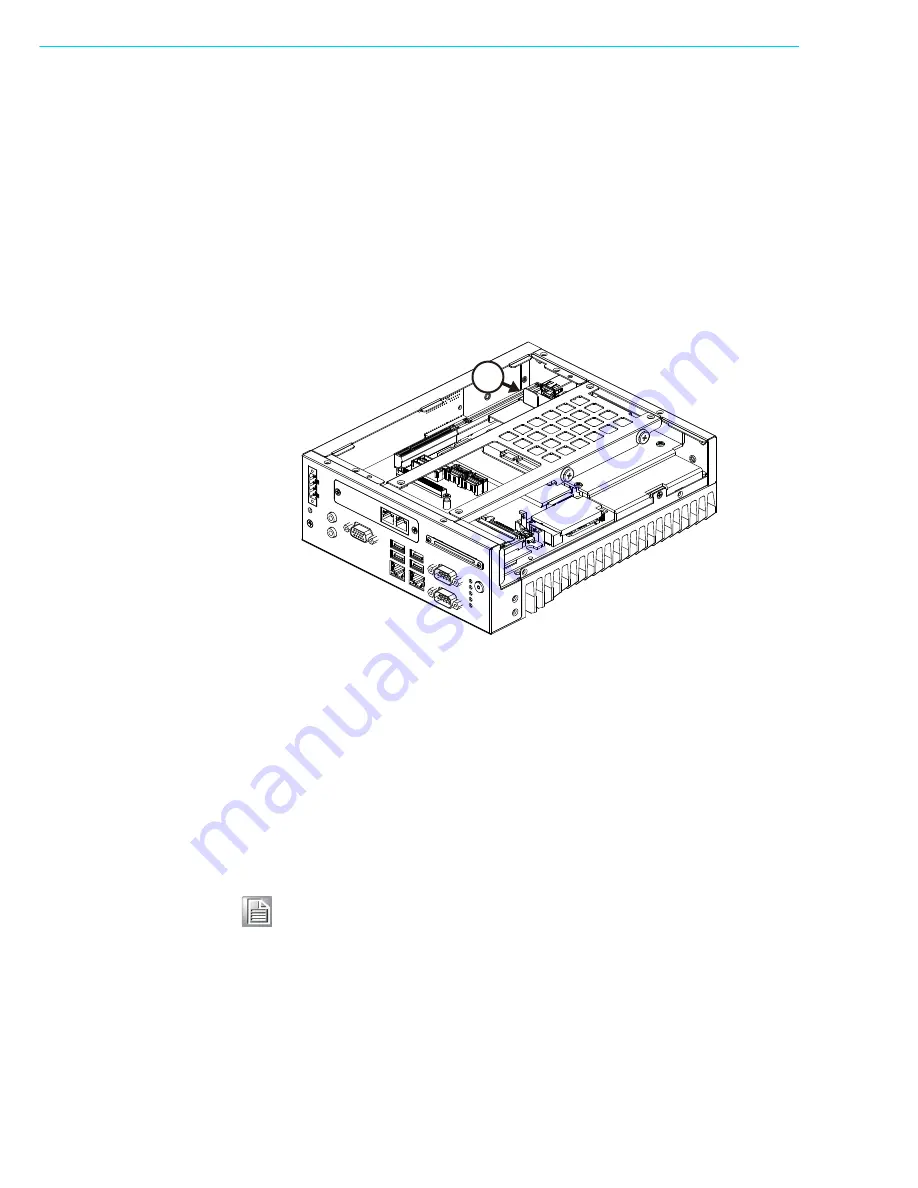
2.4.3
Mini-PCIe Installation
MIC-7900 supports one Mini-PCIE socket. Please note : MIC-7900 does not support
m-SATA.
1.
Undo 4 screws and remove the bottom cover.
2.
Install the module in Mini PCIe socket and secure with screws.
3.
Replace bottom cover and secure with screws.
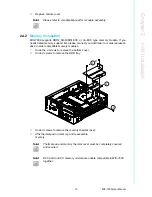
2.4.4
Internal USB 2.0 Installation
1.
Undo 4 screws and remove the bottom cover.
2.
Loosen the screw and adjust bracket size in accordance the USB dongle size.
3.
Secure the screw and replace bottom cover and secure with screws.
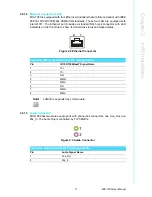
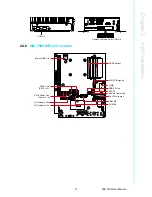
2.4.5
COM 3/4 Ports Installation
MIC-7900 has four standard serial ports. Two support RS-232/422/485. If more serial
ports are needed, MIC-7900 can expand up to six serial ports by cable (RS-232
only). There is one DP9 cable in the accessory box.
1.
Undo 4 screws and remove the bottom cover.
2.
Replace baffle plate for COMs 5 and 6.
3.
Remove HDD tray.
4.
Assemble DP9 connector in baffle, and install cable at COM5/6 connector.
5.
Secure COM module in system and replace HDD tray/bottom cover.
2
Note!
Replace LAN module for two more come.
Содержание MIC-7900
Страница 1: ...User Manual MIC 7900 Embedded Fan less IPC System 866 412 6278 CoastIPC com...
Страница 11: ...Chapter 1 1 General Introduction This chapter gives background information on MIC 7900...
Страница 16: ...MIC 7900 User Manual 6...
Страница 17: ...Chapter 2 2 H W Installation This chapter introduces external I O and the installation of MIC 7900 hardware...
Страница 28: ...MIC 7900 User Manual 18...
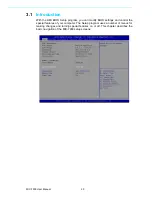
Страница 29: ...Chapter 3 3 AMI BIOS Setup This chapter introduces how to set BIOS configuration data...
Страница 49: ...39 MIC 7900 User Manual Chapter 3 AMI BIOS Setup 3 2 3 IntelRCSetup 3 2 3 1 Processor Configuration...
Страница 77: ...Chapter 4 4 Software Installation This chapter introduces driver installation...
Страница 82: ...MIC 7900 User Manual 72...
Страница 83: ...Appendix A A Programming the Watchdog Timer...
Страница 91: ...Appendix B B Programming the GPIO...


