


IPC-603MB User Manual
10
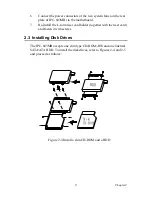
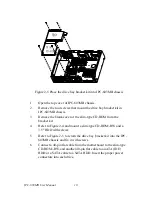
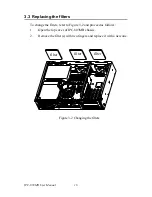
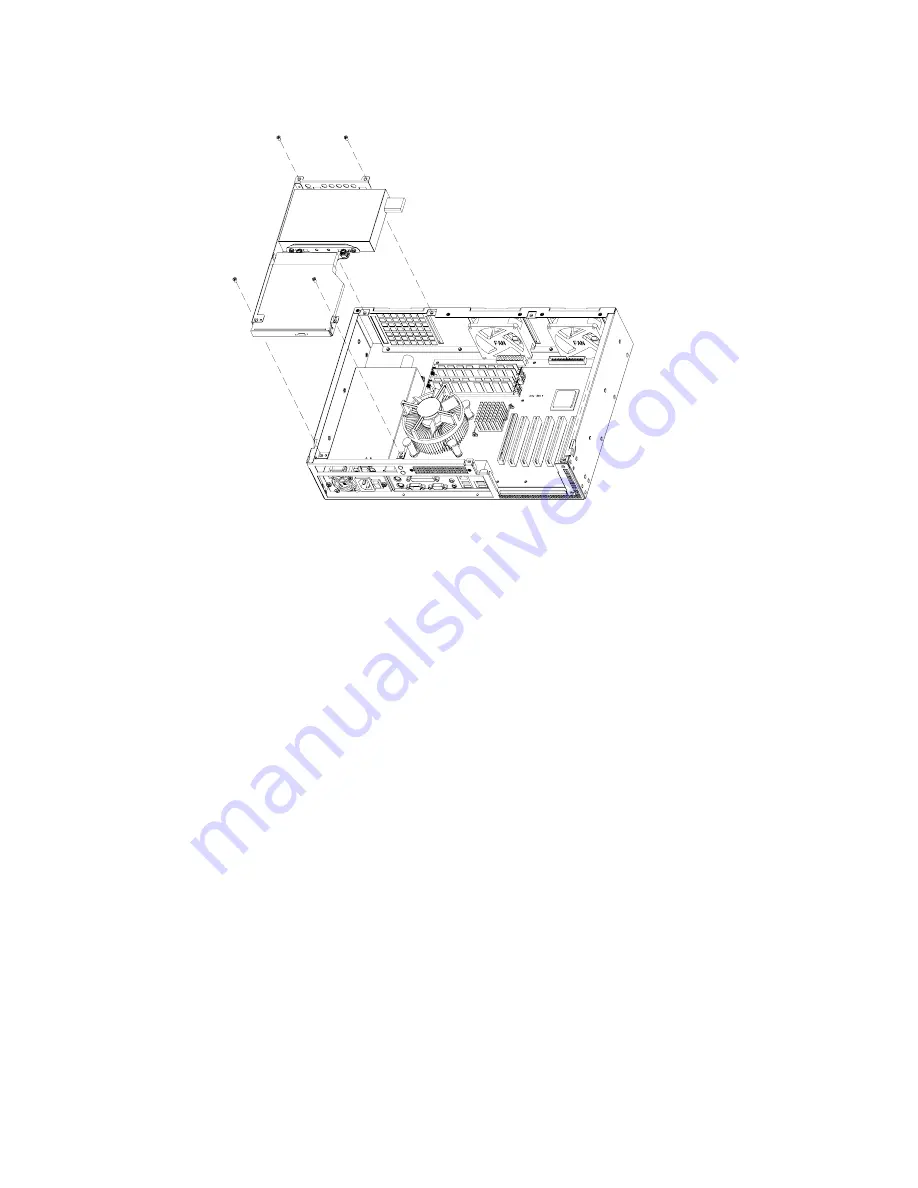
Figure 2-5 Place the drive bay bracket kit into IPC-603MB chassis
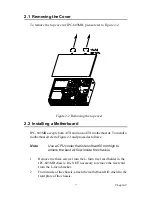
1.
Open the top cover of IPC-603MB chassis.
2.
Remove the four screws that mount the drive bay bracket kit in
IPC-603MB chassis.
3.
Remove the blank cover of the slim-type CD-ROM from the
bracket kit.
4.
Refer to Figure 2-4 and mount a slim-type CD-ROM/-RW and a
3.5" HDD with screws.
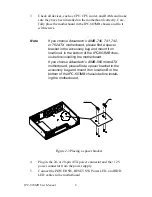
5.
Refer to Figure 2-5 to return the drive bay bracket kit into the IPC-
603MB chassis and fix it with screws.
6.
Connect a 40-pin flat cable from the motherboard to the slim-type
CD-ROM/-RW, and another 40-pin flat cable to an ATA (IDE)
HDD or a SATA cable to a SATA HDD. Insert the proper power
connectors into each drive.
H D D
S l i m
C D - R O M
Содержание IPC-603MB
Страница 1: ...IPC 603MB Ultra Compact 2U high Rack mount IPC Chassis User Manual...
Страница 10: ...IPC 603MB User Manual x...
Страница 11: ...2 CHAPTER 1 General Information...
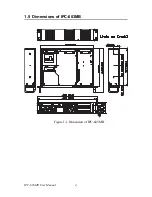
Страница 14: ...IPC 603MB User Manual 4 1 5 Dimensions of IPC 603MB Figure 1 1 Dimension of IPC 603MB...
Страница 15: ...2 CHAPTER 2 System Setup...
Страница 22: ...IPC 603MB User Manual 12...
Страница 23: ...2 CHAPTER 3 Operation...
Страница 29: ...2 APPENDIX A Exploded Diagram...
Страница 30: ...IPC 603MB User Manual 20 Appendix A Exploded Diagram...