IPC-7120 User Manual
22
3.2 Replacing the Cooling Fan
There are two cooling fans that provide good airflow inside the IPC-7120
(IPC-5120). To replace these fans, proceed as follows:
3.2.1 Replacing the 12 cm system fan
1.
Remove the chassis top cover and the disk drive housing.
2.
Take out the filter first.
3.
Disconnect the cooling fan power connector.
4.
Loosen the four screws from outside the rear plate and then gently
remove the fan module. Loosen four screws on the fan bracket and
the four screws on the rear side of the module (not the screws on
the fan) and replace it with a new fan. (see
Figure 3.3
)
5.
Attach the new cooling fan on the bracket by screwing in the four
screws.
6.
Reattach the fan power connector.
7.
Replace the fan module into the chassis and then screw the four
screws onto the rear of the chassis.
Figure 3.3: Replacing the 12 cm fan
Содержание IPC-5120
Страница 6: ......
Страница 9: ...CHAPTER 1 General Information...
Страница 16: ......
Страница 17: ...CHAPTER 2 System Setup...
Страница 21: ...13 Chapter2 Figure 2 4 Installing a motherboard its I O shielding...
Страница 24: ...IPC 7120 User Manual 16 Figure 2 7 Installing the disk drives Figure 2 8 Installing the internal 3 5 disk drive...
Страница 27: ...CHAPTER 3 Operation...
Страница 34: ...IPC 7120 User Manual 26 Figure 3 7 Renoving the power supply Figure 3 8 Replacing the front bezel...
Страница 35: ...Appendix A Exploded Diagram...
Страница 37: ...29 AppendixA A 2 Exploded Diagram of IPC 5120 Figure A 2 Exploded diagram IPC 5120...
Страница 38: ......
Страница 39: ...Appendix B Motherboard Options...
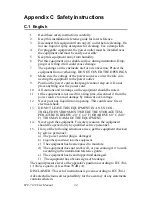
Страница 41: ...Appendix C Safety Instructions...


