HPC-7120 User Manual
/ 用户手册
20
6.
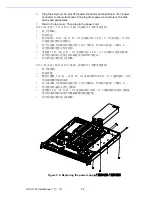
Plug the 20-pin (or 24-pin) ATX power connector and 4-pin/8-pin +12V power
connector to the motherboard. And plug other power connectors to the disk
drives and peripherals.
7.
Return the top cover. Then plug in the power cord.
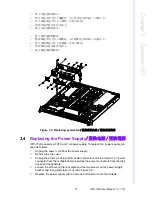
HPC-7120 支持 1 个 FATX 和 1U 电源。请按照以下步骤更换电源:
1.
拔下电源线。
2.
移除顶盖。
3.
断开母板上 20 针 (或 24 针)ATX 电源插头和 4/8 针 +12 V 电源插头,以及所
有磁盘驱动器的电源插头。
4.
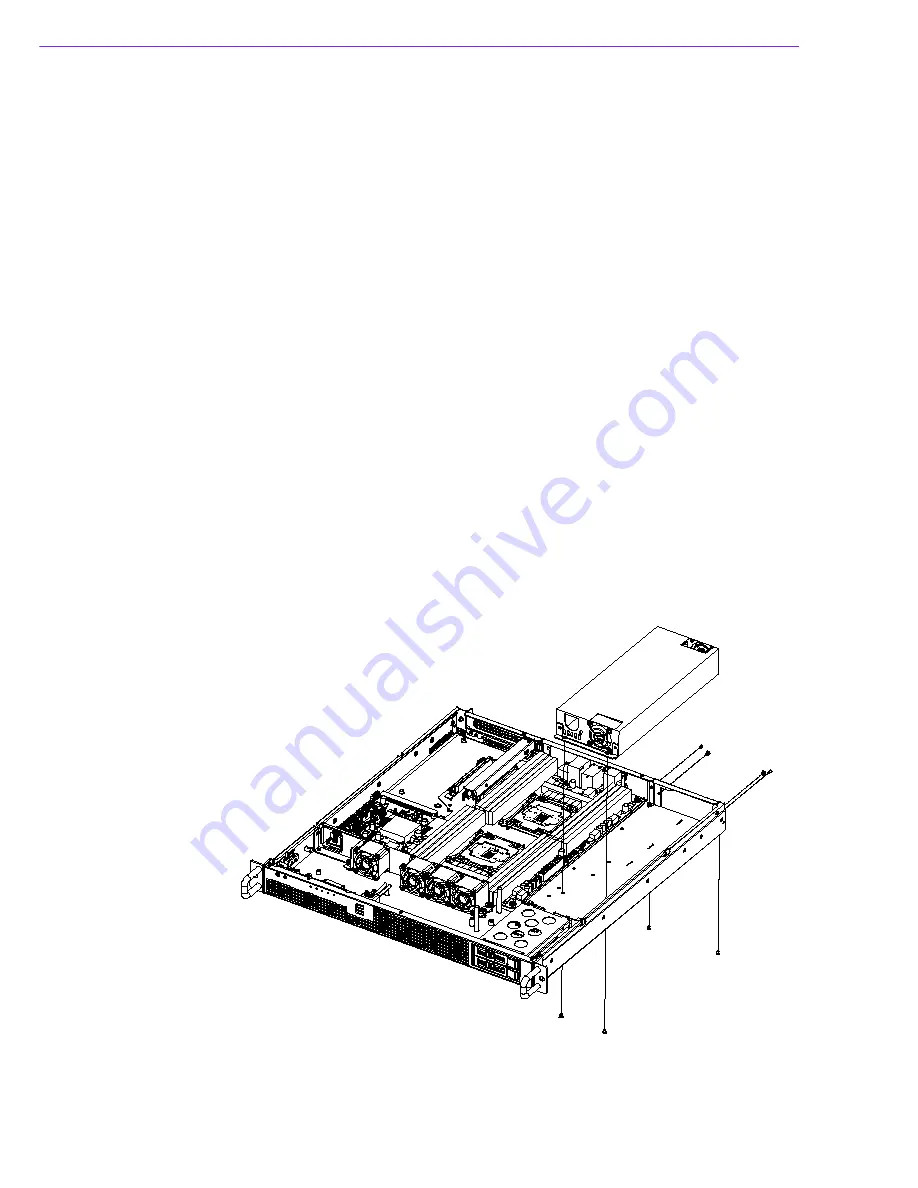
卸下后面板上的螺丝和电源支架上的 2 个螺丝,然后取出电源 (如图 3.9)。
5.
将更换的新电源安装至机箱。
6.
重新将 20 针 (或 24 针)ATX 电源插头和 4/8 针 +12 V 电源插头连接到母板;
将其他电源插头连接至相应磁盘驱动器和外围设备。
7.
放回顶盖并重新插上电源线。
HPC-7120 支持 1 個 FATX 和 1U 電源。請按照以下步驟更換電源:
1.
拔下電源線。
2.
移除頂蓋。
3.
斷開主機板上 20 針 (或 24 針)ATX 電源插頭和 4
/
8 針 +12 V 電源插頭,以及
所有磁碟機的電源插頭。
4.
卸下後面板上的螺絲和電源支架上的 2 個螺絲,然後取出電源 (如圖 3.9)。
5.
將更換的新電源安裝至主機殼。
6.
重新將 20 針 (或 24 針)ATX 電源插頭和 4
/
8 針 +12 V 電源插頭連接到主機板;
將其他電源插頭連接至相應磁碟機和週邊設備。
7.
放回頂蓋並重新插上電源線。
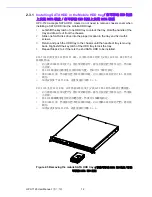
Figure 3.4: Replacing the power supply
/ 更换电源 / 更換電源
Содержание HPC-7120
Страница 9: ...ix HPC 7120 User Manual...
Страница 10: ...HPC 7120 User Manual x...
Страница 13: ...Chapter 1 1 General Information...
Страница 17: ...5 HPC 7120 User Manual Chapter 1 General Information 1 5 Dimension Diagram Figure 1 1 Dimension diagram...
Страница 18: ...HPC 7120 User Manual 6...
Страница 19: ...Chapter 2 2 System Setup...
Страница 26: ...HPC 7120 User Manual 14...
Страница 27: ...Chapter 3 3 Operation...
Страница 33: ...Chapter 4 4 Dual Slot SATA Backplane SATA SATA...
Страница 35: ...Appendix A A Exploded Diagram Parts List...
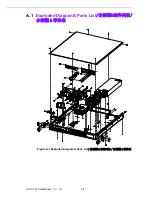
Страница 36: ...HPC 7120 User Manual 24 A 1 Exploded Diagram Parts List Figure A 1 Exploded Diagram Parts List...
Страница 37: ...25 HPC 7120 User Manual Appendix A Exploded Diagram Parts List...


