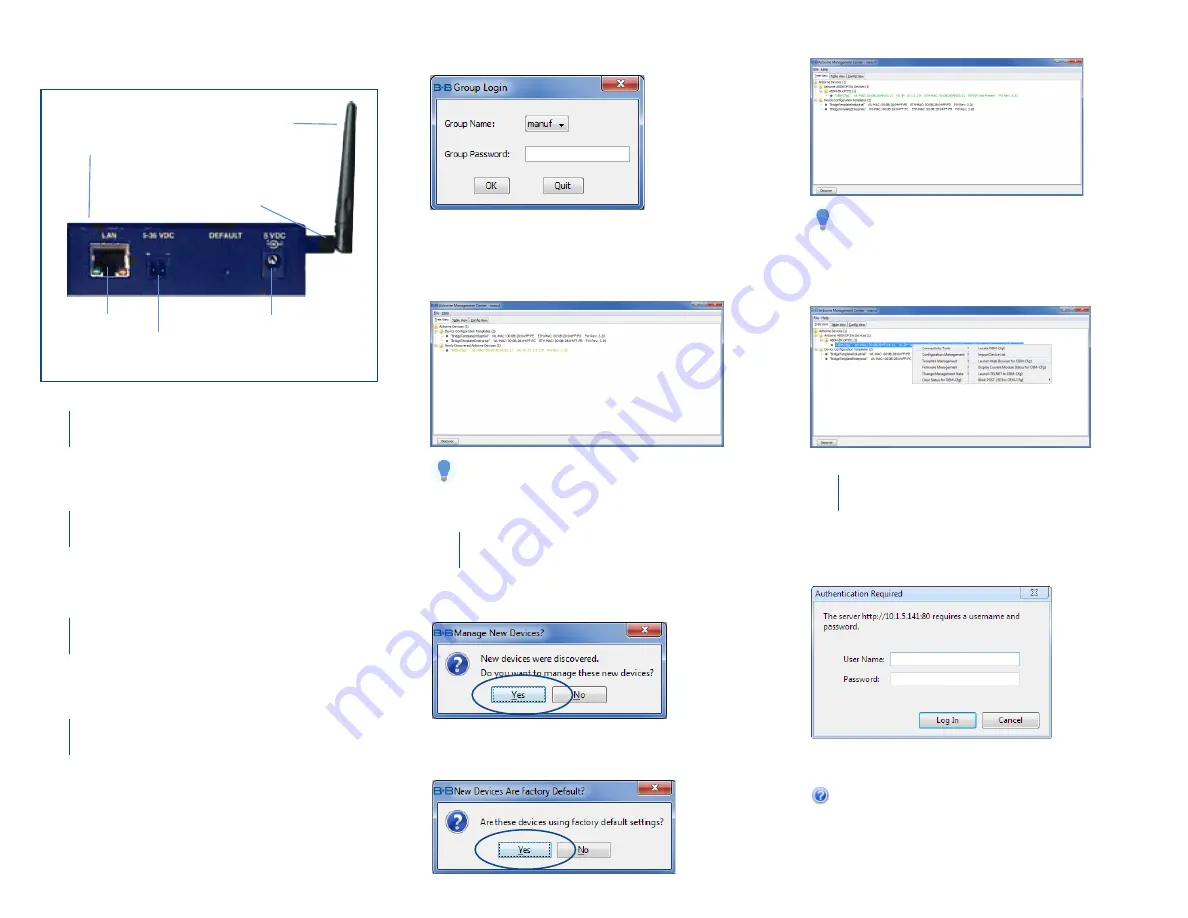
Product Overview
Attach the Antenna
1
Connect the Antenna to the antenna connector located on
the side of the device.
LAN
Port
Power
Port
Antenna
LEDs
Antenna
Port
Detachable
Terminal Block
Connect Ethernet
2
Connect a Category 5 Ethernet cable between the device
and an Ethernet port on a host computer.
Connect Power Supply
3
Connect the 5-36 VDC terminal block attachment or use
an AC power supply (optional).
Connect To The Device
4
Run the Airborne
™
Management Center (AMC)
application. If you do not currently have AMC installed,
you can install it from the included CD or download and
install it from the Advantech website: search for the model
number, click on the
Documents & Downloads
link,
then click on the
Software Utility
section to locate and
download software.
Note: You may be required to wait up to 180 seconds
before the device is discovered and displayed.
When AMC starts, it will request a login:
Select Group Name: “manuf” and enter
Group Password: “dpac”
AMC will load and discover the attached device:
Manage The Device
5
AMC will ask if you want to manage the new device,
select ‘Yes’:
Select ‘Yes’ to indicate the device is using Factory Default
settings:
AMC will display the found Airborne device(s):
Right click the device’s name. Under “Connectivity Tools”
choose “launch web browser for OEM-Cfg1.” This will
open the device’s browser-based management window.
Login to web interface:
Username “dpac”
Password: “dpac”
Continue configuration via the web interface. Start with
the Configuration -> Express Setup page.
(continued)
Configure Your Device
6
Note: Use the Help features of the interface to help you
configure the device. When you are done configuring the
device, press ‘Commit’ to save the changes, then ‘Restart’ to
restart the device. You can optionally press ‘Reload’ if you have
further configuration changes to make.
Tip: To easily convert a Direct Ethernet device to a bridge, use
the Bridge Templates in AMC.


