A-ADT4HS2 QUICK REFERENCE GUIDE
FEATURES AND FUNCTIONS (2)
EVENT ACTION SETTINGS
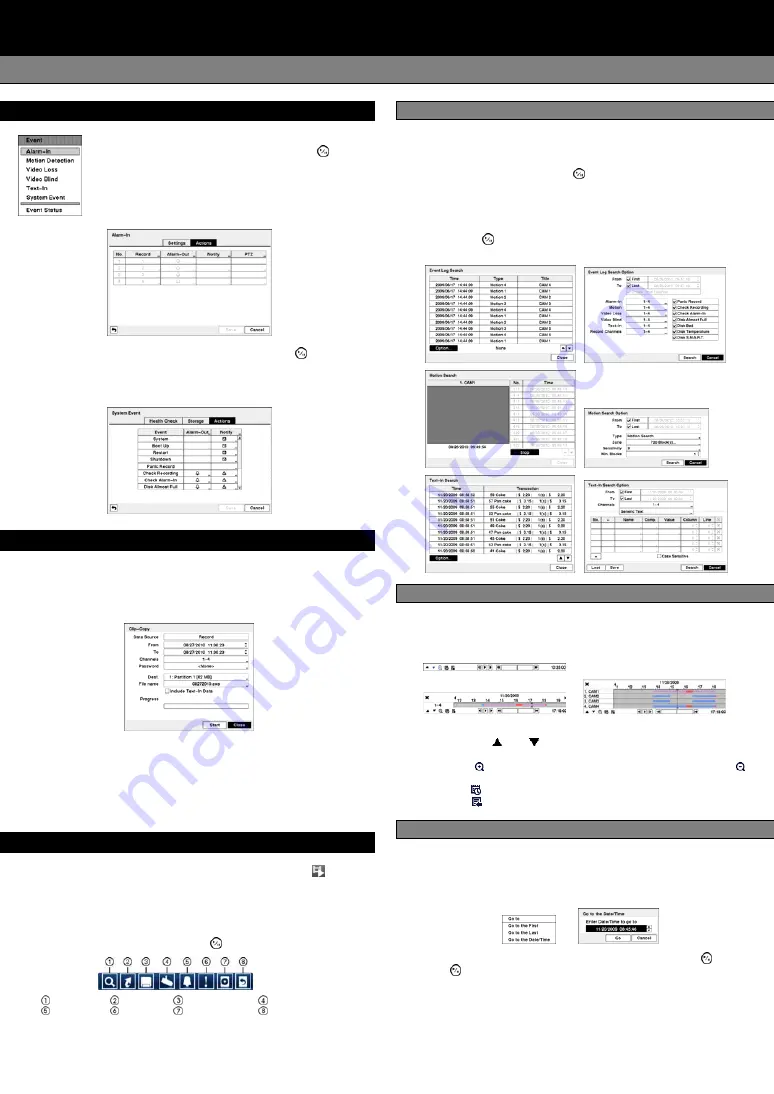
1. Highlight the Alarm-In, Motion Detection, Video Loss, Video
Blind, Text-In in the Event menu and press the
button.
The Event Setting and Actions setup screens will appear.
2. In each Event Actions screen, you can set the actions
(Record, Alarm-Out, Notify and PTZ) the DVR will take
whenever it senses alarm input, detects motion, loses
video, detects video blind and senses text input.
3. Highlight the System Event in the Event menu and press the
button. The
System Event setup screen will appear.
4. In the System Event Actions screen, you can set the actions (Alarm-Out and
Notify) the DVR will take when it detects system events.
CLIP-COPY
The Clip-Copy screen can be used to copy video to external USB hard disk
or flash drives. The clip copy can be simply done by pressing the “BACK UP”
button on the remote control, or selecting Clip-Copy or A-B Clip-Copy in the
Search menu.
*NOTE: The Clip Copy feature requires the camera title or number along
with the date and time of the recorded images to be copied. To view the
copied images, remove the USB hard disk drive or flash drive from the
DVR and install it on your PC. Select the image file name, and the
executable Clip Player software program will open automatically displaying
playback controls for viewing the video clip.
SEARCH AND PLAYBACK
1. Press the “SEARCH” button on the remote control or select
(Search
Mode) in the Live Monitoring menu to enter the Search mode. If a user
who has Search authority logs into the system, the user can view recorded
images.
2. Press the “MENU” button while in the Search mode or move the mouse pointer
to the top of the screen to display the Search Menu. Select the type of search
using the arrow buttons and press the
button.
Search
Go To
Export
Camera Menu
Alarm
Panic
Data Source
Exit
Event Search
1. Select <Event Log Search>, <Motion Search> or <Text-In Search> in
the Search Menu.
2. The event log list will be shown on the screen. Highlight the event you
would like to see and press the
button.
For more specific search conditions, select <Option> and enter search
parameters then select <Search>. The search results will be displayed
in each screen.
3. Pressing the
button will start playing the “event” video segment. Press
the “PLAYBACK” button to return to live monitoring.
Record Table Search
1. Select <Search> <Record Table Search> in the Search Menu.
2. Recording information about video images currently displayed on the
screen displays on the recording status bar.
Compact View
Standard View
Expanded View
3. Selecting the
and icon located at the bottom switches to other
view modes.
4. Selecting displays eight hours (1-minute based), and selecting
displays 24 hours (3-minute based) at once.
5. Selecting located at the bottom displays the Calendar Search screen.
6. Selecting located at the bottom displays the Search menu.
Go To Search
1. Select <Go To> in the Search Menu. Selecting <Go to the First> displays
the first recorded image, selecting < Go to the Last> displays the last
recorded image, and selecting < Go to the Date/Time> displays the Go
to the Date/Time screen.
2. Enter a specific date and time and select “OK” by pressing the
button.
The
button and arrow buttons to review the video.
V1.0


