


45
USING ADOBE AUDITION
Editing audio files
Last updated 2/16/2012
Visually raise or lower amplitude
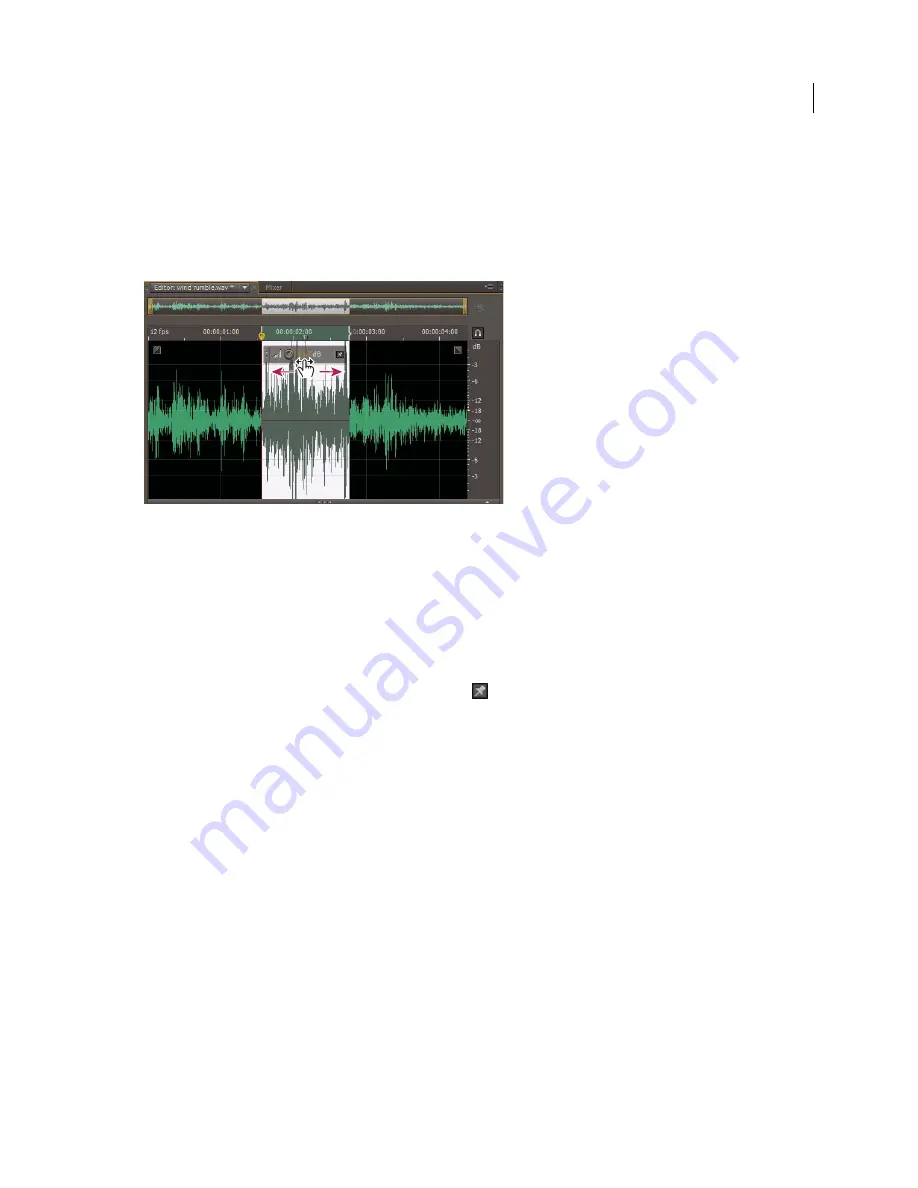
1
In the Editor panel, select specific audio, or select nothing to adjust the entire file.
2
In the gain control that floats above the panel, drag the knob or numbers.
The numbers indicate how new amplitude compares with existing amplitude. When you release the mouse button, the
numbers return to 0 dB, so you can make further adjustments.
Changing the volume of selected area
More Help topics
“
Amplify effect
” on page 67
Pin or hide the visual amplitude control
By default, the visual amplitude control appears in a heads-up display (HUD) that floats over all waveforms. If you find
the HUD distracting, do any of the following:
•
To lock the HUD in one location, click the Pin button
.
•
To show the HUD only over highlighted selections, select Show HUD for Selection Ranges Only in the General
preferences.
•
To totally hide the HUD, deselect View > Show HUD.
Working with markers
Markers
(sometimes called
cues
) are locations that you define in a waveform. Markers make it easy to navigate within
a waveform to make a selection, perform edits, or play back audio.
In Adobe Audition, a marker can be either a
point
or a
range.
A point refers to a specific time position within a
waveform (for instance, 1:08.566 from the start of the file). A range has both a start time and an end time (for example,
all of the waveform from 1:08.566 to 3:07.379). You can drag start and end markers for a range to different times.
In the timeline at the top of the Editor panel, markers have white handles you can select, drag, or right-click to access
additional commands.
Содержание 22011292 - Audition - PC
Страница 1: ...Using ADOBE AUDITION CS5 5...


