4
16. Do not use the device if the connection sockets are wet.
17. Do not put electrical appliances inside the refrigerator.
18. Do not block the device's ventilation openings.
19. Protect the device against heat sources and sunlight.
20. Put cold food into the device.
21. Place the equipment in a place with adequate ventilation. The distance from other
objects should be at least 20 cm.
22. WARNING: Do not obstruct ventilation openings in the equipment enclosure or in the
built-in structure
23. WARNING: In order to speed up the defrosting process, do not use any mechanical
means other than those recommended by the manufacturer.
24. WARNING: Protect the refrigerant circuit from damage
25. WARNING: Do not use electrical equipment inside the foodstuff storage compartment
of a type other than that recommended by the manufacturer.
Before first use: Proper location
1. 1.Before using for the first time, remove the packaging and leave a free space of at least 15 cm around the device (5 cm on the side,
10 cm when tilting the device).
2. Position the refrigerator in a dry and well-ventilated place. Keep the refrigerator away from direct sunlight, heaters and corrosive gas.
NOTE: Because this device is compressor operation based, ample space is required around the unit to allow it to exhaust properly.
NOTE: It is not recommended to move the device if the floor is not smooth. Do not use if the refrigerator is tilted. If the refrigerator is
drawn to a place for use, please leave it upright and wait for 10 minutes before use. When moving the refrigerator, always use both
handles to the carry the unit as level as possible. This is in order to protect the compressor and the sealed system.
WARNING: Use two or more people to move and handle this unit. Failure to do so can result in back or other injury.
3. Keep the portable refrigerator away from heat and direct sunlight if possible.
4. This portable refrigerator is suitable for car use and camping however, the appliance should not be exposed to rain or any other
severe weather elements.
5. This portable refrigerator should not be placed in a built-in or recessed area. The device is designed to be freestanding.
6. The normal operation of the refrigerator depends on heat radiation from the condenser.
7. Clean the interior surface with a little bit of lukewarm water and a soft cloth.
Note: When inserting the DC power-cord, make sure the input is a 12V~DC / 24V power source.
IMPORTANT: Do not remove any safety, warning, or product information labels from your portable car refrigerator.
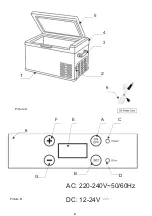
DEVICE DESCRIPTION Portable car refrigerator – Picture A
1.Base 2.Plug socket
3. Handle 4. Frame
5. Cover 6. Control Panel
7. DC Power Cord- For use when traveling, plug directly into car lighter.
CONTROL PANEL – Picture B
A – Power button ON/OFF B – SET button
C – Power indicator D – Error indicator
E – LCD display F - Button “+”
G - Button “-”
OPERATION
• When attempting to plug your portable freezer into a standard 12 V socket, the unit will not work if socket has a voltage of less than 9.6
V. The unit will restart when the voltage is 12.2V or greater.
• When attempting to plug unit into a standard 24 V socket, the unit will not work if the socket has a voltage of less than 21.3 V. The unit
will restart when the voltage is 25.2 V or greater.
• The device can also be connected to the 230V ~ 50 / 60Hz mains supply after using an external power supply (not included). The
recommended AC / DC adapter model is CR8076.1.
CONTROL PANEL (7) – Picture B
Your portable refrigerator uses a digital control system for adjusting the thermostat.
* Power button (A) - ON/OFF
:
1.Connect the refrigerator to the power supply, press the power button (A) once to switch on the device.
2.Press the power button (A) again, the refrigerator will be off.
* SET button
:
Long press SET button for 3 seconds and enter advanced modes:
Содержание AD 8081
Страница 2: ...2 4 A B C F E D 1 Picture A Picture B AC 220 240V 50 60Hz DC 12 24V 2 3 5 6 6 G...
Страница 50: ...50 8 9 10 11 12 13 14 30 15 16 17 18 19 20 21 20 22 23 24 25 1 1 15 5 10 2 10 3 4 5 6...
Страница 71: ...71 7 8 9 10 11 12 13 14 RCD 30 mA 15 16 17 18 19 20 21 20 cm 22 23 24 25 1 1 15 cm 5 cm 10 cm 2 10 3...
Страница 92: ...92 3 12 24 230 50 4 5 8 8 6 7 8 9 10 11 12 13 14 30...
Страница 95: ...95 6 18 2 8 4 6 2 5 10 15 I 1 1 2 2 4 4 5 5 II 1 1 III 1 1 24 2 2 V VI HH 40 VII OC VIII S C IX 1 1 2 2 40...
Страница 102: ...102 AR 1 2 3 50 230 24 12 4 5 8 8 6 7 8 9...
Страница 103: ...103 10 11 12 13 14 RCD 30 15 16 17 18 19 20 21 20 22 23 24 25 1 10 5 15 2 10 3 4 5 6 7 24 12...
Страница 105: ...105 H2 H2 H1 LCD F1 H3 H2 H1 F G C D LED E F1 F2 F3 F4 F5 E0 E1 LCD 2 0 20 25 20 3 18 6 8 2 6 4 5 2 10 15...
Страница 106: ...106 1 1 2 4 4 5 1 24 1 2 HH 40 OC SC 1 2 2 40 DC 12V 24V 230 50 60 R600a 40 S SN C5H10 45 3 7 A LVD EMC CE...
Страница 107: ...107 BG 1 2 12V 24V 230V 50Hz 3 4 8 8 5 6 7 8...
Страница 108: ...108 9 10 11 12 13 RCD 30 mA 14 15 16 17 18 19 20 20 21 22 23 24 1 15 5 10 2...
Страница 112: ...112 R600a 40 g S SN C5H10 I LVD EMC CE 45W 3 7A...


