background image

AD Instruments 

________________________________________________________________________ 


©Copyright Abacanto Digital SA.


8                      


Manual de usuario AD8108 


6. Funcionamiento 

 
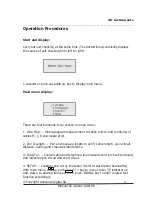
6.1 Inicio y visualización 

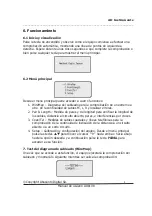
Pulse la tecla de encendido y observe como el equipo comienza a efectuar una 
comprobación automática, mostrando una línea de puntos de izquierda a 
derecha. Espere durante unos cinco segundos a que complete la comprobación o 
bien pulse cualquier tecla para mostrar el menú principal. 


6.2 Menú principal 


Desde el menú principal puede acceder a cuatro funciones: 

1.


WireMap 

 Diagrama del cableado para la comprobación de un extremo a 

otro  de la continuidad de cables M, L, R y localizar errores. 

2.


Pair & Length 

 Medida de pares y de longitud para verificar la longitud de 

los cables, distancia al circuito abierto, pares, e interferencias por cruces. 

3.


Coax/Tel 

 Medidas de cables coaxiales y líneas telefónicas para la 

comprobación de la continuidad e indicación de la distancia a un circuito 
abierto o a un corto circuito. 

4.


Setup 

 Calibración y configuración del equipo. Desde el menú principal 

pulse las teclas 

pq


para mover el cursor “

à

  hacia arriba o hacia abajo 

hasta la opción deseada y a continuación pulse la tecla 


PAIR&L


para 

acceder a esa función. 


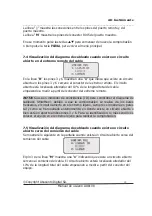
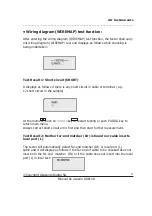
7. Test del diagrama de cableado (WireMap) 

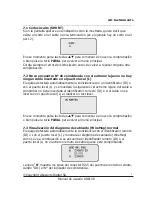
Una vez que se accede a esta función, el equipo ejecutará la comprobación del 
cableado y mostrará lo siguiente mientras se realiza la comprobación: 


Содержание AD8108

Страница 1: ...Manual de Usuario ADInstruments Comprobador de cables para redes AD8108 ...

Страница 2: ...limentación 5 1 Alimentación 5 2 Panel frontal y puertos 6 Funcionamiento 6 1 Inicio y visualización 7 Test del diagrama de cableado WireMap 7 1 Cortocircuito SHORT 7 2 No se encuentra Nº de coincidencia con el extremo lejano o no hay ningún cable insertado en el puerto local L 7 3 Visualización del diagrama de cableado WireMap Normal 7 4 Visualización del diagrama de cableado cuando existe un cir...

Страница 3: ...ht Abacanto Digital SA Manual de usuario AD8108 3 8 Medida de pares y longitud Pair Length 8 1 Cortocircuito Short 8 2 Visualización normal de pares y longitud 8 3 Visualización de pares anormales y longitud 9 Medida de cables coaxiales y de cables telefónicos 10 Calibración y configuración Setup ...

Страница 4: ...UMENTS está garantizado contra componentes defectuosos y errores de montaje durante un período de tres años a partir de la fecha de envío del equipo al cliente Cualquier equipo que esté defectuoso dentro del período de garantía deberá devolverse al centro de mantenimiento autorizado por AD INSTRUMENTS para su reparación reemplazo y calibración 2 2 Exclusiones La garantía de su equipo no se aplicar...

Страница 5: ...que el instrumento queda protegido durante su transporte 3 Información de seguridad Precauciones El comprobador usa únicamente 6V DC como alimentación No intente nunca conectar y encender el comprobador con ninguna fuente de alimentación que no sea la propia del comprobador Para prolongar la vida de la batería el comprobador se apagará automáticamente a los 30 minutos de inactividad 4 Característi...

Страница 6: ...mática de cambios en la batería o en la temperatura ambiente 4 1 Especificaciones técnicas Dimensiones 180 x 80 x 40 mm Alimentación 4 x 1 5 pilas alcalinas AA consumo 16 mA o baterías recargables AA Pantalla Pantalla LCD matricial de 61 6 x 25 2 mm con 4 líneas de 16 caracteres Tipos de cables soportados cables de pares trenzados STP UTP cable coaxial cable de línea telefónica Temperatura de func...

Страница 7: ...bación de errores como circuito abierto cortocircuito conexión inversa cruces e interferencias Localización de cables Ocho conectores pasivos en el extremo remoto ID 1 8 Apagado automático Tras 30 minutos de inactividad del equipo 5 Descripción del teclado y alimentación 5 1 Alimentación El comprobador utiliza 4 x 1 5V pilas alcalinas tipo AA con un consumo de 16mA Debe quitar las baterías si no p...

Страница 8: ...extremo a otro de la continuidad de cables M L R y localizar errores 2 Pair Length Medida de pares y de longitud para verificar la longitud de los cables distancia al circuito abierto pares e interferencias por cruces 3 Coax Tel Medidas de cables coaxiales y líneas telefónicas para la comprobación de la continuidad e indicación de la distancia a un circuito abierto o a un corto circuito 4 Setup Ca...

Страница 9: ...tectará automáticamente la coincidencia con un identificador ID o con el puerto local L y se mostrará lo siguiente si el extremo lejano del cable a comprobar no tiene insertado el identificador correcto ID o si el cable no se inserta en el puerto local L al realizar un test local En ese momento pulse las teclas pq para comenzar de nuevo la comprobación o bien pulse la tecla PAIR L para volver al m...

Страница 10: ...le empezando a medir a partir del conector del extremo remoto NOTA Si usa un indicador de coincidencia ID para comprobar el diagrama de cableado WireMap debido a que la comprobación se realiza vía los pares trenzados el circuito abierto en el extremo lejano siempre se mostrará en pares tal y como se ha mostrado anteriormente en donde existe un circuito abierto o bien está en abierto ambos pines 3 ...

Страница 11: ...r Length del equipo 8 Medida de pares y longitud Pair Length No importa si se dispone de un identificador de ID en el extremo remoto o no el equipo es capaz de realizar una medida de los pares y de la longitud de los cables Sin embargo el identificador de coincidencia remota ID puede mantenerse conectado durante la comprobación del diagrama de cableado WireMap y de la medida de pares y longitud Pa...

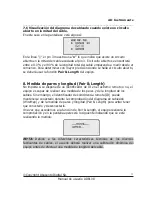
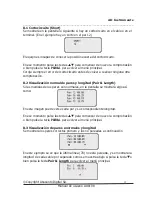
Страница 12: ...ocircuito antes de volver a realizar ninguna otra comprobación 8 2 Visualización normal de pares y longitud Pair Length Si las medidas de los pares son normales en la pantalla se mostrará algo así como En esta imagen puede verse cada par y su correspondiente longitud En ese momento pulse las teclas pq para comenzar de nuevo la comprobación o bien pulse la tecla PAIR L para volver al menú principal...

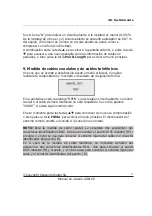
Страница 13: ...bación y mostrará el resultado de la siguiente forma En la pantalla se verá la palabra OPEN si existe algún circuito abierto o el cable coaxial o el cable de línea telefónica no está conectado Se verá la palabra SHORT si existe algún cortocircuito En ese momento pulse las teclas pq para comenzar de nuevo la comprobación o bien pulse la tecla PAIR L para volver al menú principal El reconocedor del ...

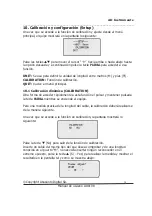
Страница 14: ...LIBRATION Función de calibración QUIT Vuelve al menú principal 10 1 Calibración dinámica CALIBRATION Otra forma de acceder rápidamente a esta función el pulsar y mantener pulsada la tecla PAIR L mientras se enciende el equipo Para una medida precisa de la longitud del cable la calibración deberá realizarse de la manera siguiente Una vez que se accede a la función de calibración la pantalla mostrar...

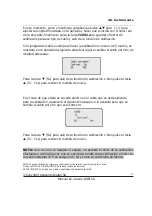
Страница 15: ...a función de calibración o bien pulse la tecla p Sí Yes para realizar la medida de nuevo En el caso de que exista un circuito abierto en el cable que se está midiendo para la calibración aparecerá el siguiente mensaje en la pantalla para que se cambie el cable por otro que esté correcto Pulse la tecla q No para salir de la función de calibración o bien pulse la tecla p Sí Yes para realizar la medi...

Страница 16: ... Instruments ________________________________________________________________________ Copyright Abacanto Digital SA 16 Manual de usuario AD8108 Instrument manual ADInstruments Network cable tester AD8108 ...

Страница 17: ... Digital SA Manual de usuario AD8108 17 1 The tester uses 6V DC as the power supply only 2 Never attempt to connect and start the tester with any power supply other than the tester itself 3 For an economic use of battery the tester will shut off automatically if it does not work for 30 minutes in succession ...

Страница 18: ...Abacanto Digital SA 18 Manual de usuario AD8108 CONTENTS PREFACE 19 FUNCTION FEATURES 19 TECHNICAL SPECIFICATION 20 INTERFACE KEY DESCRIPTION 21 OPERATION PROCEDURES 22 WIRING DIAGRAM WIREMAP TEST 23 PAIR LENGTH TEST 26 COAXIAL CABLE TELEPHONE LINE TEST 28 LENGTH UNIT SETUP 29 DYNAMIC CALIBRATION 30 ...

Страница 19: ... to complete cable continuity check Check wiring error in 5E 6E coaxial cable and telephone line such as open circuit short circuit jumper wire reverse connection or crosstalk interference Locate the wiring or connection error Measure cable length and determine the distance of open circuit and short circuit Dynamically calibrate cable length and make length measurement as accurate as 97 Simple and...

Страница 20: ...5 port L far end recognizer RJ45 port R The extra BNC and RJ11 converters are used to measure and check the continuity of coaxial cable and telephone line 7 Length Measurement of Twin Twisted Cable Scope 1 350 M 31 200ft Calibration accuracy 3 0 5M or 1 5 ft calibrating cable 5 M Shipment accuracy 5 0 5 M or 1 5 ft AMP AT T Class 5 cable Display M or ft 8 Length Calibration User can set calibratio...

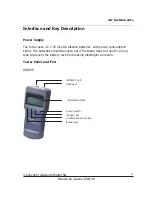
Страница 21: ...tion Power Supply The tester uses 4 x 1 5V Size AA alkaline batteries with power consumption 16mA The batteries should be taken out if the tester does not use for a long time to prevent the battery rack from leaking electrolyte corrosion Tester Panel and Port AD8108 LOOPBACK port MAIN port LCD display screen power switch function key confirmation return key function key ...

Страница 22: ...nctions to be chosen on main menu 1 Wire Map Wiring diagram measurement to check end to end continuity of cables M L R and locate error 2 Pair Length Pair and measure length to verify cable length open circuit distance pairing and cross talk interference 3 Coax Tel Coaxial cable and telephone line measurement to check continuity and indicate open circuit and short circuit 4 SETUP Calibrate and set...

Страница 23: ...ys as follows if there is any short circuit in cable or terminal e g 12 short circuit in the sample At the moment push A key to restart testing or push PAIR L key to return main menu Always correct short circuit error first and then start further measurement Test Result 2 Neither far end matcher ID is found nor cable inserts local port L The tester will automatically detect far end matcher ID or l...

Страница 24: ...ween far end port and master port M line shows the RJ45 jack pin number of master port At the moment push A key to restart testing or push PAIR L key to return main menu Test Result 4 Wiring diagram WIREMAP display when there is an open circuit at the far end of cable R line 3 and 6 pins location display x it indicates an open circuit in far end plug 3 and 6 pins and the open circuit is located ne...

Страница 25: ...plug 3 pin and the open circuit is located nearby the near end plug The open circuit should be located within 10 cable length if it is measured from the near end plug Test Result 6 Wiring diagram WIREMAP display when there is an open circuit in the middle of the cable It will display wiring diagram WIREMAP as follows if there is an open circuit in the middle of the cable line 3 pin location displa...

Страница 26: ...pair and length PAIR LENGTH test and it will display as follows to indicate the measurement is being undertaken Note In view of different technical parameters in various brand cables the user should apply the tester dynamic calibration function before length measurement Refer to the details herein Test Result 1 Short circuit SHORT It will display as follows if there is any short circuit in cable o...

Страница 27: ...es in the pair and length PAIR LENGTH measurement In which the last line 78 indicates there is no pair is found in lines 7 and 8 at the moment it will display the length of unpaired line number as shown below if you push the key Or push PAIR L key to return the main menu It will display X to indicate an open circuit if the length is less than 90 of other line pair length and the open circuit is lo...

Страница 28: ...HORT if there is any short circuit At the moment push A key to repeat the measurement or push PAIR L key to return the main menu The far end recognizer will have beep prompt sound if the connection is in normal condition Note For coaxial cable measurement it needs accessories two 2 BNC matchers One is used to connect M port RJ45 and the cable to be checked and the another is used to connect the fa...

Страница 29: ...alibration and setup SETUP function the tester shall display as follows Push A key to move cursor J indicator up and down to the desired item and then push PAIR L key to enter related setup function accordingly UNIT It is used to set up length unit and shifts between meter Meter and feet FT CALIBRATION is calibration function Detailed as related chapters hereinafter QUIT is used to return the main...

Страница 30: ...o dynamic calibration function the tester shall display as follows Push key No to exit calibration function Insert same type cable of given length into M port do not need insert far end recognizer push A key Yes to undertake measurement and display the measured length as shown below At the moment hold and A key to display the length to be adjusted to actual given length and then push PAIR L key to...

Страница 31: ...g cable length to remind the user to change a normal cable for calibration At the moment push key No to exit calibration function Push A key Yes to repeat the measurement Note If the tester is restarted after it shuts off the tester will recover the standard calibration factor of Class UTP5 cable as setup before shipment NOTE Specifications terms and conditions can be changed without advice Copyri...

Отзывы: