


www.adeept.com
35
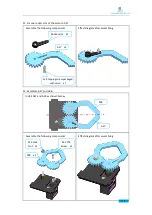
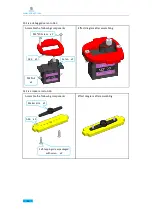
13. Fix Adeept Ultrasonic Module on A10.
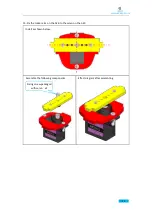
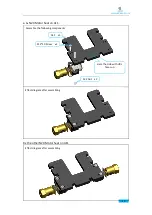
14. Fix a debugged servo to A05.
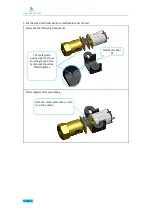
15. Fix one rocker arm of the servo on A09.
Effect diagram after assembling (When
the screw is obstructed or cannot be
screwed in, turn over the plate and
screw in the other side.)
Assemble the following components
M2 Nut x2
Assemble the following components
M1.4*6 Self-tapping
Screw x4
Adeept
Ultrasonic
Module x1
A10 x1
Effect diagram after assembling
M2*10 Screw x2
A05 x1
Servo x1
Effect diagram after assembling
Assemble the following components
Self-tapping screw
packaged with servo
x1
Rocker arm x1
A09 x1
Содержание RaspTank
Страница 1: ...www adeept com 1...
Страница 16: ...www adeept com 12 4 Connect the 18650 Battery Holder Set to the Adeept Motor HAT Note that the switch is OFF...
Страница 51: ...www adeept com 47 26 Fix A02 to A03 and A04 Assemble the following components M3 Nut x2 M3 12 Screw x2...
Страница 52: ...www adeept com 48 Effect diagram after assembling...
Страница 56: ...www adeept com 52 6 Install the track of the other side as described above Effect diagram after assembling...
Страница 61: ...www adeept com 57 If a warning window prompts click Yes...
Страница 69: ...www adeept com 65...


