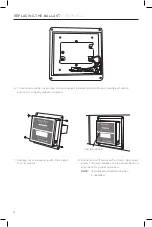
12
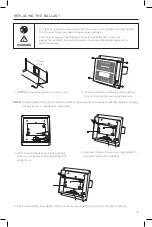
1.
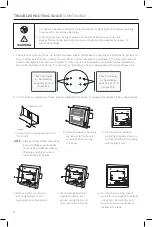
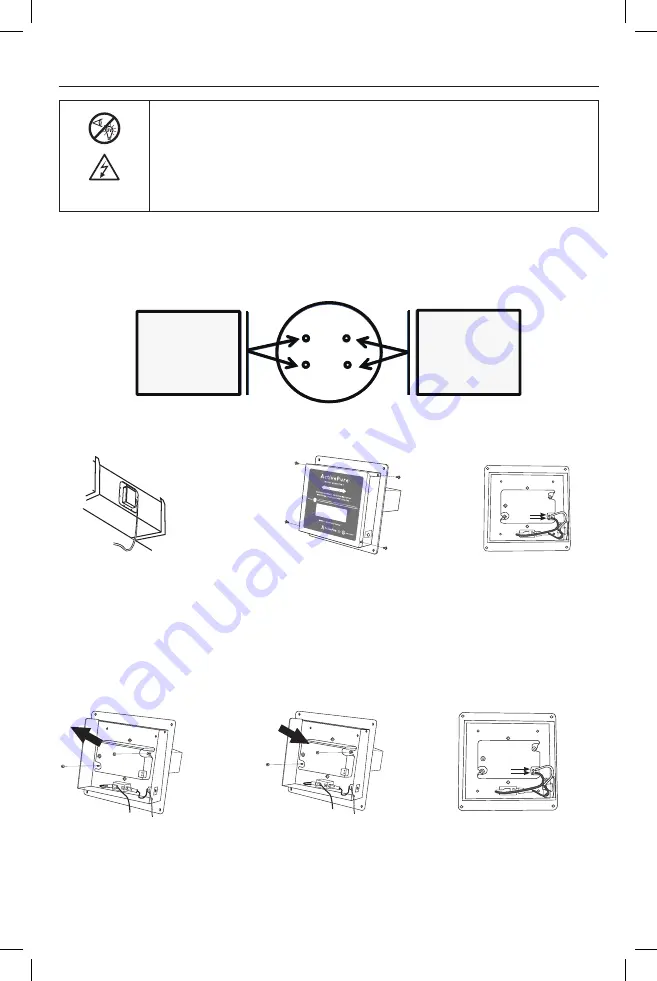
Check the continuity of the UV lamp filaments with a Multimeter by placing the Multimeter probes on
the UV lamp pins that are closest to each other. The Multimeter should beep if the filaments are not
broken. Resistance can also be checked if continuity is not available on the Multimeter. Resistance
should be between 3-5 ohms. If continuity or resistance check is bad, replace the ActivePure
®
Cell.
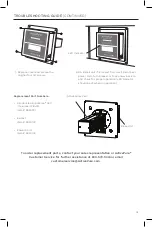
4. Remove the two (2) nuts
securing ballast to the
case. Remove the ballast.
2. Open the ballast housing
by removing the four (4)
screws then removing
the cover.
5. Place new ballast into
original location and
secure using the two (2)
nuts removed in step 4.
3. Disconnect all ballast
wiring by pressing down on
connector tabs and pulling
wire straight out.
6. To reconnect wiring, insert
wire into wire pocket in ballast
until bottomed. Gently pull
wire to ensure it is properly
locked into place.
1. Disconnect (unplug) power cord
from unit.
NOTE:
Always follow OHSA electrical
lockout safety requirements
to prevent accidental release
of energy during service or
maintenance activities.
TROUBLESHOOTING GUIDE
(CONTINUED)
2. If continuity or resistance check is good replace the ballast. To replace the ballast follow these steps.
Test Continuity
or Resistance
at each set of 2
closest Pin
Test Continuity
or Resistance
at each set of 2
closest Pin
Power Cord
• UV light in operation; DO NOT look directly at UV light; failure to follow warning
may result in severe eye damage
• Disconnect power at the breaker or fuse panel before servicing unit;
always follow OSHA lockout procedures to prevent accidental exposure to
electrical energy
WARNING


