


Vll
19
Configuring File and Printer Sharing
Vll
18
Configuring File and Printer Sharing
4.
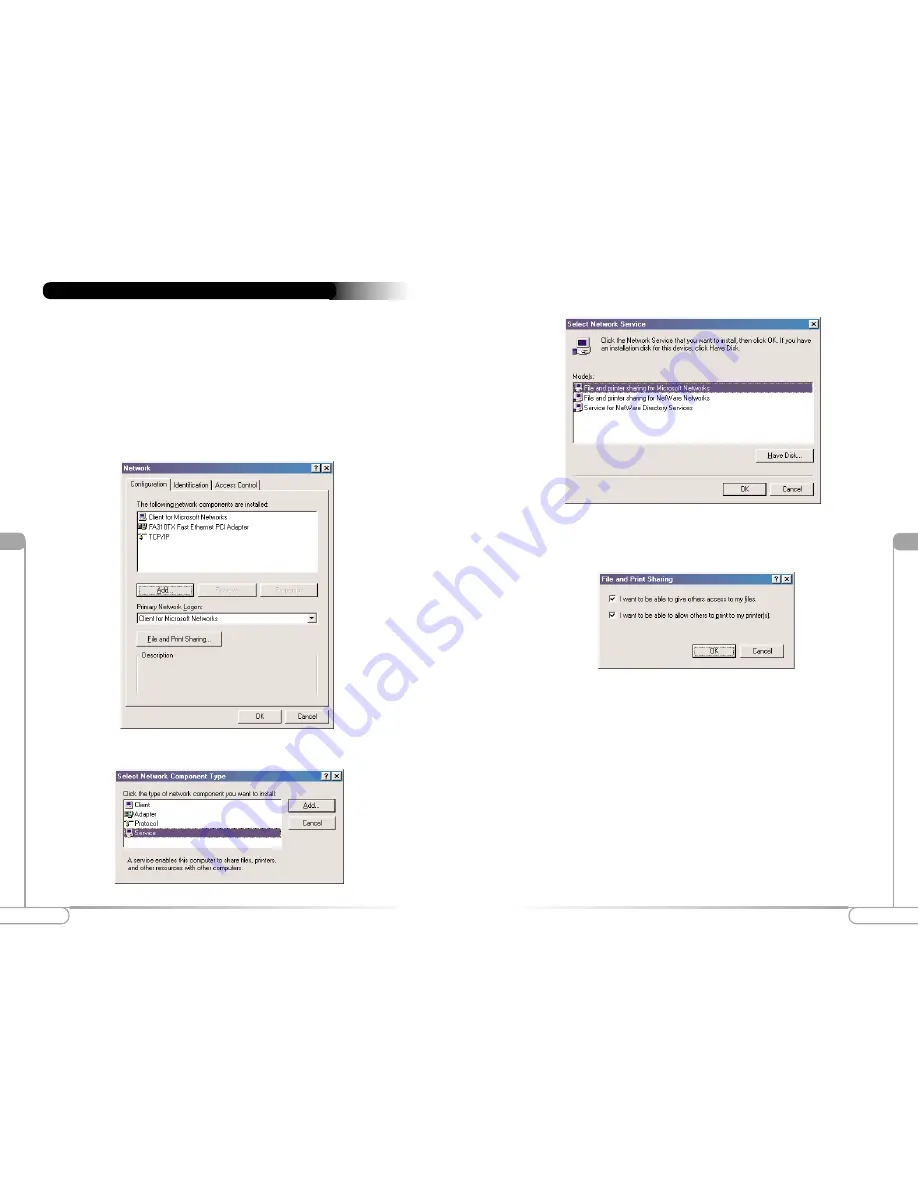
The “Select Network Service” window appears. Select
File and printer sharing
for Microsoft Networks
from the “Models” list box, and then click
OK
.
5.
The “File and Print Sharing” window appears. Ensure both of the selections have
a check mark beside them. If not, click in the box next to each selection. Click
OK
.
6.
The “Network” window reappears. Click on the
Identification
tab (see the first
figure on page 20).
Computer Name:
In this field, enter any name you want (for example, My
Computer, John, CPU654). Each computer included on your network must
have a different name.
Workgroup:
Enter the name of your network in this field. The Workgroup
name must be the same on every computer included on your network.
Computer Description:
In this field, enter the location of the computer, the
main user’s name, or any other information you want.
If you use a home gateway or access point, you can establish a network allowing you
to share files and printers. This is an easy method to set up a network in your home or
small office. Follow these steps to set up file and print sharing:
Windows 98 SE and Windows Me
1.
From your computer’s desktop, click
Start
,
Settings
, and then
Control Panel
. In
the “Control Panel” window, double-click the
Network
icon.
2.
The “Network” window appears. Select
Configuration
, then click
Add
.
Configuring File and Printer Sharing
3.
The “Select Network Component Type” window appears. Click
Service
,
then
Add
.


