background image

ENGLISH

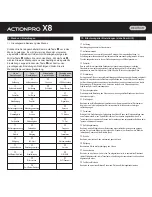
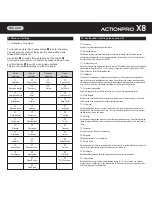
1)  Operation of the menu

Turn on the camera. Short press button 

➊ 

to enter the menu. 

You will enter the menu of the currently set operation mode

(Video/Photo/Playback).
Use button 

➌ 

to switch through the menu. Use button 

➋ 

to choose a menu entry or to confirm a choosen setting. Press
and hold button 

➋ 

to switch over to basic settings. 

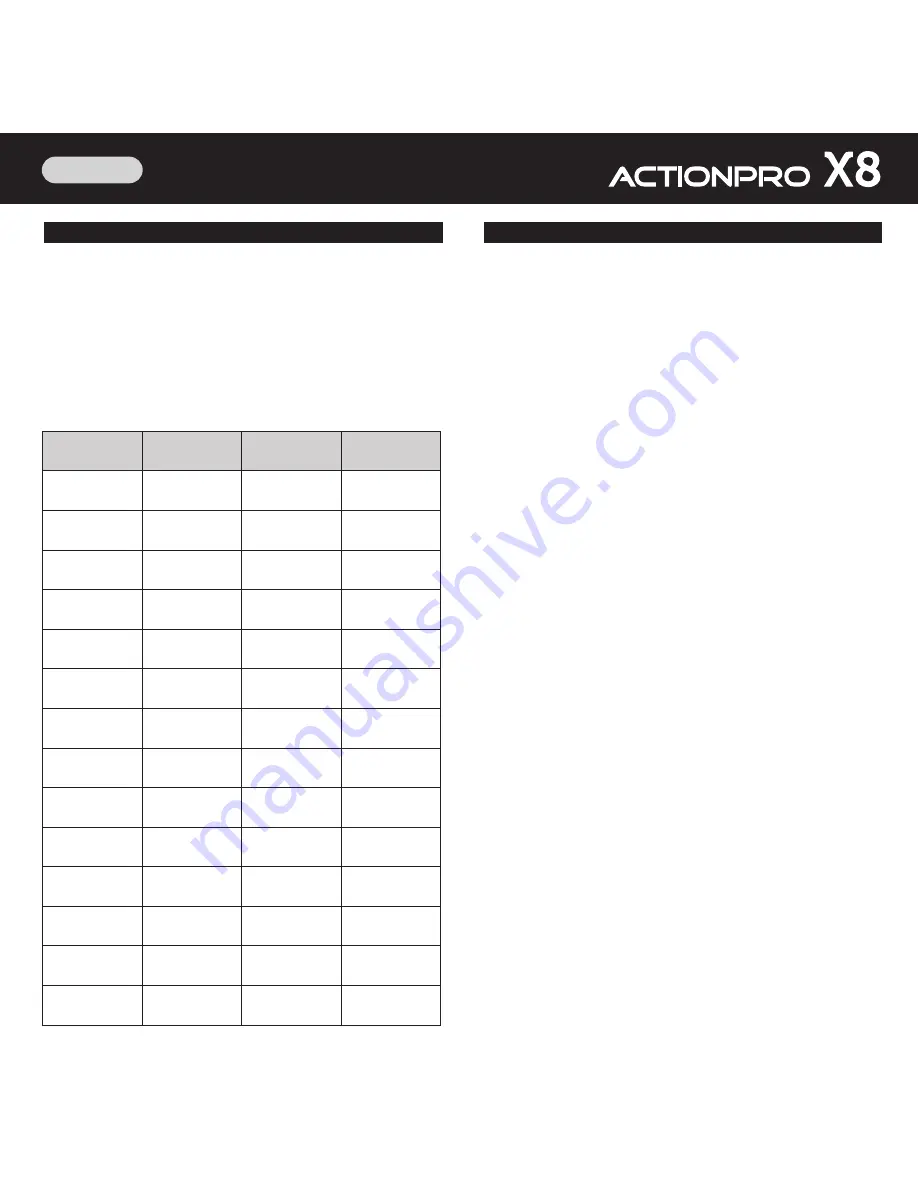
This are the available settings and their meaning:

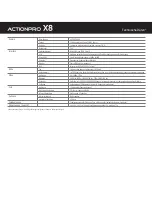
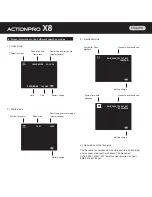
9. Menu and settings

10. Explanation of settings (see section 9)

Video

settings

Photo

settings

Playback

settings

Basic

settings

Resolution

Recording interval

Time-lapse Record

Stabilization

Exposure comp.

White Balance

Color mode

Metering

Sharpness

Saturation

Record Audio

Date Stamp

Capture Mode

Resolution

Burst

Quality

Metering

Sharpness

White Balance



Color mode



Saturation



ISO 



Exposure comp.



Stabilization



Quick Review



Delete



Protect



Screen Save



Date/Time



Auto Power Off



Beep Sound



Language



TV Mode



TV Out



Frequenz



Format



Default setting



Version



Date Stamp



WiFi SSID



WiFi Password

 

Resolution

Defines the resolution of the recorded pictures in megapixels. Smaller resolutions allow more 

shots in the remaining memory space, but offer a lower image quality.

 

Burst

With each release, 3 photos are captured in a short interval.

 

Quality

Defines the compression strength of the photos taken. The setting "fine" provides the 

maximum quality but produces larger files.

 

Metering

Defines which image areas are used to calculate the correct exposure: The entire image area 

(Show Average - standard), the area around the center (center-weighted), or the exact center 

(Spot).

 

Sharpness

Defines how much the photo is sharpened.

 

White Balance

Defines if the white balance is automatically set by the camera (default setting), or if a fixed 

value is used. May be useful under difficult lighting conditions.

 

Color mode

Allows changing the color of the photo. In addition to the factory setting, color can be set to 

black&white, a sepia effect or dive mode. The dive mode may replace the use of an external 

red filter when diving in salt water.

 

Saturation

Defines the amount of color saturation.

 

ISO 

Allows to manually adjust the light sensitivity.

 

Exposure compensation

Automatic exposure of the photo is corrected up or down by the set aperture value.

 

Stabilization

The built-in G-sensor detects vibrations and movements of the camera and compensates 

them by an electronic stabilization of the image. Depending on the strength and frequency of 

the vibrations, this works differently well and always brings a slight reduction in image quality 

with it. Please test of the usefulness of stabilization for your recording situation.

 

Quick review

After taking a photo, it can be reviewed for a few seconds on the LCD screen.

 

Date stamp

Defines whether date and time are displayed at the bottom of recorded photo.

 

Delete

Delete the currently viewed or all photos.

 

Resolution

Setting of the video resolution and frame rate. 

 

Recording interval

Defines the length of recorded files during a continious recording. Individual files can be 

seamlessly joined together in video editing software. If this setting is set to off, every file will 

be recorded up to the file size limit of 4GB.

 

Time-lapse Record

Camera will record one frame at the set time interval. A final video file in the currently selected 

video format will be stored. The "1 sec." setting for example, created in video format 1080p / 

30fps, will save a 30-fold accelerated video.

 

Stabilization

The built-in G-sensor detects vibrations and movements of the camera and compensates 

them by an electronic stabilization of the image. Depending on the strength and frequency of 

the vibrations, this works differently well and always brings a slight reduction in image quality 

with it. Please test of the usefulness of stabilization for your recording situation.

 

Exposure compensation

Automatic exposure of the video is corrected up or down by the set aperture value.

 

White Balance

Defines if the white balance is automatically set by the camera (default setting), or if a fixed 

value is used. May be useful under difficult lighting conditions.

 

Color mode

Allows changing the color of the video. In addition to the factory setting, color can be set to 

black&white, a sepia effect or dive mode. The dive mode may replace the use of an external 

red filter when diving in salt water.

 

Metering

Defines which image areas are used to calculate the correct exposure: The entire image area 

(Show Average - standard), the area around the center (center-weighted), or the exact center 

(Spot).

 

Sharpness

Defines how much the video is sharpened.

 

Saturation

Defines the amount of color saturation.

 

Record Audio

Defines whether the video is recorded with or without sound. In certain situations (strong wind 

noise e.g.) the audio recording is unusable and can be turned off.

 

Date Stamp

Defines whether date and time are displayed at the bottom of recorded video.

 

Capture Mode

Defines whether a single photo, a time-delayed picture (2, 5 or 10 seconds), or a series of 

photos is taken. A series photo-recording starts with the first press of shutter button and ends 

with the re-pressing of shutter button.

 

Protect

Protect the currently viewed or all photos against deletion. Can also be used to remove the 

protection.

 

Screen Save

Turns off the LCD screen after the set time automatically, when no buttons are operated. Also 

works during recording, which continues normally. Any button input will still be executed 

immediately and reactivates the screen.

 

Date/Time

Setting the time and date. Use button  

 

to change the currently highlighted value. Long 

press button  

 

to jump to the next value.

 

Auto Power Off

The camera turns off when not in use after the specified time.

 

Beep Sound

Turns off or on sounds when a button is pressed.

 

Language

Setup menu language.

 

TV Mode

Setting the desired TV standard, PAL or NTSC. This setting also defines the video frame rate 

(25/50/100fps for PAL, 30/60/120fps for NTSC)

 

TV Out

Activates the analog video signal output via the USB output.

 

Frequency

Adjusts the recording to the frequency of artificial lighting (50Hz for Europe) to prevent 

flickering in video recordings under artificial lighting.

 

Format

Formats the memory card and thus erases all contents of the memory card.

 

Default Setting

Resets all the camera changed settings back to the factory settings.

 

Version

Displays the currently installed firmware version.

 

WiFi SSID

Determines the WiFi name of the camera.

 

WiFi Password

Sets the WiFi password of the camera. Long press of button 

 

jumps between capital 

letters, lower case letters, numbers, delete, OK and back. Use button  

 

wto choose a 

value and confirm it by pressing button  

.  To delete the last sign in row, jump to delete and 

press button  

. To confirm your password, jump to OK and press button  

.

Содержание X8

Страница 1: ...www actionpro de Ver 101 BEDIENUNGSANLEITUNG USER MANUAL ...

Страница 2: ...wir die aktuellste Version dieser Anleitung im Servicebereich unserer Webseite herunter zu laden www actionpro de www actionpro de CI IMAGEWEAR activSport GmbH Steinegaden 151 D 88167 Röthenbach RoHS Altbatterien und Akkus gehören nicht in den Hausmüll Sie sind gesetzlich verpflichtet Batterien und Akkus zurück zu geben Sie können diese nach Gebrauch in einer kommunalen Sammelstelle oder auch im H...

Страница 3: ...n um ein oder aus zu schalten Kurz drücken um in das Menü zu kommen oder um dieses zu verlassen Aufnahme Start Stop Auslöser Modus Menüwahl Kurz drücken um Aufnahme zu starten oder stoppen Lange drücken um zwischen den Betriebsmodi Video Foto Wiedergabe zu wechseln Im Menü kurz drücken um Auswahl zu bestätigen oder lange drücken um die zweite Einstellungsebene zu wählen WiFi Ein Aus Menü blättern ...

Страница 4: ...le die durch regelmäßiges Fetten mit Silikonfett gewartet und bei Bedarf ausgetauscht werden müssen 2 Prüfen Sie Befestigungs und Zubehörteile vor dem Gebrauch auf Vorschäden 3 Befestigen Sie die Kamera immer so dass sie bei einem möglichen Versagen eines Befestigungsteils nicht verloren gehen und oder Sie und andere gefährden kann 4 Verwenden Sie ausschließlich original ACTIONPRO X8 Akkus 5 Verwe...

Страница 5: ...Symbol für Video Datum Uhrzeit Ladezustand des Akkus Auflösung und Bildrate Verbleibende Aufnahmezeit Speicherplatz DEUTSCH 8 Bildschirminformationen in den 3 Betriebsarten 12M 0980 1080P 60FPS 02 15 30 2016 04 06 14 10 00 2016_0420_152741_001 1080FHD Symbol für Video Wiedergabe Ladezustand des Akkus Dateiname und Auflösung 2016_0420_154541_001 4032x3024 Symbol für Foto Wiedergabe Ladezustand des ...

Страница 6: ...rmat gespeichert Die Einstellung 1 Sek beispielsweise erstellt im Videoformat 1080p 30fps ein 30 fach beschleunigtes Video Stabilisierung Der eingebaute G Sensor erkennt Erschütterungen und Bewegungen der Kamera und gleicht diese durch eine elektronische Stabilisierung des Bildes aus Je nach Stärke und Frequenz der Erschütterungen funktioniert dies unterschiedlich gut und bringt immer auch eine le...

Страница 7: ...tabilisierung des Bildes aus Je nach Stärke und Frequenz der Erschütterungen funktioniert dies unterschiedlich gut und bringt immer auch eine leichte Reduzierung der Bildqualität mit sich Am besten testen Sie die Verwendbarkeit der Stabilisierung für Ihren Einsatzzweck aus Zeit Datum Einblend Bestimmt ob am unteren Bildrand Datum und Zeit in das Bild eingeblendet werden Bildvorschau Das gerade auf...

Страница 8: ...alten Sie diese ein Drücken Sie die Taste zur Bestätigung der PC Übertragung Am PC wird die Speicherkarte der Kamera nun als eigenes Speichermedium erkannt Im Verzeichnis DCIM finden Sie je einen Unterordner für die gespeicherten Videos Movie und Fotos Photo Bevor Sie die Kamera ausschalten und abstecken sollten Sie den entsprechenden Wechseldatenträger am PC auswerfen Alternativ können Sie auch d...

Страница 9: ...g Die Fernbedienung schaltet sich automatisch aus nachdem die Kamera ausgeschaltet wurde Sie können auch die Kamera über die Fernbedienung ausschalten indem Sie die Taste für einige Sekunden gedrückt halten Ein Einschalten der Kamera über die Fernbedienung ist nicht möglich Ein Einschalten der Fernbedienung ist nicht nötig Sobald die Kamera eingeschaltet ist und Sie über die Tasten oder der Fernbe...

Страница 10: ...E 802 11 b g n Lithium Ionen Akku auswechselbar 1000 mAh ca 100 Minuten in bester Qualitätseinstellung kann je nach Videomodus und Umgebungstemperatur abweichen 4k 1080p 720p 4k 24fps 1080p 25 30 50 60 fps 720p 50 60 120 fps Ein Bild alle 1 5 10 30 60 300 600 Sekunden in fertiger Videodatei mit der gerade eingestellten Bildrate Aufnahmen ab 100fps werden in einer Zeitlupendatei gespeichert 12 Mega...

Страница 11: ...y before use Due to the ongoing development of the camera software we recommend that you download the latest version of this manual in the service area of our web site www actionpro de www actionpro de CI IMAGEWEAR activSport GmbH Steinegaden 151 D 88167 Röthenbach RoHS ...

Страница 12: ...or LCD screen Battery compartment ON OFF Menu Long press for switching on or off Short press to enter or leave the menu Record start stop shutter mode menu confirmation Short press to start or stop recording Long press to switch between operation modes Video Photo Playback Within menu short press to confirm your choice or long press to switch to second menu level WiFi ON OFF menu selection Short p...

Страница 13: ...amination in the seal area before each dive Seals are wearing parts which needs to be maintained by greasing with silicone grease and if necessary needs to be replaced 2 Before use please check mounting parts and accessories on predamages 3 Always attach the camera in a way that it cannot get lost in case of a broken mounting part because it could endanger you and others 4 Please only use the orig...

Страница 14: ...te Time Battery charge Resolution and frame rate Remaining recording time memory space ENGLISH 8 Screen information in the 3 different operation modes 12M 0980 1080P 60FPS 02 15 30 2016 04 06 14 10 00 2016_0420_152741_001 1080FHD Symbol for video playback Battery charge File name and resolution 2016_0420_154541_001 4032x3024 Symbol for photo playback Battery charge File name and resolution Symbol ...

Страница 15: ... a 30 fold accelerated video Stabilization The built in G sensor detects vibrations and movements of the camera and compensates them by an electronic stabilization of the image Depending on the strength and frequency of the vibrations this works differently well and always brings a slight reduction in image quality with it Please test of the usefulness of stabilization for your recording situation...

Страница 16: ...ther date and time are displayed at the bottom of recorded photo Delete Delete the currently viewed or all photos Defines whether a single photo a time delayed picture 2 5 or 10 seconds or a series of photos is taken A series photo recording starts with the first press of shutter button and ends with the re pressing of shutter button Protect Protect the currently viewed or all photos against delet...

Страница 17: ...n remove the memory card from your camera and access the data via a card reader on your PC 12 Transfering your files to a PC Using the built in WiFi feature lets you control the X8 on a smartphone To activate the WiFi function press button when the camera is on On your smartphone select the WiFi named ACTIONPRO and connect to it The default password is 12345678 Now you can start the ACTIONPRO X8 A...

Страница 18: ... The remote control automatically turns off after the camera was turned off By pressing buttun for some seconds you can switch of the camera and remote at the same time but you will not be able to switch on the camera again by the remote You don t need to switch on the remote As soon as your camera is switched on and you send a command from your remote by pressing button or the remote will switch ...

Страница 19: ...chargeable exchangeable 1000 mAh about 100 minutes in best quality setting may vary in different video modes and temperatures 4k 1080p 720p 4k 24fps 1080p 25 30 50 60 fps 720p 50 60 120 fps One frame every 1 5 10 30 60 300 600 seconds saved in a finished video file with currently set resolution Recordings from100fps up will be saved in a slow motion file 12 megapixels Sensor resolution 3 photos in hi...

Страница 20: ......

Отзывы: