www.acti.com
Hardware Manual
12
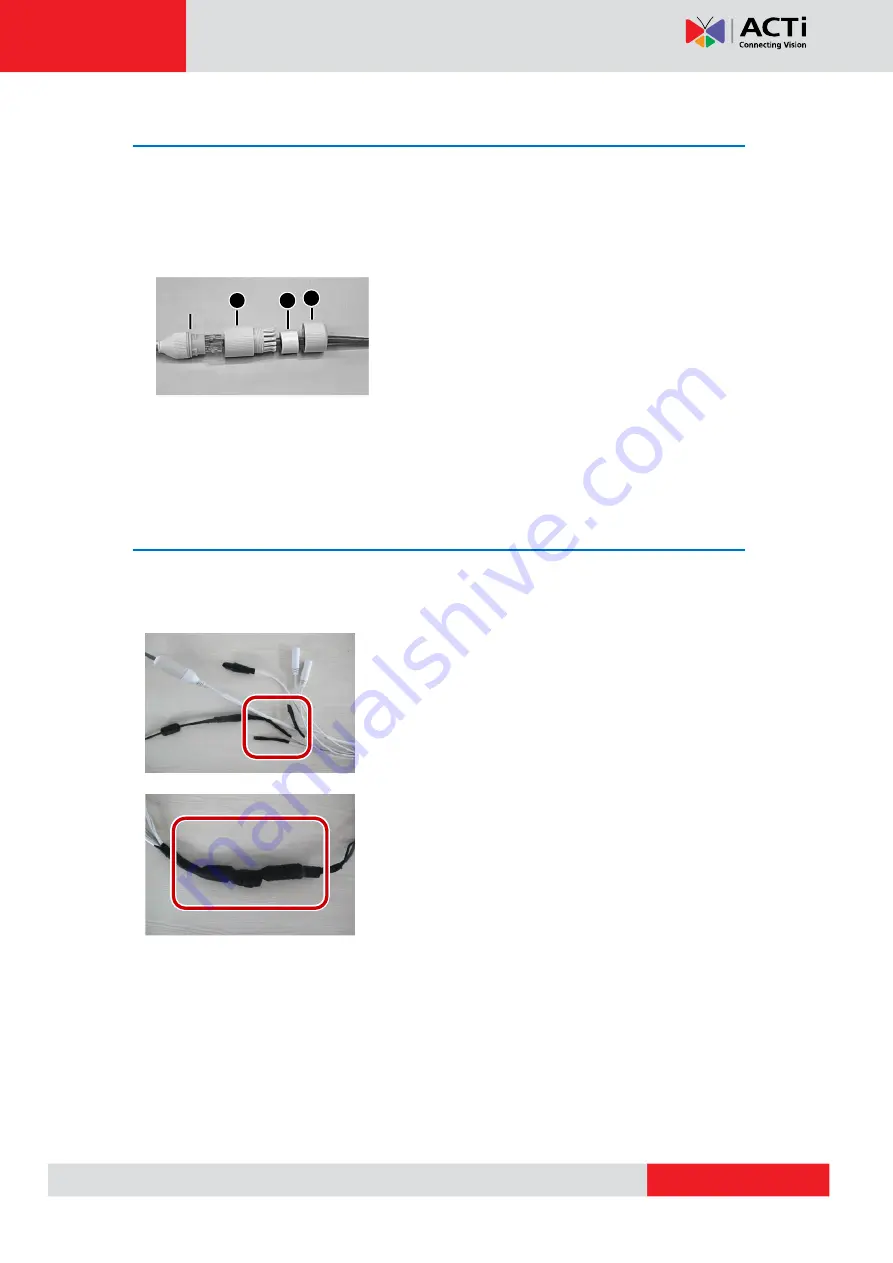
Waterproof RJ-45 Connector
NOTE:
The preceding installation process is for concealed installation, during which holes are
punched on the wall and cables are penetrated into the wall. If open installation is adopted,
cables are not penetrated into the wall but threaded out from the outlet on one side of the
base.
Attach the seal ring to the Ethernet interface. Mount
the waterproof components in order. Then insert the
cable into the Ethernet interface and screw the
waterproof bolt in.
NOTE:
You can crimp the inner wires of the cable with the RJ45 plug first and then cover the
waterproof components. You may also cover the waterproof components first.
Waterproof Tail Cable
Connect the tail cables and then take the following steps to protect the tail cables from water
using waterproof tapes. The figures are for your reference only.
Connect the tail cables, and protect the cables and cable
connections using insulating tapes. Then wrap all the tail
cables together using insulating tapes.
Choose a start point for waterproof tapes and protect the
tail cables using waterproof tapes.
NOTE:
Avoid short circuit when insulating the cables.
Use self adhesive waterproof tapes that will stick together with the twisted cables.
Tighten waterproof tapes when wrapping the cables and make sure the cable connections
are fully covered. Wrap with take and protect unused cable connections, as well.
You are recommended to put the waterproof cables in a waterproof junction box which
needs to be purchased separately.
Insert in order
Seal ring
1
2
3


