ACTi GNR-350 Скачать руководство пользователя страница 11

Standalone NVR Quick Installation Guide     

11


CONFIGURE CAMERA SETTINGS

1. Go to 

Setup

 page and then 

Devices

 tab. Choose the camera from the 

Camera List

.

2. Select 

Basic

Video

Audio

PTZ

, or 

Preset Tour tab to configure related 

settings.


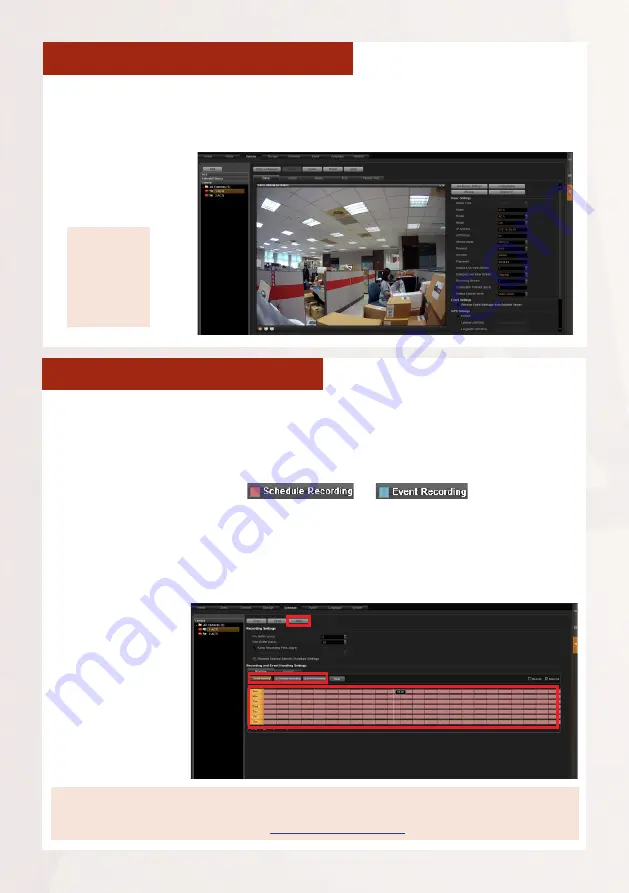
SET RECORDING SCHEDULE

The recording service automatically starts full-time recording for a newly added 

camera. You can modify the recording schedule to suit your needs.
1. Go to 

Setup

 page and then 

Schedule

 tab.  Select the camera from 

Camera 

List

2. Choose a recording mode: 

 or 

Schedule Recording

: Records video continuously during the scheduled 

session.     

Event Recording

: Records video based on specific triggers such as when a 

motion is deteced by the camera.

Note

If you have any question during system installation, please feel free to contact our engineers via 

ACTi Customer Help Desk

 platform at 

http://www.acti.com/CHD

3. 

Drag on the time 

table to define 

the time session.

4. Click “

Apply

“.

3. 

Click “

Apply


to save the 

settings.

Note

Availability 

of page tabs 

depend 

on camera 

capabilities.

Содержание GNR-350

Страница 1: ...Quick Installation Guide GNR 350 100 Channel Tower Standalone NVR...

Страница 2: ...d instructions on installation and operation please search for the product manuals on http www acti com downloadcenter The items below are required for installation Network cameras Monitor with HDMI D...

Страница 3: ...Audio Output USB Ports 2 Power Button Reset Button USB Port PS 2 Port DisplayPort 1 2 3 4 5 6 USB Ports 2 HDMI Port USB Ports 2 USB Type C Port SS USB Port Audio Input Output Power Switch Power Conne...

Страница 4: ...specific orientation Step 4 Locate the SATA ports on the motherboard then plug in the other end of the SATA cable Step 6 If more than one HDD will be installed repeat steps 2 5 to install more HDDs Wh...

Страница 5: ...etwork with the NVR and the basic required peripherals to start using the device Network Cameras USB Device Monitor Power Source POWER ON After connecting the NVR to the power socket turn on the POWER...

Страница 6: ...ess the available storage space 1 On Windows Search Box search and enter computer management SOFTWARE CONFIGURATION 2 Select Disk Management right click on a disk title and select Initialize Disk choo...

Страница 7: ...tion Guide 7 4 Follow the on screen Wizard to complete Make sure you assign the desired drive letter and give a proper label name to this volume 5 After the volume is created it is shown on Volume Lis...

Страница 8: ...ch Box search and enter administrator tool 2 Click NVR3 Administrator Tool to open the application LOG IN On Windows Destop double click on to enter NVR interface Type the Account and Password and cli...

Страница 9: ...dding a new user group 2 Input group ID Name and click Apply 3 Click on the Users panel click Add to start adding a new user 4 Input the user s Account Password Email address and select its User Group...

Страница 10: ...arch for ONVIF compliant cameras of any brand After selecting your desired cameras click Apply Add Camera Manually If you are adding a camera located in another network use Add Camera Manually Fill in...

Страница 11: ...to Setup page and then Schedule tab Select the camera from Camera List 2 Choose a recording mode or Schedule Recording Records video continuously during the scheduled session Event Recording Records v...

Страница 12: ...on upload the map Drag the lower right corner to adjust the channel size 4 On the View Tool Bar click on to save this view 5 You can set this view as default view by clicking on VALIDATION To check l...

Страница 13: ...ents some contents may have changed from the time this documentation was printed You can download the latest user documentation which shall prevail over the printed version provided in the package fro...

Отзывы: