Quick Installation Guide
5
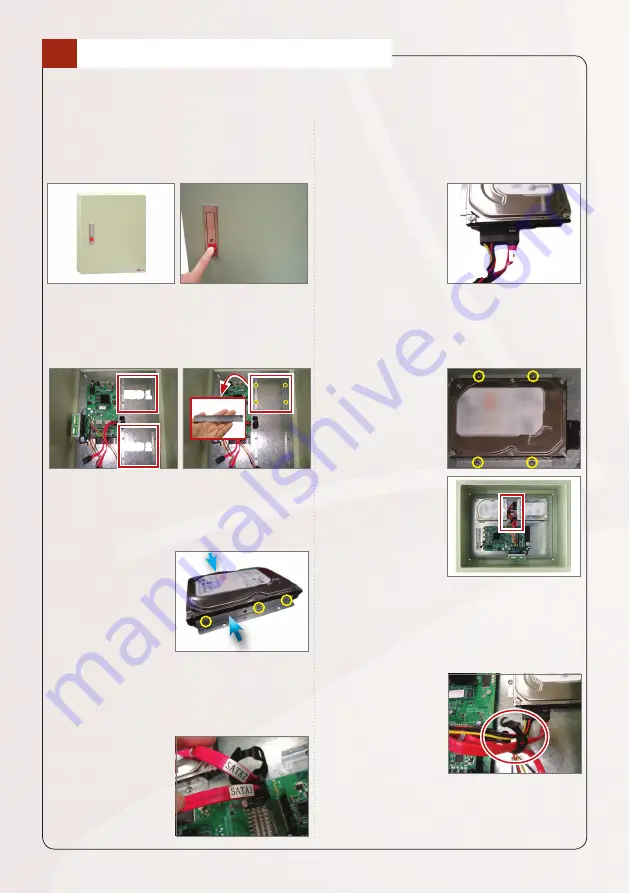
INSTALL HARD DISK DRIVE
3
Step 1
Press the red button to open the front
cover.
Step 2
Remove one pair of HDD brackets.
HDD 1
HDD 2
Step 3
Attach one bracket on each side of the
HDD.
NOTE:
Depending on
the hard disk drive,
attach at least two
(2) screws on each
side of the hdd to
properly secure the
bracket.
Step 4
Take note of the SATA cable label, this
will determine which one is HDD1 or
HDD2 on the ENR
user interface.
Step 5
Connect the data cable and the power
cable to the hard disk.
Power
Cable
Data
Cable
NOTE:
Take note
of the connectors
direction.
Step 7
Tie the data and power cables using
the black velcro strip to organize the
cables.
NOTE:
Take note of the
cable direction when
installing the hard disk
drives.
Step 6
Attach the four (4) screws to secure the
hdd brackets to the lockbox.
Repeat steps
2 ~ 6 to install the
other hard disk
drive.
NOTE:
The photos below are for reference only, actual unit and parts may vary. However, the same
procedures apply for the ENR models covered in this QIG.


