■
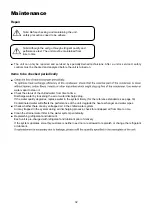
KEEP CLEAR FROM THE HEAT EXCHANGER AS IT MIGHT GET DAMAGED AND POTENTIAL HEALTH HAZARD.
21
Installing Chiller
■
The user manual, warranty card, accessories, and packing list are place at the right side of the unit.
■
■
If the unit is installed in a place where it snows during winter, proper measures must be taken to protect the
unit against snow and ensure that the unit works properly.
■
The groundwork should be made of concrete or supporting structures. While designing the groundwork, you
must fully consider the strength of the
fl
oor, water discharge (the unit discharges water
while working), pipelining and wiring. If the foundation is not strong, the unit might fall
off and breakdown, even incur bodily injuries.
■
Screw down the chilled water unit using anchor bolts so that it will not fall off in case of
strong wind or earthquakes. In order to minimize damages cause by mother nature, it is
advise to installed the unit in places that can minimize weathering effects.
■
The unit will vibrate during operation and it might transfer through the groundwork
causing noises in the floor or walls. Therefore, proper vibration dampening mechanisms
(such as bumper cushion, bumper frame etc.) should be in place.
■
Corners and edges should be properly installed. Otherwise, the unit might get unbalanced and cause the
grounding pins to bend. The unit might fall off and cause bodily injuries if it is not properly installed.
Hoisting the Chiller
Please hoist the unit according to the following illustrations. Tie the cables to the four corners of the unit while
moving it. If you tie the cables to only two corners of the unit, the unit might get unbalanced and fall off.
NOTES:
■
CHILLED WATER UNITS MUST BE MOVED WITH GREAT CARE.
■
ACCESSORY STRIPS AND/OR STRAPPING TAPES THAT COME WITH THE UNIT IS NOT FOR HOISTING PURPOSES.
ANY ATTEMPT TO USE IT TO MOVE THE UNIT MIGHT BREAK AND CAUSE ACCIDENTS.
Keep clear from the heat exchanger as it might get damaged and potential health hazard.
■
DISPOSE ALL PLASTIC BAGS PROPERLY AND KEEP THEM AWAY FROM CHILDREN.
■
DUE TO THE DIFFERENT APPEARANCE OF THE UNIT, THE ABOVE HOISTING PICTURE IS ONLY FOR REFERENCE.
Содержание A5MAC 210D
Страница 1: ...Technical Manual AIR COOLED MODULAR CHILLER A5MAC 210D A5MAC 230D A5MAC 340D A5MAC 450D...
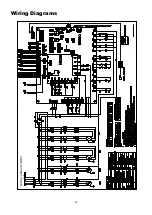
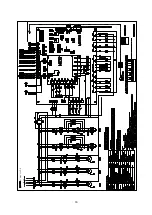
Страница 14: ...14 Wiring Diagrams MODEL A5MAC210 230D...
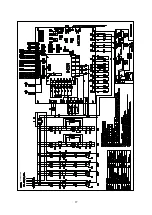
Страница 15: ...16 1 4 5 3 2 7 8 6 1 4 5 3 2 7 8 6 A5MAC340DR...
Страница 16: ...17 1 4 5 3 2 7 8 6 1 4 5 3 2 7 8 6 A5MAC450D...
Страница 36: ...38 Wired Controller Instruction Dimensions Controller Installation...


