


- 70 -
- 71 -
10. In the Select a Disk
window, choose
your mini Pal as
the location for the
Backup Set (Figure
29, next page) and
click
OK
.
11. Verify the Backup
Set name; make
sure your mini Pal is
selected as the des-
tination disk. Click
Next
.
12. Keep
Backup Set
Security
set at None
and click
Next
(Figure 30).
13. Click
Next
to save
the
Retrospect
Catalog File
for this
Backup Set in the
default location:
My Documents\
Retrospect Catalog
Files (Figure 31)
.
Retrospect uses
the catalog to keep
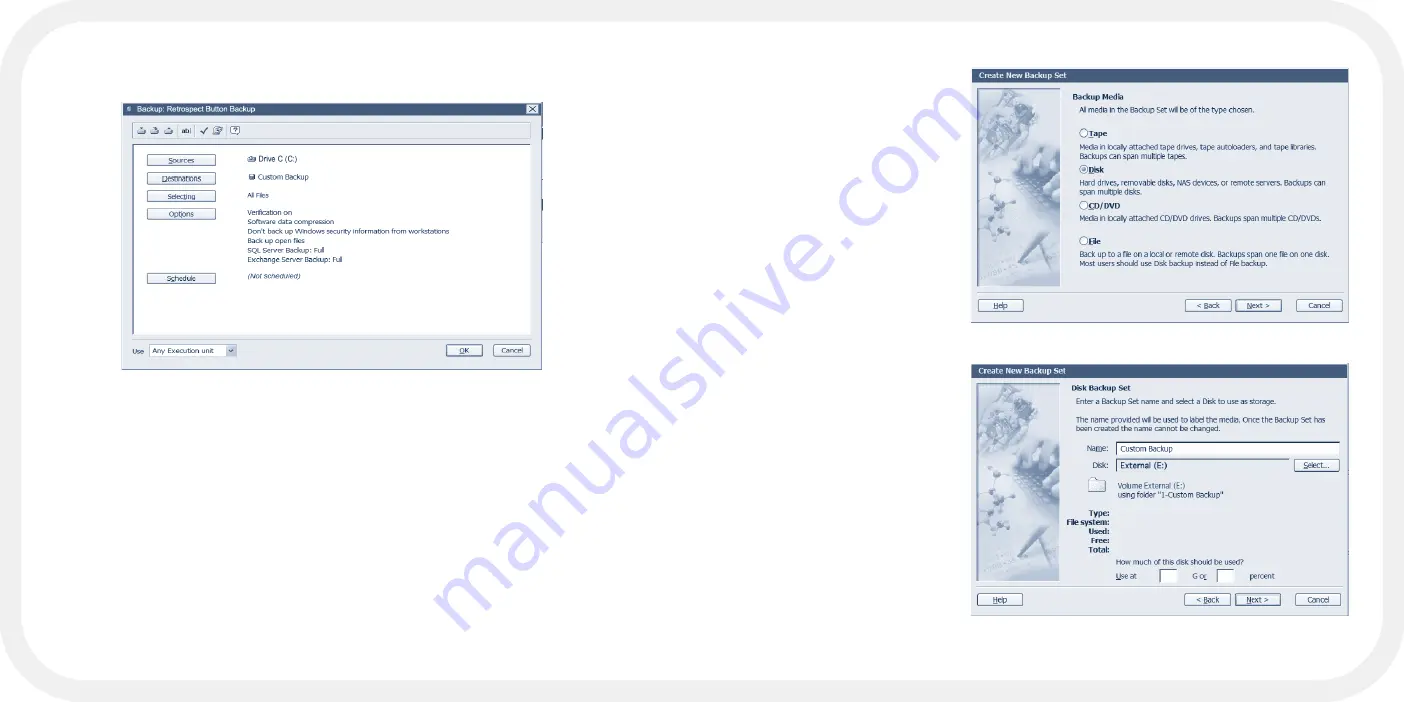
FIGURE 27
FIGURE 28
6. To add additional folders or drives as described in the previous step, click
Add
in the
Sources
window. After you finish adding folders and drives, click
OK
.
7. In the
Backup: Retrospect Button Backup
window, click
Destinations
. To cre-
ate a new location, in the
Backup Set Selection
window, click
Create New
to
launch the
Create New Backup Set
wizard.
8. In the
Create New Backup Set
wizard, click
Next
. Select
Disk
(Figure 27) as
the
Backup Media
and click
Next
.
9. Enter a name for the Backup Set or use the default name (Figure 28). In this
example, the Backup Set is named Custom Backup. Click
Select
.
FIGURE 26
Содержание HD250FPMM-72
Страница 1: ...mini Pal User s Guide ...
Страница 4: ...PART I MEET MINI PAL MUCH MORE ...
Страница 13: ...PART II SETTING UP MINI PAL ...
Страница 23: ...PART III PUSHBUTTON BACKUP ...
Страница 38: ...APPENDIX ...
Страница 51: ...mini Pal User s Guide ...


