41 from 68
Installation instructions for separator systems
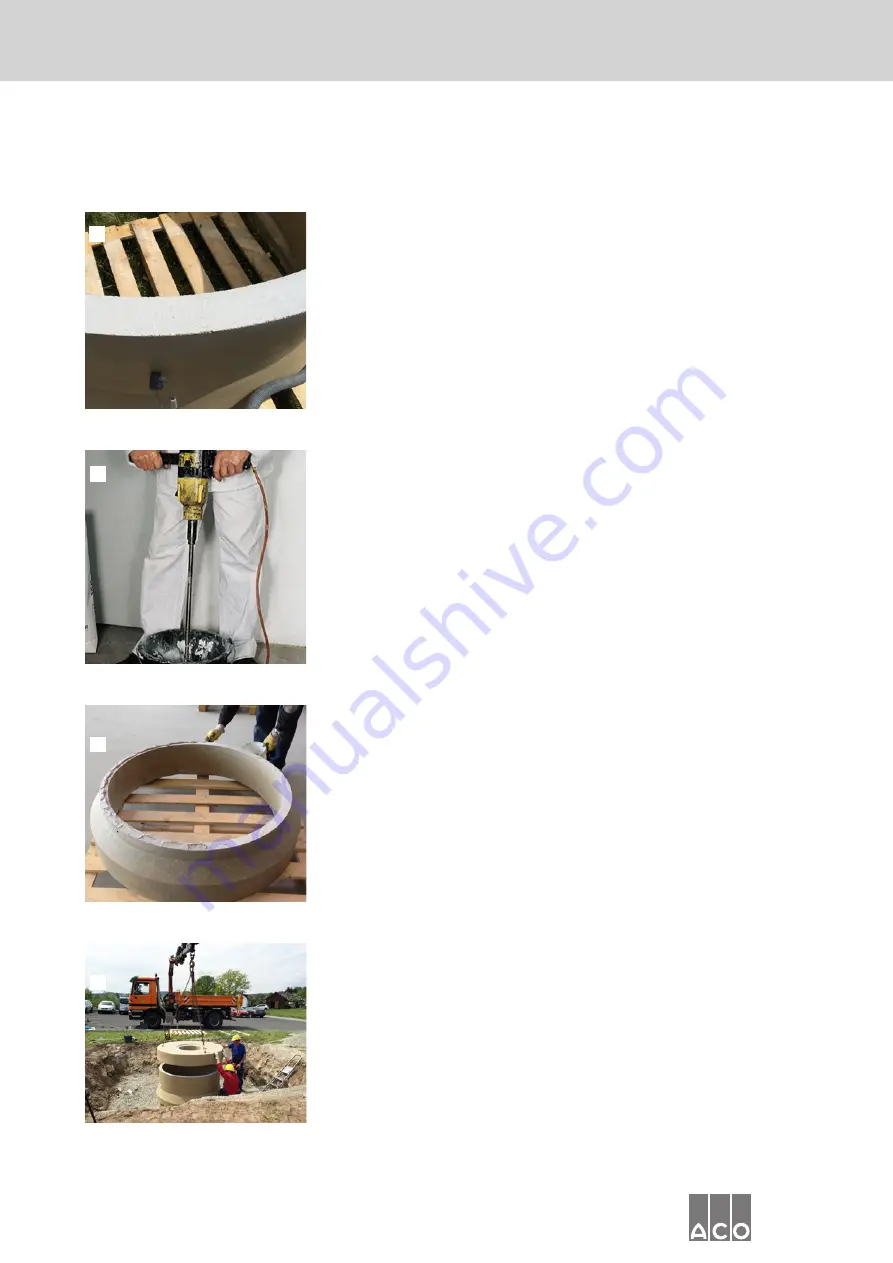
To get a free from separating agents sur-
face, the tear strip must be removed from
the intended for bonding surfaces. The
surfaces of the roughened adhesive
points must be intact, clean and dry, as
well as free from standing water, greases
and oils, dust, loose parts, and other
forms of con¬tamination. The tank only
has a free from separating agents surface
at the top. All the other parts have a free
from separating agents surface at both
the top and bottom.
To mix the 2-component adhesive, add
component B (hardener) to component A
(instructions for use appear on compo-
nent A). Using a mechanical mixer, mix
thoroughly until an even consistency is
attained. The pot life of the 2-component
adhesive is around one hour.
Apply the adhesive over the full surface of
the adhesive joint, creating beads that
reach around 10 mm at their peak.
Using suitable equipment, combine the
component with the next component so
that the two are internally flush. Once the
components are in place, the adhesive
should squeeze out from the inside, all the
way around.
Smooth out any protruding material and
fill the inner bevel. Then smooth out the
bevel. For all the other shaft components
(shaft and adjustment rings), proceed in
Bonding the components
A 2-component adhesive is applied to the tank, the cover plate, and the shaft rings and adjustment rings to provide waterproofing.
the same way as described in steps 3 and
4. Once you have completed the work,
clean the tools immediately with a subs-
tance such as acetone (once set, any
remaining material can only be removed
mechanically). For information on arran-
ging the shaft construction and on the
sampling shaft, accessories and commis-
sioning, refer to Pages 13–15.
1
2
3
4


