4.2.1 Software Functions(Resistive Touch)
Upon rebooting, the computer automatically finds the new 6000 controller board.
The touch screen is connected but not calibrated. Follow the procedures below to
carry out calibration.
1. After installation, click the PenMount Monitor icon “PM” in the menu bar.
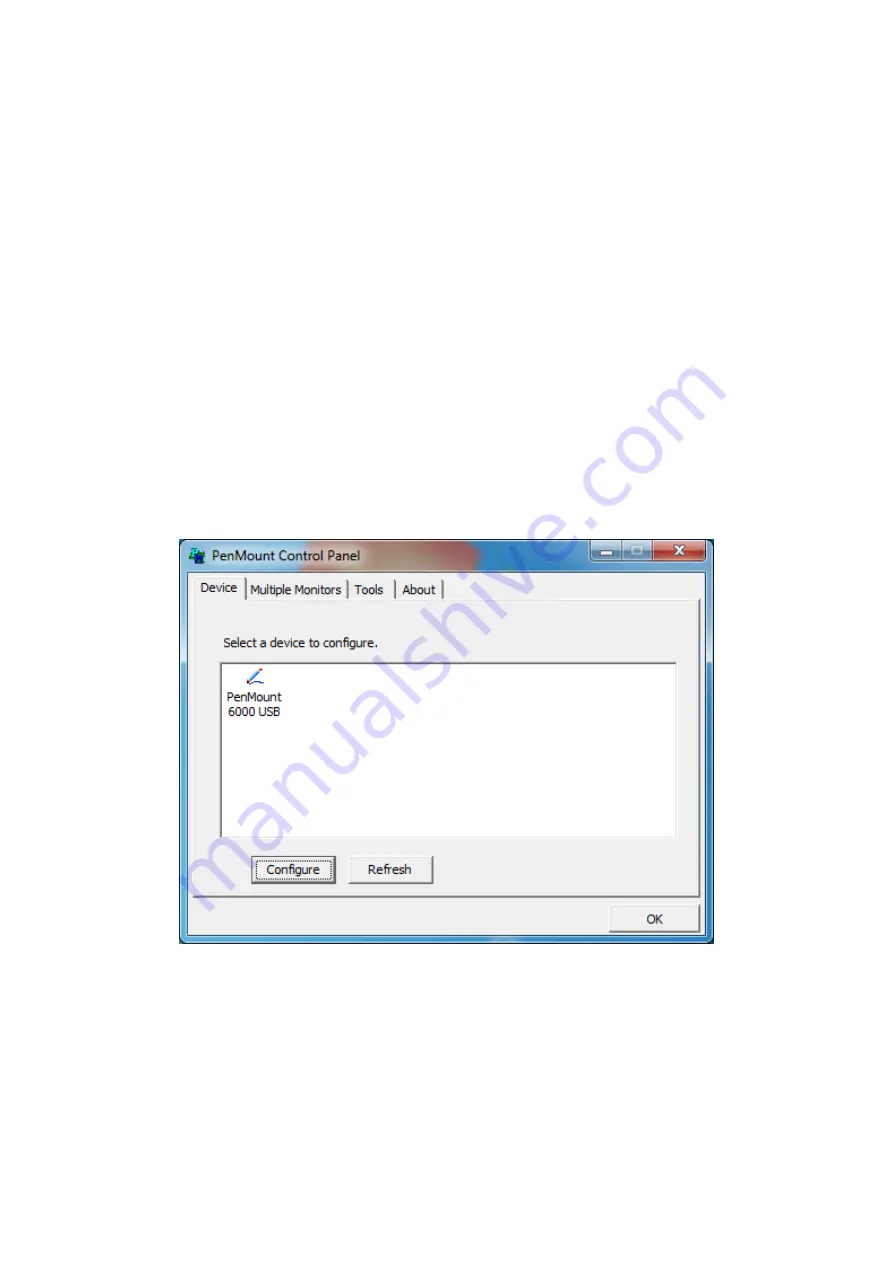
2. When the PenMount Control Panel appears, select a device to “Calibrate.”
PenMount Control Panel(Resistive Touch)
The functions of the PenMount Control Panel are
Device, Multiple Monitors
,
Tools
and
About
, which are explained in the following sections.
Device
In this window, you can find out that how many devices be detected on your system.
Calibrate
This function offers two ways to calibrate your touch screen. ‘Standard Calibration’
adjusts most touch screens. ‘Advanced Calibration’ adjusts aging touch screens.
52
Содержание AP9120
Страница 10: ...1 3 Dimensions Figure 1 1 Dimensions of APA9070 Figure 1 2 Dimensions of APA9080 9 ...
Страница 11: ...Figure 1 3 Dimensions of APA9101 Figure 1 4 Dimensions of AP9120 10 ...
Страница 12: ...Figure 1 5 Dimensions of APA9150 Figure 1 6 Dimensions of APA9156 11 ...
Страница 13: ...Figure 1 7 Dimensions of APA9170 Figure 1 8 Dimensions of APA9185 12 ...
Страница 14: ...Figure 1 9 Dimensions of APA9190 Figure 1 10 Dimensions of APA9215 13 ...
Страница 15: ...Figure 1 11 Dimensions of APA9238 Figure 1 12 Dimensions of APA9320 14 ...
Страница 17: ...Figure 1 13 Front View of APA9070 Figure 1 14 Rear View of APA9070 16 ...
Страница 18: ...Figure 1 15 Front View of APA9080 Figure 1 16 Rear View of APA9080 17 ...
Страница 19: ...Figure 1 17 Front View of APA9101 Figure 1 18 Rear View of APA9101 18 ...
Страница 20: ...Figure 1 19 Front View of AP9120 Figure 1 20 Rear View of AP9120 19 ...
Страница 21: ...Figure 1 21 Front View of APA9150 Figure 1 22 Rear View of APA9150 20 ...
Страница 22: ...Figure 1 23 Front View of APA9156 Figure 1 24 Rear View of APA9156 21 ...
Страница 23: ...Figure 1 25 Front View of APA9170 Figure 1 26 Rear View of APA9170 22 ...
Страница 24: ...Figure 1 27 Front View of APA9185 Figure 1 28 Rear View of APA9185 23 ...
Страница 25: ...Figure 1 29 Front View of APA9190 Figure 1 30 Rear View of APA9190 24 ...
Страница 26: ...Figure 1 31 Front View of APA9215 Figure 1 32 Rear View of APA9215 25 ...
Страница 27: ...Figure 1 33 Front View of APA9238 Figure 1 34 Back View of APA9238 26 ...
Страница 28: ...Figure 1 35 Front View of APA9320 Figure 1 36 Back View of APA9320 27 ...
Страница 30: ...2 2 Board Dimensions Figure 2 1 Dimension of TB 6802 Top Figure 2 2 Dimension of TB 6802 Bottom 29 ...
Страница 44: ...Information part 43 ...
Страница 47: ...Step 4 Click Yes to continue Step 5 Click Finish to complete installation 46 ...
Страница 49: ...Step 3 Click Next to continue Step 4 Click Install RS232 interface driver 48 ...
Страница 50: ...Step 5 Select None Click Next Step 6 Click OK Step 7 Click Support Muti Monitor System Click Next 49 ...
Страница 51: ...Step 8 Go to C Program Files eGalaxTouch Click Next Step 9 Click Next 50 ...
Страница 58: ...Edge Compensation You can use Edge Compensation to calibrate more subtly 57 ...
Страница 69: ...Hardware Saturn Hardware Configuration 68 ...
Страница 70: ...About To display information about eGalaxTouch and its version 69 ...


