
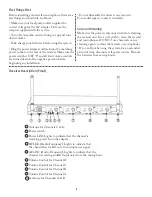

• Unpack the box. Screw the dual antennas into the
connectors on each side of the front panel of the
receiver unit. Point them both upward in a vertical
position.
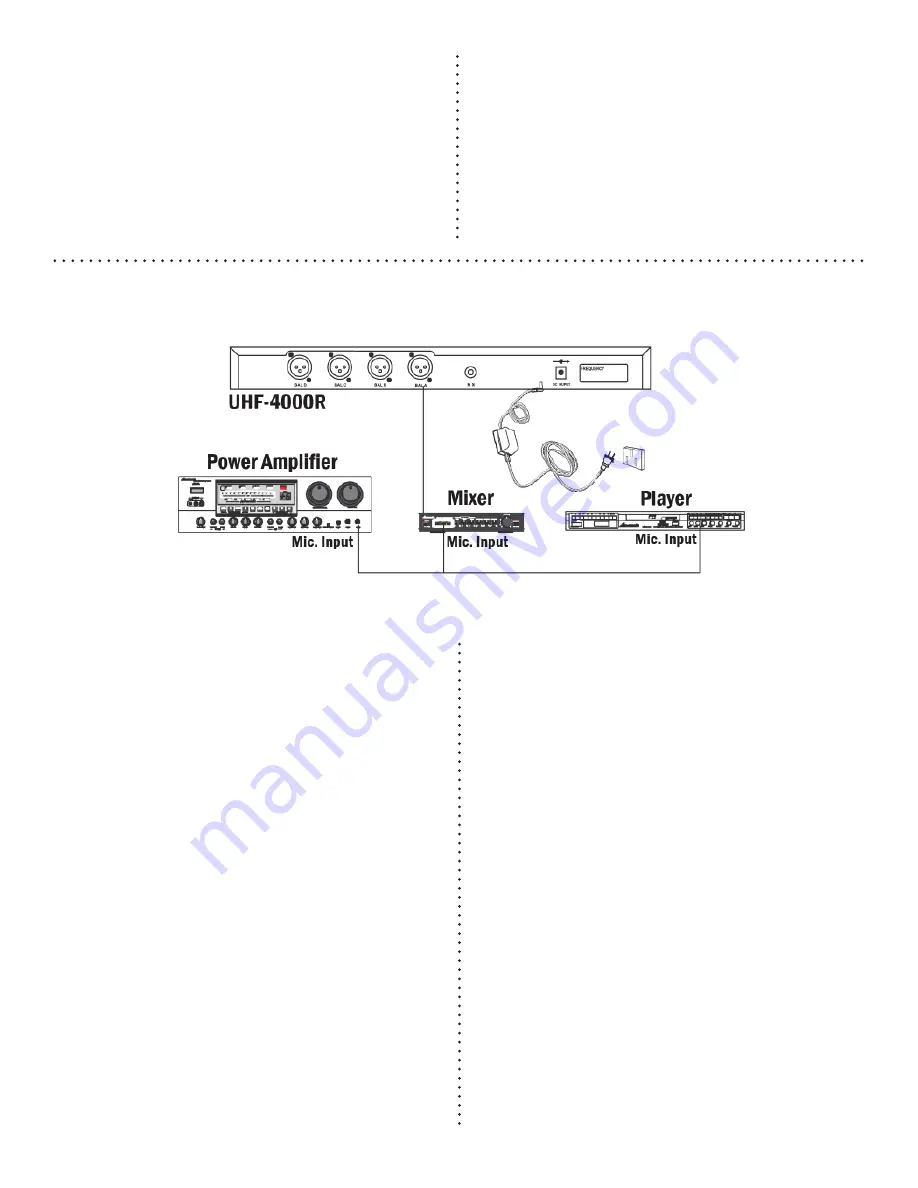
• Use the provided 1/4-inch cable to connect the
UHF-4000R receiver from the 1/4-inch Unbalanced
Audio Output to the “Mic In” on your amplifi er,
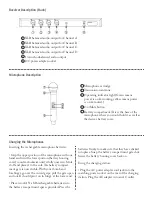
mixer or player. Alternatively on a multi-channel
mixer, use the four optional XLR output ports on the
back of the receiver. Use 1/4-inch XLR cables* to
connect the microphones. *Cables not included.
• Plug the power adapter into an AC outlet.
Press ON “1” on the power switch. All four channel
Power LEDs should light up RED. If any micro-
phones have been left on and are in range, their cor-
responding receiver RF LEDs will light yellow.
• Press the microphone’s ON/MUTE button for one
second. GREEN light indicates “ON”. YELLOW
light indicates “MUTE”. Test the microphone by
speaking into it. Th
e corresponding AF LED on the
receiver should pulse GREEN with your voice.
Press for one second again to turn off the microphone.
• Th
e UHF-4000R receiver has 4 separate volume
controls for each microphone. Check your system
set-up for Master Volume Control.
• It’s always a good idea to turn all volume controls
down after using any audio device. Th
is will help
prevent accidental damage to speakers, headphones
and/or your ears upon the next use.
• For best performance, hold the microphone hori-
zontally and speak or sing directly into it’s top.
To avoid distortion, keep a distance of two inches
between your mouth and the microphone.
• If so desired, mount the UHF-4000R receiver into
a console or rack by using the provided rack-mount
brackets. Make sure holes are aligned and screwed
with even tension.
Cable Connections & Operating the Microphone System
• Stand the microphones upright into the station’s
dual base charging station. Each status LED on the
charging station will light up RED to indicate a good
connection and that the batteries are charging. Al-
low the batteries to charge fully before removing the
microphones from the charging station.
• When system is not in use, unplug the receiver from
the wall socket and remove the power adapter from
the rear panel.
• If a microphone won’t be used for an extended
period of time or putting it in storage, remove the
batteries to prevent corrosion.
4


