4 Upgrading your computer
64
2.
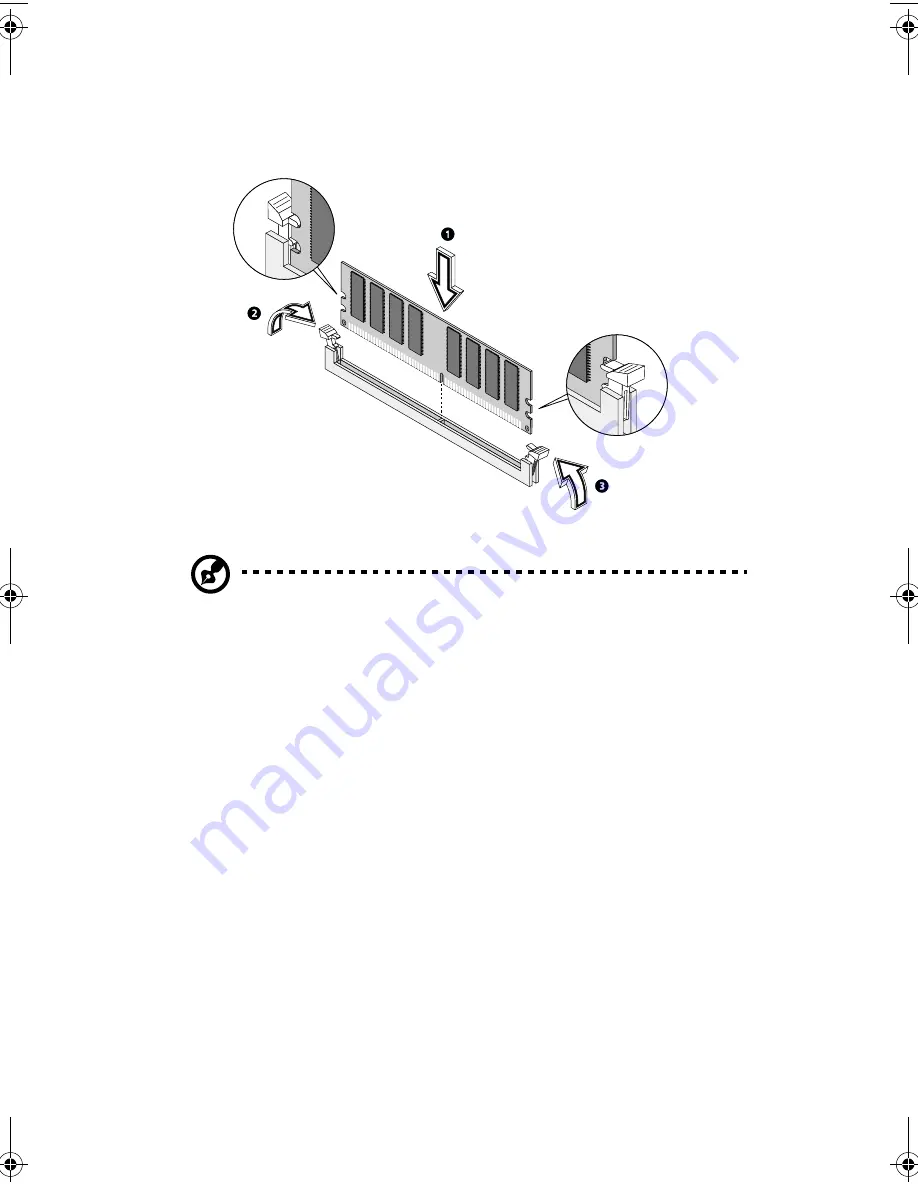
Align the DDR DIMM with the socket (1). Press the DDR DIMM into
the socket until the clips lock onto the DDR DIMM (2,3).
Note:
The DDR DIMM sockets are slotted to ensure proper
installation. If you insert a DDR DIMM but it does not fit easily
into the socket, you may have inserted it incorrectly. Turn the DDR
DIMM and try to insert it again.
Reconfiguring your computer
Your computer automatically detects the amount of memory installed.
Run the BIOS (Basic Input/Output System) Setup utility to view the new
value for total system memory and make a note of it. For more
information on BIOS Setup utility, refer to the AcerPower Sd online
guide (see “Accessing the online guide” on page 6).
Replacing the hard disk
Follow these steps to replace your computer’s hard disk:
1.
Remove the side panel (see page 53).
2.
Locate the hard disk frame.
APSd-ug-en.book Page 64 Thursday, February 7, 2002 4:12 PM
Содержание Power Sd
Страница 1: ...AcerPower Sd User s guide...
Страница 8: ...viii...
Страница 11: ...xi Recovering your system 80 6 Q A 81 Index 87...
Страница 12: ...xii...
Страница 13: ...1 First things first...
Страница 19: ...2 System tour...
Страница 20: ...This chapter discusses the features and components of your computer...
Страница 37: ...3 Setting up your computer...
Страница 42: ...3 Setting up your computer 30 Connecting the PS 2 mouse...
Страница 44: ...3 Setting up your computer 32 Connecting the PS 2 keyboard...
Страница 61: ...4 Upgrading your computer...
Страница 68: ...4 Upgrading your computer 56 2 Secure the side panel with two screws...
Страница 85: ...5 Software...
Страница 86: ...This chapter describes the applications that came with your computer...
Страница 93: ...6 Q A...
Страница 98: ...6 Q A 86...


