


5 Configuring IDE Software RAID
106
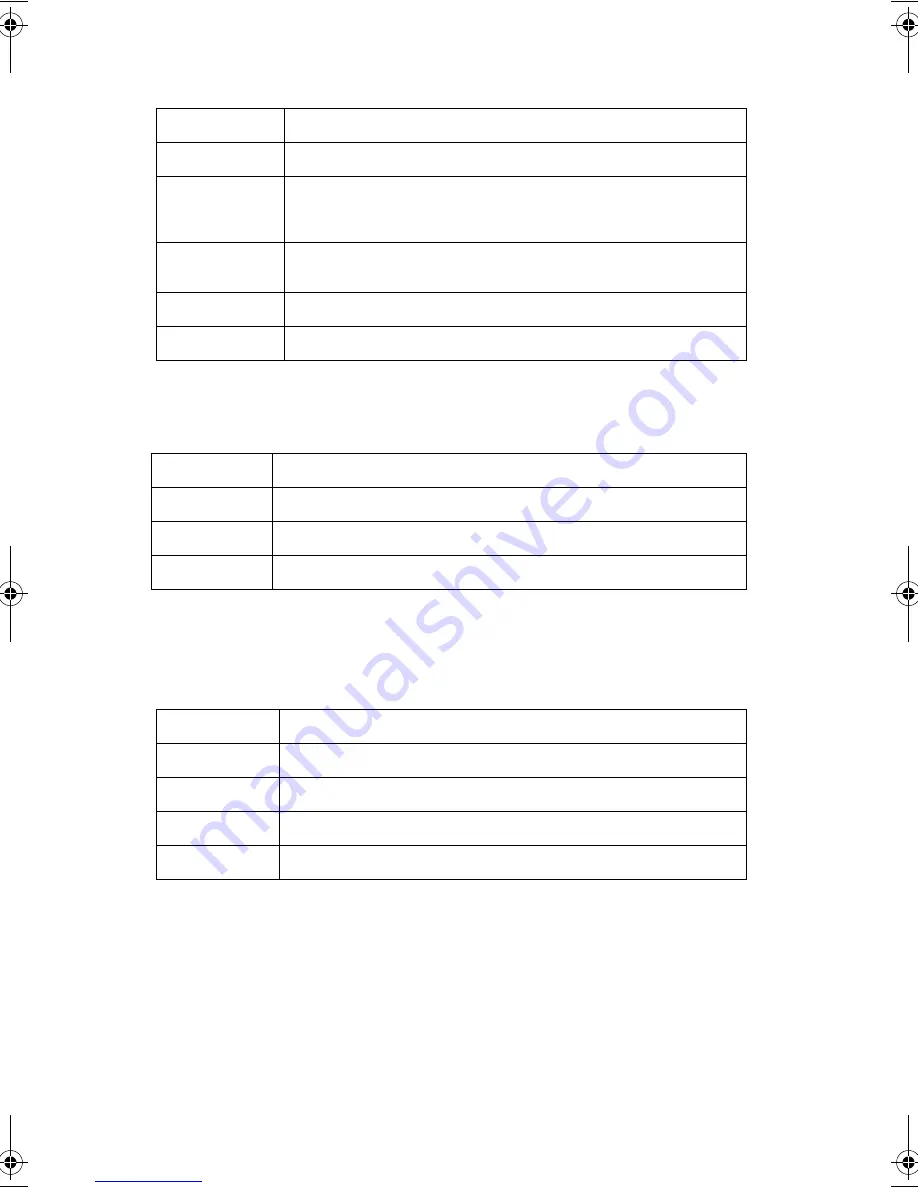
Physical Drive Error Status
- This screen displays the physical drive
error status. This table provides a description of each field.
Physical Drive Errors
- Error codes for the physical drives display
when you select the error log view. The following table provides a list
and descriptions of the error codes.
Array
To display the Array Properties, perform a Check Consistency, or rebuild
the array, click the icon in the lower middle frame next to Array.
After you click the icon, the Array ID displays in the right frame. The
links to the Array Properties, Check Consistency, and Rebuild display as
Capacity
Specifies the capacity of this physical drive.
Transfer Mode
Specifies the type of transfer mode used on this physical drive.
Part of Array
Specifies the part of the array wo which this physical drive belongs.
The RAID mode for a striped array (RAID 0) is called performance,
and for a mirrored array (RAID 1) is called reliability.
Connection
Specifies the type of IDE connection that is used to connect this drive
to the RAID controller. (primary or secondary, master or slave)
Model
Specifies the model number of the physical drive.
Serial Number
Specifies the serial number of the physical drive.
Field
Description
Time and Date
Specifies the time and date the error was logged.
Error
Specifies the error type.
Sector
Specifies the sector that contains the error.
Code
Description
Error 01
Media read error. The disk surface is damaged.
Error 02
Media write error. The disk surface is damaged.
Error 03
Media verify error.
Error 04
Missing drive type.
aa300.book Page 106 Tuesday, December 17, 2002 5:27 PM
Содержание G301
Страница 1: ...Acer Altos G300 Series User s guide ...
Страница 8: ...viii ...
Страница 13: ...1 Getting started ...
Страница 21: ...9 Connecting the mouse ...
Страница 22: ...1 Getting started 10 Connecting the VGA monitor Connecting to the network ...
Страница 23: ...11 Connecting the power cable ...
Страница 29: ...2 System tour ...
Страница 30: ...This chapter discusses the features and components of your computer ...
Страница 38: ...2 System tour 26 Control Panel JP3 Jumper Setting J13 Function Default setting PIN 1 2 Clear password ON ...
Страница 40: ...2 System tour 28 ...
Страница 41: ...3 Upgrading your system ...
Страница 42: ...This chapter contains instructions on how to upgrade your computer ...
Страница 47: ...35 5 Detach the side panel 6 Repeat steps 4 to 5 to remove the other side panel ...
Страница 59: ...4 Setup utility ...
Страница 90: ...4 Setup utility 78 ...
Страница 91: ...5 Configuring IDE Software RAID ...
Страница 107: ...95 This screen displays the progress of the installation Click Finish to complete the installation ...
Страница 129: ...117 ...
Страница 130: ...5 Configuring IDE Software RAID 118 ...
Страница 131: ...Appendix A AMIBIOS POST Checkpoint Codes ...
Страница 132: ......
Страница 145: ...Appendix B ASM quick installation guide ...
Страница 146: ...This appendix shows you how to install the ASM software package ...
Страница 149: ...Appendix C Rack installation guide ...


