3 System upgrades
52
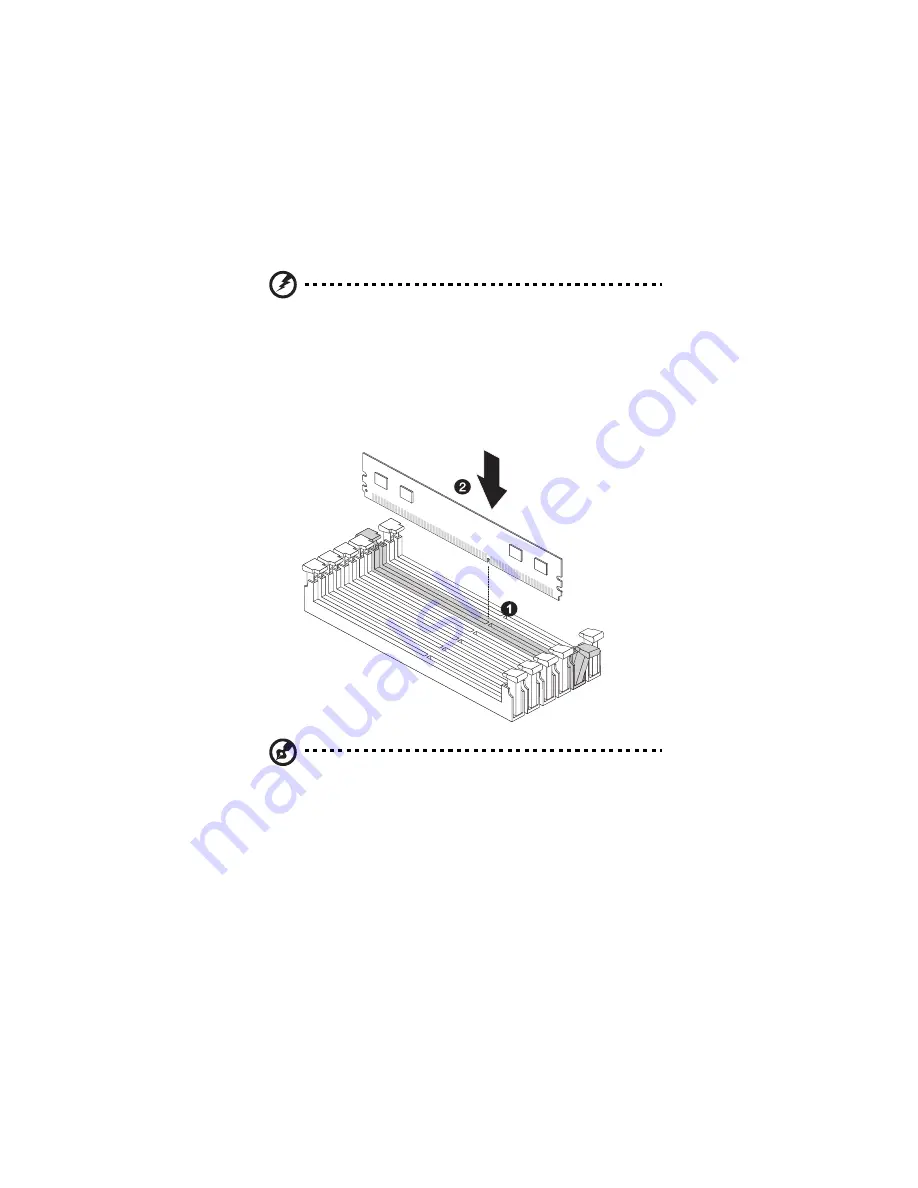
Installing a memory module
Warning! Memory of the identical size, speed and organization
must be installed in the same colored DIMM slots.
1
Locate the DIMM slot on the mainboard.
2
Install the memory module.
a
Align then insert the DIMM into the socket.
b
Push the DIMM to the socket until the retaining clips snap
inward.
Note: The DIMM slot is slotted to ensure proper installation. If you
insert a DIMM but it does not fit easily into the socket, you may
have inserted it incorrectly. Reverse the orientation of the DIMM
and insert it again.
3
Observe the post-installation instructions described on page 25.
4
Reconfigure the system memory. See “To reconfigure the system
memory” on page 53 for more information.
Содержание AW2000h-AW170h
Страница 1: ...AW2000h Series User Guide AW170h F1 AW170hd F1 AW170hq F1 ...
Страница 16: ...xvi ...
Страница 17: ...1 System tour ...
Страница 25: ...9 The mainboard becomes accessible once you open the system It should look like the figure shown below ...
Страница 30: ...1 System tour 14 ...
Страница 31: ...2 System setup ...
Страница 38: ...2 System setup 22 ...
Страница 39: ...3 System upgrades ...
Страница 51: ...35 4 Insert the add on card 3 into the PCI slot 5 Secure the add on card with the locking tab 4 ...
Страница 70: ...3 System upgrades 54 ...
Страница 71: ...4 System BIOS ...
Страница 99: ...5 System troubleshooting ...
Страница 109: ...Appendix A Server management tools ...
Страница 114: ...Appendix A Server management tools 98 ...
Страница 115: ...Appendix B Rack mount configuration ...
Страница 126: ...Appendix B Rack mount configuration 110 ...
Страница 127: ...Appendix C Acer Smart Console ...
Страница 155: ...139 Exit Yes At the prompt click Yes to exit from remote redirection No Click No to return to the current session ...
Страница 156: ...Appendix C Acer Smart Console 140 ...
Страница 160: ...150 ...


