An Introduction to Your Aspire
17
16
Using Your CD-ROM/DVD-ROM Drive
Unlike floppy disks, CD-ROM/DVD-ROM discs can be used
only for putting data into your computer. Your Acer computer
can use two types of CD-ROM discs: audio discs or data discs.
Data CDs can hold a lot of information and very large pro-
grams. One CD can hold more information than is contained
on 450 floppy diskettes.
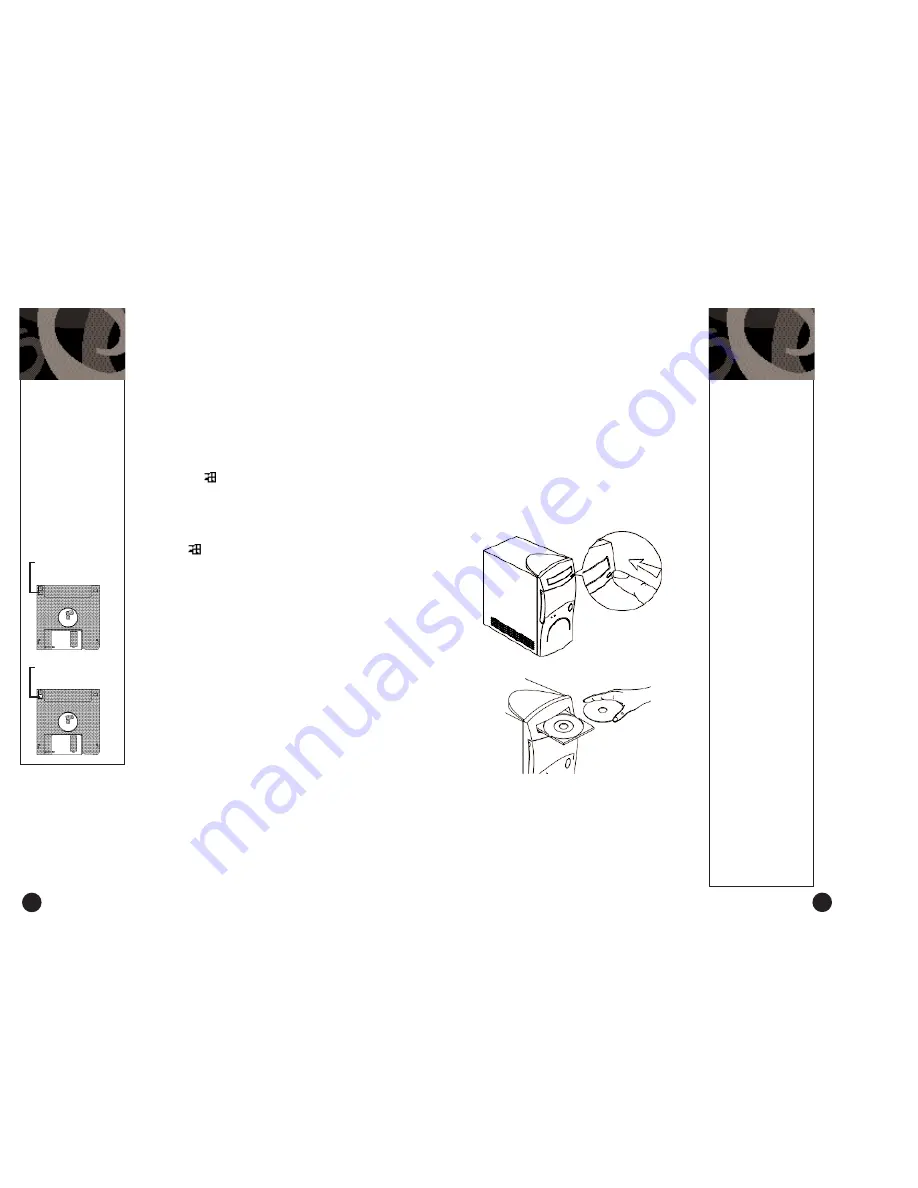
Press the eject button to manually open or close the CD tray.
To insert a CD or a DVD, place it in the tray with the title side
facing up, then press the CD eject button to close it.
Note:
It may take up to 30 seconds for a disc to stop spinning before
the drive opens up. If you try to run the software when you first insert
the CD (or DVD) and you get an error message like Drive Not Ready,
wait a few seconds, then try again.
A CD/DVD has two sides:
• The title side tells you
which CD/DVD it is.
• The data side stores all the
data.
CDs and DVDs are fragile,
so when handling your CDs
or DVDs, hold them by the
edges to avoid leaving
smudges or fingerprints.
Always keep them in a disc
case when not in use to
avoid scratches or other
damage.
Any kind of dirt or
damage can affect the data
on the disc, impair the disc
lens reader on the CD-ROM
and DVD-ROM drives, or
stop the computer from suc-
cessfully reading the disc.
To clean your CDs and
DVDs, use a clean, dust-
free cloth and wipe in a
straight line from the cen-
ter to the edge. Continue
around the whole disc.
(DO NOT wipe in a circle.)
You can also periodically
clean your CD-ROM/DVD-
ROM drive to prevent
problems from reading
CDs/DVDs on your com-
puter. For more informa-
tion, refer to the Cleaning
Kit that came with your
system.
Caring for
your CDs and
DVDs
Note:
Your CD-ROM/DVD-ROM drive will probably emit a sound
like that of a fan. Unless you are having other problems with your
drive, you should not be concerned.
Formatting a Floppy Diskette
A floppy disk is, basically, just a thin piece of magnetic tape on
which data can be stored electronically. Most floppy disks are
protected with a hard plastic case.
Before a floppy can be used, it must be formatted, or made
ready to accept data.
Note:
Many stores sell pre-formatted 3.5” floppy disks.
1 •
Make sure your floppy is not write-protected. (See sidebar
for instructions).
2 •
Insert the diskette into your floppy drive.
3 •
Click on the
Start
button, point to Programs, and click
on Windows Explorer.
4 •
Point to 3.5” Floppy (A:) under My Computer.
5 •
Click on the right mouse button, then select Format.
6 •
Click on
Start
.
Cautions:
•
Formatting a disk removes any data that might have been
saved on that disk.
•
Be sure to keep your disks away from heat and other magnet-
ic items that can damage the disk and the information on it.
When the write protect
notch is open, data cannot
be written to (saved on)
the disk. The notch must
be closed for data to be
written to (copied on) the
disk.
Write protecting diskettes
is a good way to keep
them safe from viruses,
should you use them in a
different computer.
Write-Protect Tab
(can be saved on)
Write-Protect Tab
(cannot be saved on)
Write Protecting
a Floppy Diskette
Содержание Aspire 6200
Страница 29: ...50 P N 49 31C03 001 Barcode goes here ...


