


Page 22
Page 21
Initial Setup Menu Programming for All Aircraft
Initial Setup Menu Programming for All Aircraft
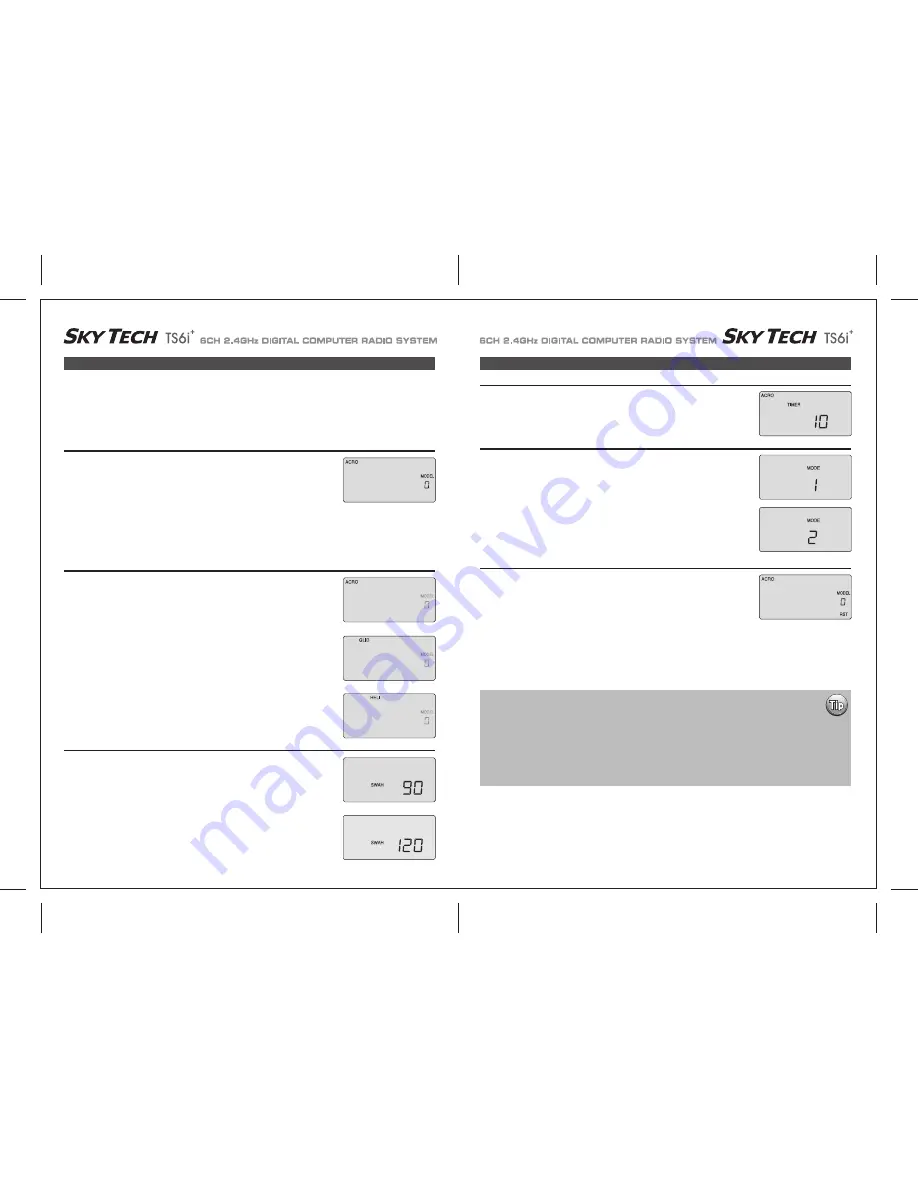
Now you are at the TIMER menu item with a number blinking away at you-its 10 (minutes) by
default. If you want to set a timer value, go to page 19 for more information on using the timer
function. Otherwise, move down to the next menu item.
Before you turn on the transmitter to begin programming one of the model slots for your aircraft, refer to the servo connection chart on page
13, to see how to plug the servos into their proper channel sockets in the receiver.
Don't turn on the receiver in your model just yet - we'll tell you when to do so.
First we'll get started setting up the aircraft in the Initial Setup program menu, then we'll continue into the Main Function menu to configure the
servo responses and travels of your particular model.
4. Configure the countdown timer:
Hold down both EDIT buttons and slide the on-off switch to "on".
The transmitter will beep, the red light will come on, and on the LCD screen you will find yourself
in the first menu item of the initial setup menu.
Under the word "MODEL" the number will be blinking on and off to get your attention.
If this is the first model you are setting up in this transmitter, go ahead and accept this numbered
slot by pushing the right-hand EDIT button to scroll down to the next menu item.
When there are already models inputted, the number that comes up when you turn on the
transmitter will be the last activated model slot.
To change to a different slot, push on one of the CURSOR buttons to go to an empty slot
(consult your list!) and then scroll to the next screen to automatically select it.
1. Select a model slot:
In the second menu screen, the programming baseline of ACRO, GLID, or HELI will be blinking.
Since we are setting up a powered aircraft, select ACRO by scrolling to it with a CURSOR
button. Push down both DATA buttons simultaneously to tell the program to accept the
choice-you should hear the transmitter beep twice in acknowledgement.
Now push the right-hand EDIT button to move to the next menu screen.
2. Select the Model type programming baseline:
If you selected HELI as your model type, this screen will appear allowing you to select between
NORMAL (90 degree mechanical) or 120 degree swash plate heli's by pressing one of the
CURSOR buttons.
Find out which one of these popular swash formats your helicopter uses and select it here. After
selecting the appropriate swash type, continue down to the next menu item.
3. Heli Swash Plate:
Under the word "MODE", the number "2" is blinking by default.
Go ahead and accept mode 2 by pushing the right-hand EDIT button to continue to the next
screen.Of course, if you are used to the mode 1 configuration (elevator on the left stick, throttle on
the right), then select number 1. Other changes to accommodate Mode 1 flyers must be done to
the transmitter.
Please refer to page 26 for more information.
5. Select the control's Mode configuration:
In this screen you should now see a tiny "RST" blinking in the lower right hand corner This means
RESET-and if you push both DATA buttons at the same time that's exactly what will happen: You
will hear a "double beep" and undo all the initial programming we just did, returning all the
programming to the factory's default settings!
Now push the Right EDIT button to scroll right back where we started when we first turned on the
transmitter. We are now done with the initial setup programming of your aircraft, so switch off the
transmitter.
When you switch it on again without holding down both EDIT buttons the transmitter will open up in
the current model slot (the one we just programmed) with all the initial settings we just
programmed in effect.
6. Reset Screen:
At this point you have selected the type of model ACRO, GLID or HELI, you wish to set-up.
In the manual text that follows, we will review and explain the Model Setup Menu of the three
different model types.
The first is ACRO, followed by GLID, then HELI. All ACRO features will be described in detail within
the ACRO section.
Within the following GLID and HELI sections, only features exclusive to GLID and HELI programming
will be described in detail.
For those GLID and HELI features common to ACRO, we will refer you to their description within
the ACRO section.


