background image

1

Opening your life

8

608

Owl

Original state

Press “*” 
then press
“#”

Voice broadcast: please 
enter administrator 
inmormation (enter 
123456 #)

After operation successfu-
lly, voice broadcast: press 
1 for administrator 
setting, press 2 for user 
setting, press 3 for system 
setting, press 4 for restore 
factory setting.

4) Administrator settings

a) Add administrator (step 2)

Lock funtion management (step 
one)

Voice broadcast:
press 1 for adminis-
trator setting, press 2 
for user setting.

Press 1 to add administra-
tor, input fingerprint or 
password (you should 
input fingerprint four 
times, input password 4 -8 
digit 2 times (eg. 8888#) , 
IC card one time)

After input successful, 
press * to return to the 
previous level to continue 
adding an administrator 
or delete administrator

Lock function management 
(step one)

b) Delete administrator information

Voice broadcast:
press 1 for adminis-
trator setting, press 2 
for user setting.

Press 2 voice broadcast: 
please input number, 
press # to confirm (for 
example 002#)

After input successful, 
press *to retunr to the 
previous level to conti-
nue adding an adminis-
trator or delete adminis-
trator

Содержание OwlGo8

Страница 1: ...ente antes de la instalación el uso del producto La instalación de su nueva puerta debe ser realizada por una persona técnicamente calificada o licenciada Tratar de instalar o reparar el motor sin tener la calificación técnica puede resultar en severas lesiones personales muerte y o daños a la propiedad Owl608 ...

Страница 2: ...te la manija derecha y la manija izquierda Ajuste la dirección de la caja Accesorios para tipos de espesores de puertas Precaución antes de instalación Instalación Puntos a chequear antes de la instalación Otras notas Parametros técnicos CONTENIDO 1 2 2 3 3 5 5 7 13 14 ...

Страница 3: ...ación del cuerpo del bloqueo antirrobo 1 Accesorios 1 2 3 4 5 6 7 8 9 10 Cerradura frontal Pilar conector 40 60mm Cilindro de fijación Caja Tapa de la batería Cerradura trasera Placa inferior trasera Tornillo M5 Eje Tornillo M5 x 12mm Imagen Item Nombre ...

Страница 4: ...recha fije el tornillo después del mango en la dirección correcta Nota No retire el tornillo dentro del soporte de la manija de lo contrario no habrá garantía Derecha hacia dentro Dentro Dentro Dentro Dentro Fuera Fuera Fuera Fuera Derecha hacia fuera Izquierda hacia dentro Izquierda hacia fuera 11 12 13 14 15 Caja de impacto solo puerta de madera Placa de impacto Tornillo 4 2x25mm Puerta de mader...

Страница 5: ...ione los accesorios correctos de acuerdo con el grosor de su puerta Panel frontal Panel trasero Girar a 180 Girar a 180 El vértice superior del debe coincidir con el de la placa inferior Suelte el tornillo y fijelo después de cambiar la dirección Suelte el tornillo y fijelo después de cambiar la dirección Derecha Izquierda Picaporte Placa de cambio picaporte No permita desmontar la placa frontal P...

Страница 6: ...je Corte el eje de acuerdo al espesor de su puerta Tornillo 4 2 x 25mm Puerta madera unicamente Tornillo M5 x 8mm Puerta acero unicamen te Tornillo M5 Corte el tornillo de acuerdo al espesor de la puerta Cilindro de fijación Corte el cilindro de fijación de acuerdo al espesor de su puerta Pilar de conección 40 60mm 10 8 2 2 2 2 8 8 8 10 10 10 ...

Страница 7: ... 7 instalación Pasos de instalación 1 Como en la figura 1 Retire la tapa de la batería de la cara posterior de la cerra dura 2 Como en la figura 2 Haga que el cable de la caja pase a través de la placa de la puerta fije la caja con 4 torni llos 3 Como en la figura 3 Instale los 2 pilares de conección con los 2 cilidrosdefijaciónenel panel frontal Cara trasera cerradura Tapa batería Panel posterior...

Страница 8: ...gura 5 Conecte el cable del panel frontal con el conector en el panel posterior Fije el panel trasero a la placa inferior trasera con 4 tornillos Nota asegúrese de que la perilla esté vertical 6 Como en la figura 6 Coloque las baterías correctamente y fije la tapa de las baterías figura 7 1 Fije la caja de impacto de la cerradu ra en el marco de la puerta y luego fije la placa de la cerradura con ...

Страница 9: ...s y claves funcionales a Información del administrador consulte la huella digital la contraseña o la tarjeta IC del administrador Información de desbloqueo consulte la huella digital de entrada la contraseña el control remoto o la información de la tarjeta IC incluidos el administrador y los usuarios normales b Tecla tecla borrar tecla atrás Ingrese la contraseña o el punto borrando la entrada ant...

Страница 10: ...rio Presione 1 para añadir administrador introduzca la huella digital o contra seña 4 veces ingrese la contraseña de 4 a 8 digitos 2 veces ejempo 8888 tARJETA IC una vez Despues de ingresar con exito presione para retornal al nivel anterior para continuar añadien do administrando o borrando un administra dor Gestión de la función de bloqueo Paso 1 b Borrar información de administrador Transmisor d...

Страница 11: ...2 veces Ejemplo 6666 o la tarjeta IC Presione 2 transmision de voz Presio ne 1 para añadir usuario presione 2 para borrar usuario b Borrar información del usuario Gestión de la función de bloqueo Paso 1 Presione 2 transmisión de voz Presione 1 para borrar numero presione 2 para borrar todo Pr ejemplo presione 1 y luego ingrese el numero 010 Usted borrara el usuario 010 Transmisión de voz presione ...

Страница 12: ...isión de voz presione 1 para ajustes de voz presione 2 para modo desbloqueo 3paraseleccióndelenguajey4para ajuste de hora b Configuración del modo de desbloqueo Gestión de la función de bloqueo Paso 1 Transmisión de voz Presione 1 para ajustes de administrador presione 2 para ajustes de asuario Presione 2 transmisión de voz Presione 1 para modo simple presione 2 para modo combina do presione 3 par...

Страница 13: ...esbloqueo 3 para selección de lenguaje y 4 para ajustes de hora 4 Configuración de hora Gestión de la función de bloqueo Paso 1 Presione 4 transmisión de voz Fecha actual 1908080808 luego presione transmisión de voz por favor ingrese la fecha actual Por favor modifi quela basado en este formato año mes dia hora y minuto por ejemplo 1903041153 y luego presione para confir mar Presiona 3 transmisión...

Страница 14: ...ón 3 Haga clic en Seguridad y sensor busque Bloquear Wi Fi haga clic y agre gue un dispositivo siguiendo las instrucciones antes de usarlo 4 Desbloqueo remoto active la pantalla y presione 9 Habrá un mensaje de voz solicitando desbloqueo remoto Agregar una red 1 Presione para autenticar la identidad del administrador y luego presione 1 para acceder a la configuración del administrador Luego habrá ...

Страница 15: ... agregar algunos códigos extraños antes y después de la contraseña y luego presione para confirmar La contraseña debe estar incluida en el conte nido de entrada 3 Si no se realiza ninguna operación durante más de 10 segundos el sistema se cerrará automáticamente 4 Después de que el voltaje sea inferior a 4 6 V la cerradura emitirá una alarma automáticamente cada vez que se abra Después de la alarm...

Страница 16: ...de huella Tasa de falso rechazo Tasa de reconocimiento falso Tiempo de reacción Tipo de potencia Potencia de emergencia Temperatura de trabajo Humedad relativa de trabajo Voz humana Teclado Longitud de la contraseña Contraseña fantasma Alarma de bajo voltaje Tiempo de desbloqueo Item Parameters 50uA 180mA 9 100 300 Semiconductor O 6 Second 360 0 1 0 0001 0 1 Segundos 6V 5VDC 25C 60C 20 90 RH Si Es...

Страница 17: ...do con el mensaje para obtener el código de verificación por SMS configure la contraseña Si tiene una cuenta existente haga clic en iniciar sesión con una cuenta existente para iniciar sesión en la aplicación Contraseña código de verificación 2 Crear Hogares Creesuhogardespuésderegistrarse e iniciar sesión correctamente Cada cuenta puede crear y agregar varias casas y los dispositivos se pueden ag...

Страница 18: ... la página en la figura 2 Cuando el dispositivo ingrese al modo conectado continúe operando de acuerdo con las instrucciones y los consejos de la APLICACIÓN 4 Página de inicio La página de inicio incluye desblo queo remoto mensaje de alarma y administración de miembros regis tro contraseña temporal y otras funciones Desbloqueo remoto inicie una solicitud desde la cerradura de la puerta y la aplica...

Страница 19: ...aga clic para obtener la contraseña dinámica mientras copia el texto de la contraseña 6 Centro de mensajes El centro de mensajes contiene infor mación de alarma información de llamada de timbre e información de alarma de secuestro que se puede consultar ...

Страница 20: ...dor de la aplicación puede hacer eso Inventario de registro 24 horas al día 7 días a la semana organizado en orden cronológico inverso La ID desbloquea da con el nombre de usuario asociado mostrará directamente el nombre de usuario mientras que la ID desbloquea da sin el nombre asociado mostrará la ID de desbloqueo específica 8 Inventario de registros ...

Страница 21: ...aplicación se requiere el hardware de bloqueo para sincronizar con el servi dor b En el momento de la creación puedeelegirsideseaenviarSMSono Se admiten SMS en todo el mundo 10 Alarma de secuestro Cuando se abre la marca anti secues tro en la imagen de la izquierda si ocurre la acción de desbloqueo del ID de desbloqueo el registro informará y la aplicación activará la alarma anti secuestro ...

Страница 22: ...clic en el icono en la esquina superior derecha de la interfaz princi pal Busque el restablecimiento de datos de fábrica y haga clic El restablecimiento de datos de fábrica también se puede operar en la cerradura Consulte el manual de instrucciones para obtener más deta lles ...

Страница 23: ...ly before installation using the product The installation of your new door must be carried out by a technically qualified or licensed person Attempting to install or repair the motor without technical qualification can result in severe personal injury death and or proper ty damage Owl608 ...

Страница 24: ...ection Adjust right handle and left hande Adjust the mortise direction Accessories for sorts of door thickness Caution before installation lnstallation Check points after installation Other notes Technical Parameters CONTENT 1 2 2 3 3 5 5 7 13 14 ...

Страница 25: ...1 Opening your life 608 Owl lnstallation instruction of anti theft lock body 1 Accessory 1 2 3 4 5 6 7 8 9 10 Item Name Figure ...

Страница 26: ... right handle and left hande Release the screw with a screw driver and turn 180 degree according to your needs to adjust the left and right fix the screw after handle on the correct direc tion NOTE Do not remove the screw inside the handle hold otherwise there is no warranty 11 12 13 14 15 Item Name Figure ...

Страница 27: ...g ID lhe your nBBd ID adjull lhe mortiae direction 5 Accessories for sorts of door thickness Available door thickness 40mm 120mm If the door is over this range please contact us for more information Please select the correct accessories according to your door thickness ...

Страница 28: ...s ranges QTY Spindle Cut the spindle according to the door thickness Screw 4 2 x 25 mm wood door only Screw M5 X 8 mm steel door only Screw M5 cut the crew according to the door thickness Fixing cylinder Cut the fixing cylinder according to the door thickness Connecting pillar 40 60 mm 10 8 2 2 2 2 8 8 8 10 10 10 ...

Страница 29: ...yes when drilling holes 4 Drilling the door holes on both side of thedooravoidingtodamagingthedoor plate 7 lnstallation Installation steps 1 As figure 1 Divide the back lock into battery cover and back panel 2 As figure 2 Make the mortise cable get through the door plate fix the mortise with 4 screws 3 As figure 3 Install the two connec ting pillars with two fixing cylinders into front panel ...

Страница 30: ...ottom plate The two on the bottom plate must toward to the central of the spindle As Figure 5 1 Connect the front panel cable with the connect on the back panel 2 Fix the back panel on to the back bottom plate with 4 screws Note make sure the knob is vertical As Figure 6 1 Put the batteries correctly and fix the battery cover Figure 7 1 Fix the strike box on the door frame and then fix the strike ...

Страница 31: ...al 1 Function and Operation Description of terms and functional keys a Adminstrator information refer to the Administrator s fingerprint password or IC card Unlock information refer to the input fingerprint password Remote control or IC card information including Administrator and ordinary users b Key clear key back key Enter the password or point by clearing the previous input Press the clear key...

Страница 32: ...2 for user setting Press 1 to add administra tor input fingerprint or password you should input fingerprint four times inputpassword4 8 digit 2 times eg 8888 IC card one time After input successful press to return to the previous level to continue adding an administrator or delete administrator Lock function management step one b Delete administrator information Voice broadcast press 1 for adminis...

Страница 33: ...ut fingerprint 3 times imput password 4 8 digit 2 times eg 6666 or IC Card Press 2 voice broadcast press 1 to add user press 2 to delete user 2 Delete user information Lock function managment step one Press 2 voice broadcast press 1 for number delete press 2 to delete all for example press 1 and then input number 010 you will delete user 010 Voice broadcast press 1 for adminis trator setting press...

Страница 34: ...se press 1 for voice setting 2 for unlock mode 3 for lenguage setting 4 for time setting b Unlock mode setting Lock function managment step one Voice broadcast press 1 for adminis trator setting press 2 for user setting Press 2 voice broadcast press 1 for single mode press 2 for combination mode press 3 to enable passage mode press 4 to cancel passage mode you can choose one choice and then it wou...

Страница 35: ... 1 for voice setting 2 for unlock mode 3 for language selection 4 for time setting 4 Time setting Lock function managment step one Press 4 voice broadcast current time 1908080808 then press voice broadcast please enter current time Please modify based on the format year month day hour minute for example 1903041153 and then press to confirmed Press 3 voice broadcast please press1forvoicesetting 2fo...

Страница 36: ...ons before use 4 Remoteunlocking wakeupthescreenandpress 9 Therewillbeavoice prompt requesting remote unlocking Add one network 1 Press to authenticate administrator identity and then press 1 to access administrator settings Then there will be a voice prompt of pressing 3 for network configuration 2 Voice prompt in network configuration mode press 1 for hotspot connec tion and 2 for intelligent co...

Страница 37: ...assword and then press to confirm The password must be included in the input contents 3 If there is no operation more than 10 seconds system will automatically exit 4 After the voltage is lower than 4 6v the lock will automatically alarm every time when it is opened After the alarm the lock can be opened for about 200 times 5 Remove the battery cover press the Set key for 6 seconds the lock was re...

Страница 38: ... Rejection Rate False Recognition Rate Reaction time Power type Emergency power Working temperature Working Relative Humidity Human voice Human voice Keyboard Password Length Phantom password Low voltage alarm Unlock time 10 Technical Parameters Parameters 50uA 180mA 9 100 300 Semiconductor O 6 Second 360 0 1 0 0001 0 1 Second 6V 5VDC 25C 60C 20 90 RH Yes Touch standard 12 bit keyboard 4 8 digits ...

Страница 39: ...btain SMS verification code setthe password lf you have an existing account click loginwithanexistingaccount tolog in to the APP Password verification code and social account login are supported 2 Create Homes Create your home after registering and logging in successfully Each account can create and add multiple homes and devices can be grouped by room in the home Weather and other functions depen...

Страница 40: ...r part and enter the page in figure 2 When the device enters the connec ted mode continue to operate accor ding to the instructions and APP tips 4 Home Page Home page includes remote unlock alarm message member management record temporary password and other functions Remote Unlock initiate a request from the door lock and the app can respond to allow I refusal door opening ...

Страница 41: ... Dynamic password Click to gel the dynamic password Meanwhile copy the password text for you 6 Message cantar Message center contains alarm infor mation doorbell call information and hijacking alarm information which can be inquired ...

Страница 42: ...gement Only the administrator user of app is allowed to do that 24 7 Record Log arranged in reverse chronological arder The unlocked ID with the associated user name will directly display the user name while the unlocked ID without the associated name will display the specific unlock ID 8 Record Log ...

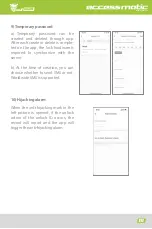
Страница 43: ...he app the lock hardware is required to synchronize with the server b At the time of creation you can choose whether to send SMS or not Worldwide SMS is supported 10 Hijacking alarm When the anti hijacking mark in the left picture is opened if the unlock action of the unlock ID occurs the record will report and the app will trigger the anti hijacking alarm ...

Страница 44: ...11 Factory Data Reset a Click the icon in he upper right comer of the main interface Find the Factory Data Reset and click b The Factory Data Reset can also be operated on the lock Please refer to the instruction manual for details ...

Страница 45: ...21 Opening your life 608 Owl ...

Страница 46: ...Opening your life Opening your life Opening your life www accessmatic com Opening your life 608 Owl ...

Отзывы: