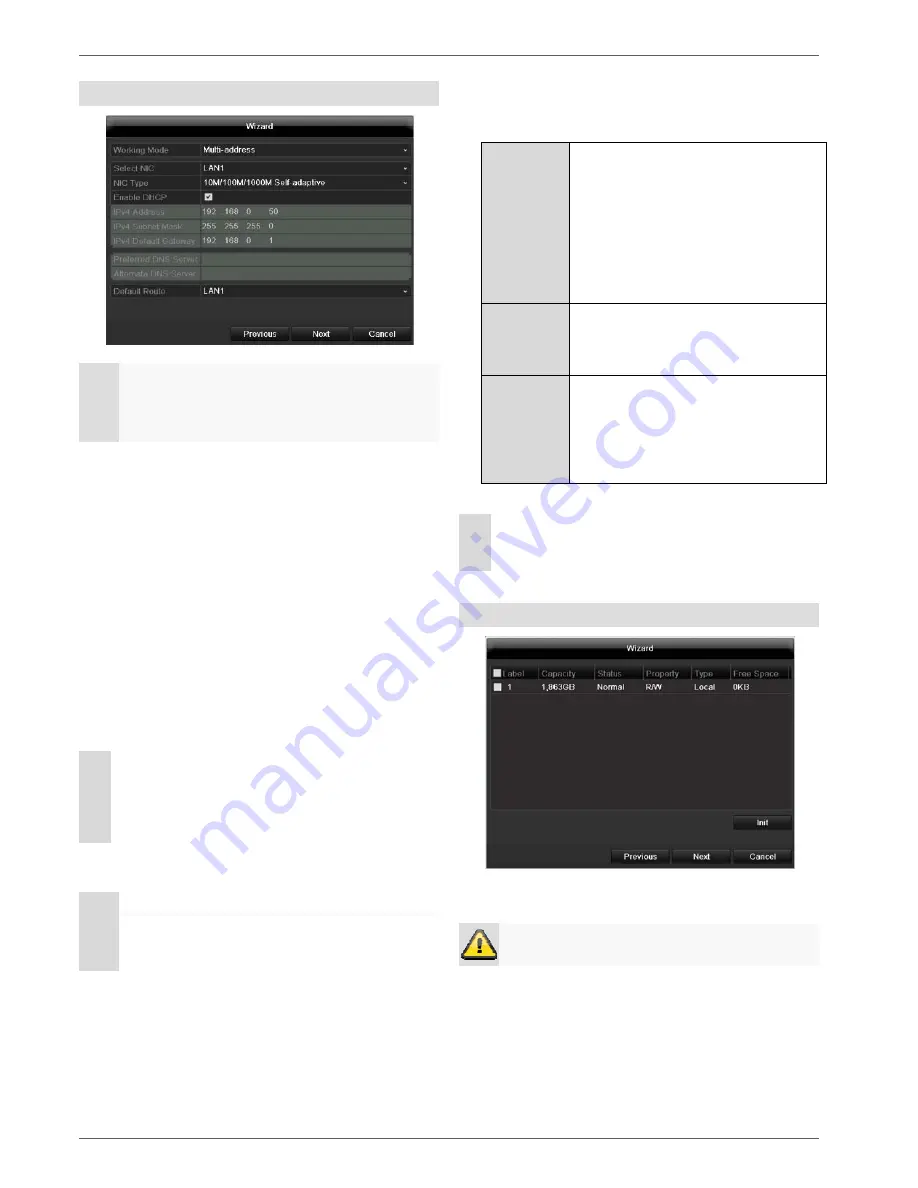
Setup wizard
82
Network Settings
Note
To check whether DHCP can be selected (or if
you have to set the IP address and other settings
manually), consult your network administrator.
1.
DHCP activated:
If DHCP is set up in the network
router, then tick the DHCP box. All network settings
are then made automatically.
2.
DHCP not activated:
Enter the data manually (IPv4
address, IPv4 subnet mask and IPv4default gateway
= IPv4 address of the router). You can also option-
ally enter the address of the DNS server that you
need for sending the E-mail.
A typical address specification is as follows:
IPv4
address: 192.168.0.50
IPv4 Subnet mask:
255.255.255.0
IPv4 Default gateway:
192.168.0.1
Preferred
DNS
server: 192.168.0.1
Note
If you have selected the “multi-address” mode,
then you must configure both network connec-
tions. For this, change the LAN output at “select
NIC”.
Because this device has two network connections, there
are setting possibilities for the parallel and the separate
use of the connections:
Net Fault-
tolerance
A LAN connection is selected for the
data transfer (select “NIC”). The other
connection is in a type of standby
mode. If ,for whatever reason, data
transfer can no longer be guaranteed
(e.g. broken network card, defective
cable...), change the device to the
other interface and use this for data
transfer.
Load
Balance
When this mode is selected, both net-
work cards/network connections work
together in order to get a broader
band width.
Multi-
adresse
When selecting this mode, configure
the network data separately for each
connection. In this way it is possible to
integrate the device into two different
networks, so that the network load is
reduced.
Note
Further information on the network settings can
be found on page 41.
HDD Management
1. To set up a new hard disc, activate the “Check box”
with a left click and then click on
Init.
Warning
All data on the drive is deleted!
2. Confirm the prompt by pressing
OK
. The HDD is
then set up for operation. The progress is displayed
on the status bar.
3. Exit the setting by pressing
Next
.
Note
When the device is accessed remotely via the
internet, it should be given a fixed network ad-
dress.
Содержание TVHD80000
Страница 4: ...Geräteübersicht 4 Fernbedienung TVAC40930 optional erhältlich ...
Страница 64: ...ABUS HD SDI recorder TVHD800x0 User manual Version 1 2 ...
Страница 67: ...Device overview 67 Remote control TVAC40930 optional available ...
Страница 123: ...ABUS HD SDI recorder TVHD800x0 Manufacturer ABUS Security Center GmbH Co KG Linker Kreuthweg 5 86444 Affing Germany ...
Страница 124: ...ABUS HD SDI recorder TVHD800x0 Gebruikershandleiding Version 1 2 ...
Страница 127: ...Overzicht 127 Afstandsbediening TVAC40930 optioneel beschikbaar ...
Страница 183: ...ABUS HD SDI recorder TVHD800x0 Fabrikant ABUS Security Center GmbH Co KG Linker Kreuthweg 5 86444 Affing Germany ...
Страница 184: ...ABUS Enregistreur HD SDI TVHD800x0 Manuel d utilisateur Version 1 2 ...
Страница 187: ...Vue d ensemble de l appareil 187 Télécommande TVAC40930 disponible en option ...
Страница 243: ...Enregistreur HD SDI ABUS TVHD800x0 Fabricant ABUS Security Center GmbH Co KG Linker Kreuthweg 5 86444 Affing Allemagne ...
Страница 244: ...ABUS HD SDI optager TVHD800x0 Brugerhåndbog Version 1 2 ...
Страница 247: ...Oversigt over apparatet 247 Fjernbetjening TVAC40930 kan også vælges ...
Страница 303: ...ABUS HD SDI optager TVHD800x0 Producent ABUS Security Center GmbH Co KG Linker Kreuthweg 5 86444 Affing Germany ...
Страница 304: ...Nagrywarka cyfrowa ABUS HD SDI TVHD800x0 Instrukcja obsługi Wersja 1 2 ...
Страница 307: ...Przegląd urządzenia 307 Pilot TVAC40930 dostępny jako opcja ...
Страница 366: ...Nagrywarka ABUS HD SDI TVHD800x0 Producent ABUS Security Center GmbH Co KG Linker Kreuthweg 5 86444 Affing Niemcy ...


