


20
English
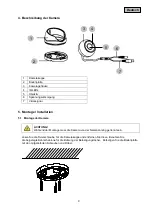
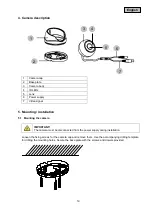
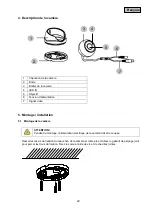
Guide the cable through the base plate, and when necessary, through the side opening. Then screw on
the camera cap and secure with the fixing screws.
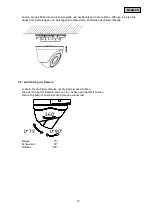
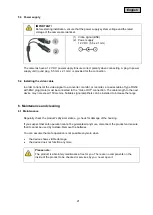
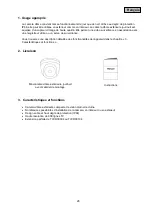
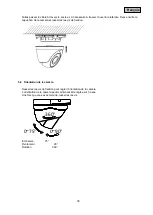
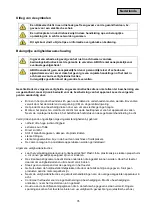
5.2 Aligning the camera
Loosen the fixing screws in order to align the camera.
The camera can now be aligned in 3 axes.
Please tighten the screws again when finished.
360°
0~90°
0~75°
Incline
75°
Pivot
90°
Rotation
360°
Содержание TVCC34020
Страница 13: ...TVCC34020 User guide Version 02 2014 English translation of the original German user guide Keep for future use...
Страница 93: ...TVCC34020 02 2014...
Страница 95: ...95 CE...
Страница 96: ...96 1 100 240 V AC 50 60 12 V DC 1 5 A 2 3 1 2 3...
Страница 97: ...97 1 98 2 98 3 98 4 99 5 99 5 1 99 5 2 100 5 3 101 5 4 101 6 101 6 1 101 6 2 102 7 102 8 102...
Страница 98: ...98 1 IP66 3 2 12 V DC 1 5 A 20 3 IP66 600 TVL TVVR30004 TVVR30104...
Страница 99: ...99 4 1 2 3 4 5 6 7 5 5 1 1 2 3 4 5 6 7...
Страница 100: ...100 5 2 360 0 90 0 75 75 90 360...
Страница 101: ...101 5 3 1 BNC 2 12 V DC 5 5 x 2 1 12 V DC 5 5 x 2 1 5 4 RG59 BNC Video OUT 150 6 6 1 1 2...


