background image

3

4

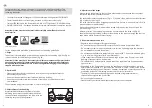
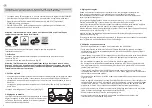
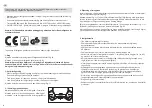
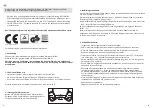
4.  Adjustment of the straps

When wearing the helmet for the first time, please adjust the straps so that they meet 

tautly and comfortably beneath the ears.  


The easily adjustable triangular locks (fig. 1 + 2) on both sides, with their optional fastener 

(fig. 1) help you in doing so.
The child proof lock must be engaged properly, before first use, with an audible “click” to 

prevent accidental displacement.
Make sure the chin-guard, which must be locked before every ride, doesn’t lie on the 

jaw-bone (fig. 3 – 5).
After adjustment, the overlapping straps can be secured with the strap clip (fig. 6).
Should the straps be too long, please cut them down to the required length and seal the 

ends with a match flame to prevent fraying.

5. Proper maintenance and care

•    Regularly check the helmet for signs of damage.
•    Do not alter the specification of this helmet as it will reduce its protective effect.
•    Do not apply stickers or paint to the helmet as this can be damaging to the materials.
•    Do not remodel or misuse the helmet.

•    Do not expose the helmet to temperatures in excess of 60˚C. Do not store behind glass, 

e.g. in a car (burning glass effect), near heaters etc.

•    If you suspect that the helmet has received a large impact, even if there is no visible 

damage, please purchase a new helmet.

•    This helmet has a limited service life and should be replaced when it shows obvious 

signs of wear.

•   Depending on the frequency of use and the specific operational conditions, a bicycle 

helmet must be replaced 4 - 5 years after the first time it is used. In view of the unavoi-

dable material fatigue, the helmet must, however, be replaced at most 8 years after its 

production date even if it displays no clear visible or technical defects.

•   The helmet, inner pads and head ring can be cleaned using lukewarm water,  

solvent-free detergents and a soft cloth.

•    Only use original spare parts.
•  Please contact your local waste disposal company for correct disposal.

Congratulations! You are now the owner of a top quality ABUS bicycle helmet. This  

helmet has been produced under strict conditions and is certified according to the  

following standards:

•    The helmet is classed as Category II PPE and conforms with Regulation (EU) 2016/425.
•   The full declaration of conformity can be found at https://docs.abus.com/
•    Testhaus TÜV Rheinland LGA Products GmbH, N.B. 0197, Tillystrasse 2, D-90431 Nürnberg.
•    EN 1078:2012+A1:2012 – European standard for cyclists, skateboarders and inline skaters.

Attention: Please note that no helmet is indestructible and will not prevent all  

head injuries. 


For the best possible protection, please observe the following guidelines:

1. Usage

This helmet is recommended as protective equipment for the following activities (fig. A).
It is not suitable for the following activities (fig. B).

Attention: Please note that it is necessary for children to remove their helmets before 

entering playgrounds. This helmet should not be used by children while climbing or 

doing other activities when there is a risk of strangulation/hanging if the child gets 

trapped with the helmet. 

2. Optimum fit

•    Please try various sizes for comfort and security, ensuring that the helmet sits  

horizontally on your head. 

•    Do not pull the helmet over your forehead, reducing visibility. 
•    Do not push the helmet towards the back of your head, as this will not protect  

your forehead.

The helmet can only protect your head if it fits correctly (fig. C).

3. Adjustement of the head ring

Almost all ABUS helmets are available in 2 sizes.  

Adjusting the helmet to the individual head size  

can be achieved, depending on the type, with the  

following easy to use fitting systems.

EN 1078:2012+A1:2012

Содержание 40371

Страница 1: ... Mode d emploi 3 4 Instruction manual 9 10 Instrucciones de uso 25 26 Návod na použití 29 30 Használati utasítás 1 2 Gebrauchsanleitung 11 12 Instruções de uso ABUS August Bremicker Söhne KG D 58292 Wetter E Mail mobile abus de Tel 49 2335 634 0 Fax 49 2335 634 300 www abus com Download further languages 27 28 Návod na použitie I N S T R U C T I O N M A N U A L S K U R B ...

Страница 2: ...und be quem unterhalb der Ohren zusammenlaufen ohne diese zu berühren Dabei helfen Ihnen die bequem bedienbaren beidseitigen Gurtverteiler mit optionaler Fixiereinheit Abb 1 Diese muss vor der ersten Benutzung nach dem Justieren der Riemen mit einem hörbaren Klick gegen unbeabsichtigtes Verstellen Kindersicherung fest verriegelt werden und einrasten Beim Justieren des Kinnverschlusses der vor der ...

Страница 3: ...e helmet inner pads and head ring can be cleaned using lukewarm water solvent free detergents and a soft cloth Only use original spare parts Please contact your local waste disposal company for correct disposal Congratulations You are now the owner of a top quality ABUS bicycle helmet This helmet has been produced under strict conditions and is certified according to the following standards The he...

Страница 4: ...gles de réglage faciles à utiliser sur les deux côtés fig 1 2 et équipées d une fixation optionnelle fig 1 vous aideront à ajuster au mieux votre casque Après l ajustement des lanières mais avant la première utilisation cette fixation doit être sécurisée par un clic audible pour éviter tout dérèglement accidentel Assurez vous que la boucle de mentonnière qui doit être fermée avant chaque utilisati...

Страница 5: ...te keer draagt dient u de riemen zo af te stellen dat deze strak en comfortabel onder uw oren samenkomen De gemakkelijk te verstellen driehoekige klemmen fig 1 2 met optionele sluiting fig 1 helpen u hierbij Vóór gebruik dient de kindveilige sluiting met een duidelijk hoorbare klik te worden vastgezet om te voorkomen dat de helm ongewild kan verschuiven Controleer voor elke tocht of de kinband ges...

Страница 6: ...se coloque el casco por primera vez por favor ajuste las correas de forma que se tensen fija y cómodamente detrás de sus orejas A este propósito le ayudaran los cierres triangulares de fácil manejo Figs 1 y 2 ubicados hacia los dos lados de la cabeza y dotados de un cierre opcional especial Fig 1 Antes del primer uso el cierre a prueba de niños se debe fijar correctamente hasta que se escuche un c...

Страница 7: ...echos triangulares fig 1 2 de ajuste fácil de ambos os lados com o retentor opcional fig 1 ajudam nessa tarefa Antes da primeira utilização o fecho à prova de crianças tem de ficar devidamente engata do com um clique audível para impedir o seu deslocamento acidental Verificar se a guarda para o queixo que deve ser bloqueada antes de qualquer atividade não fica assente no maxilar fig 3 5 Depois do ...

Страница 8: ...ultino ben tesi e confortevoli sotto le orecchie A tale scopo utilizzare i pratici cursori triangolari regolabili fig 1 2 presenti su entrambi i lati dotati di sistema di bloccaggio opzionale fig 1 Al primo utilizzo fissare correttamente il sistema di bloccaggio a prova di bambino fino a udire un click in modo da prevenire un accidentale spostamento del casco Accertarsi che la chiusura sotto mento...

Страница 9: ...e uden at berøre ører ne når hjelmen bruges første gang Sidespænderne fig 1 2 og det ekstra låsespænde fig 1 hjælper dig med justeringen Før den første brug skal låsespændet børnesikringen lukkes med et hørbart klik så det ikke længere er muligt at skubbe hjelmen frem og tilbage Sørg for at hagespændet som skal lukkes før kørslen ikke hviler på kæbebenet fig 3 5 Efter endt justering kan stropperne...

Страница 10: ... sitter bekvämt under öronen Det lätt justerbara triangulära spännet bild 1 2 på båda sidorna med sin justerbara förslutning bild 1 hjälper dig att göra det Det barnsäkra låset ska vara ordentligt stängd före första användningen med ett hörbart klick för att förhindra oavsiktlig förflyttning Se till att hakspännet som ska vara låst innan varje cykeltur inte ligger på käkbenet bild 3 5 Efter juster...

Страница 11: ...kkelig stramt og komfortabelt under ørene De trekantede sidespennene fig 1 2 på begge sider med den valgfrie festeenheten fig 1 hjelper deg med dette De barnesikrede spennene må lukkes ordentlig man skal høre et klikk før første gangs bruk for å hindre at de beveger seg Kontroller at hakespennen er låst før hver tur og ikke ligger på kjevebenet fig 3 5 Etter justeringen kan de overlappende stroppe...

Страница 12: ... ja mukavasti korvien alapuolella Helposti säädettävät kolmionmuotoiset lukot kuvat 1 2 molemmilla puolilla ja niiden valinnainen kiinnitys kuva 1 auttavat sinua säätämään hihnat oikein Lapsiturvallinen lukko täytyy kiinnittää oikein ennen ensimmäistä käyttöä Selvästi kuuluva klik varmistaa oikean kiinnitystavan Leukahihna on lukittava aina kypärää käytettäessä kuvat 3 5 Varmista ettei hihna jää l...

Страница 13: ...alnym zaciskiem rys 1 Muszą one być przed pierwszym użyciem kasku po ustawieniu pasków zabezpieczone pr zed przypadkowym przestawieniem przez dziecko poprzez mocne zaciśnięcie aż do słyszal nego kliknięcia Przy regulacji zapięcia pod brodą które przed jazdą musi być bezwzględnie zamknięte należy pamiętać żeby nie znajdowało się ono na wysokości żuchwy rys 3 5 Po zakończonej regulacji wystające koń...

Страница 14: ...přizpůsobení přilby konkrétní hlavě uživatele 4 Nastavení popruhů Popruhy musí být nastaveny tak aby byly pevné a pohodlně se sbíhaly pod ušima aniž by se jich dotýkaly K tomu slouží pohodlné oboustranné a snadno nastavitelné řemínky obr 1 2 s optimální fixací obr 1 Před prvním použitím přilby je nutné správně seřídit řemínky a pevně je zajistit proti nežádoucímu uvolnění Před jízdou je nutné vždy...

Страница 15: ...ducho nastaviteľné trojuholníkové zámky obr 1 2 na oboch stranách s voliteľným zapínaním obr 1 Detská poistka musí byť pred prvým použitím riadne zabezpečená s počuteľným cvak nutím aby sa zabránilo náhodnému uvoľneniu remienkov Pred každou jazdou sa uistite že ochrana brady je zapnutá a neleží na čeľustnej kosti obr 3 5 Po nastavení remienkov môžete konce remienkov zaistiť pomocou priloženej spon...

Страница 16: ...dja nak el a fülek mellett Ebben segítségére lesznek a mindkét oldalon található egyszerűen beállítható háromszögű osztók 1 és 2 ábra amelyek külön rögzíthetőek Az első használat előtt a biztonsági gyermekzárat megfelelően rögzíteni kell hallható kattanásig így megelőzve az esetleges elmozdulást Figyeljen arra hogy az állvédő amelyet minden használat előtt rögzíteni kell ne az áll kapocscsontra ke...

Страница 17: ...õrvade all Seda aitavad hõlpsasti teha mugavad reguleerimiskolmnurgad pilt 1 ja 2 mõlemal küljel ja soovi korral kasutatav kinnitusdetail pilt 1 Kiivri juhusliku paigaltnihkumise takistamiseks peab lapselukk olema enne kiivri esmakordset kasutamist korralikult peal millest annab märku kuuldav klõpsatus Lõuakaitse tuleb enne iga kasutamist lukustada ning see ei tohi asetseda lõualuu peal pilt 3 5 P...

Страница 18: ...33 34 ...
Отзывы: