


EN
OPERATING INSTRUCTIONS
AB-CPEXPERT
10
OPERATION
ON/OFF Switch
Attention
!
• Hold the machine before switching on with both hands, the right on the front grip (1) and the left hand on the rear grip (3).
•
• Use the lock button (5) for setting the power switch for continuous use.
• Turn the speed-controller (2) up or down to increase or to reduce the speed .
Polishing
• Use the sponge pad to apply the polishing agent.
• Make sure that the sponge pad is free of any debris.
• Spread the polishing paste evenly over the sponge pad. Do not apply the polishing paste to the surface.
• Do not exert pressure on the polishing machine.
• Allow the polishing machine to slide over the surface.
•
• Make sure that the wool pad is free of any debris.
Tips for an optimal polishing result
• Wash the car at least every two weeks.
• Wash the car from above always downward.
• Polish the car twice or three times a year.
•
• Difficult-to-reach sections of the car should be polished by hand, without the use of the polisher.
CLEANING AND MAINTENANCE
Attention!
• Always disconnect power adaptor from the mains before starting any cleaning or maintenance.
• The polishing and sanding machine does not require special maintenance.
• Keep all safety devices, air vents and the motor housing free of dirt and dust.
• The housing of the equipment can easily be cleaned with a moistened cloth.
• Wash the sponge and wool pads regularly and only by hand. Air-dry the pads.
• Store the machine in its original packaging.
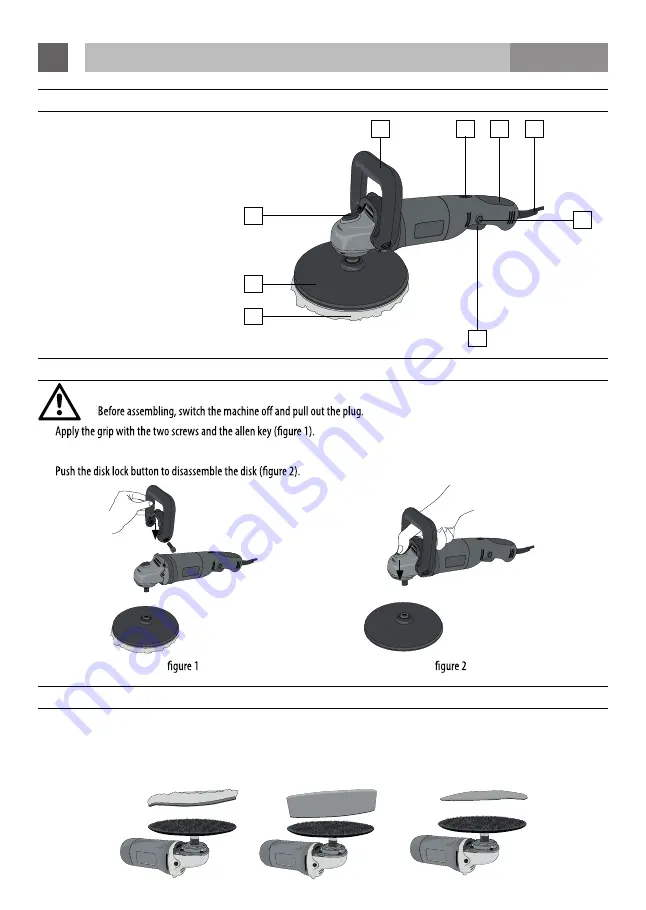
PARTS
1 Front grip
2 Speed controller
3 Rear grip
4 Power cord
5 Lock button
6 Power switch
7 Wool pad
8 Polishing / sanding disk
9 Disk lock
ASSEMBLY
Danger!
•
• Screw the polishing / sanding disk on the stud (use a wrench).
•
ATTACH POLISHING PAD AND SANDING PAPER
• Put the equipment with the polishing disk upward on the table.
• Attach the supplied sponge pad or sanding paper on the disk.
• The hook-and-loop fastener enables easy changing of the polishing and sanding attachments.
• To remove, pull the sanding paper or the pad from the disk.
1
2
3
6
5
9
8
7
4


