3-2
Chapter 3
Three to five seconds after the message is displayed, if you press the
Del
key, or if you press simultaneously the
Ctrl Alt Esc
keys, you will access the
BIOS Setup menu. At that moment, the BIOS will display the following
message:
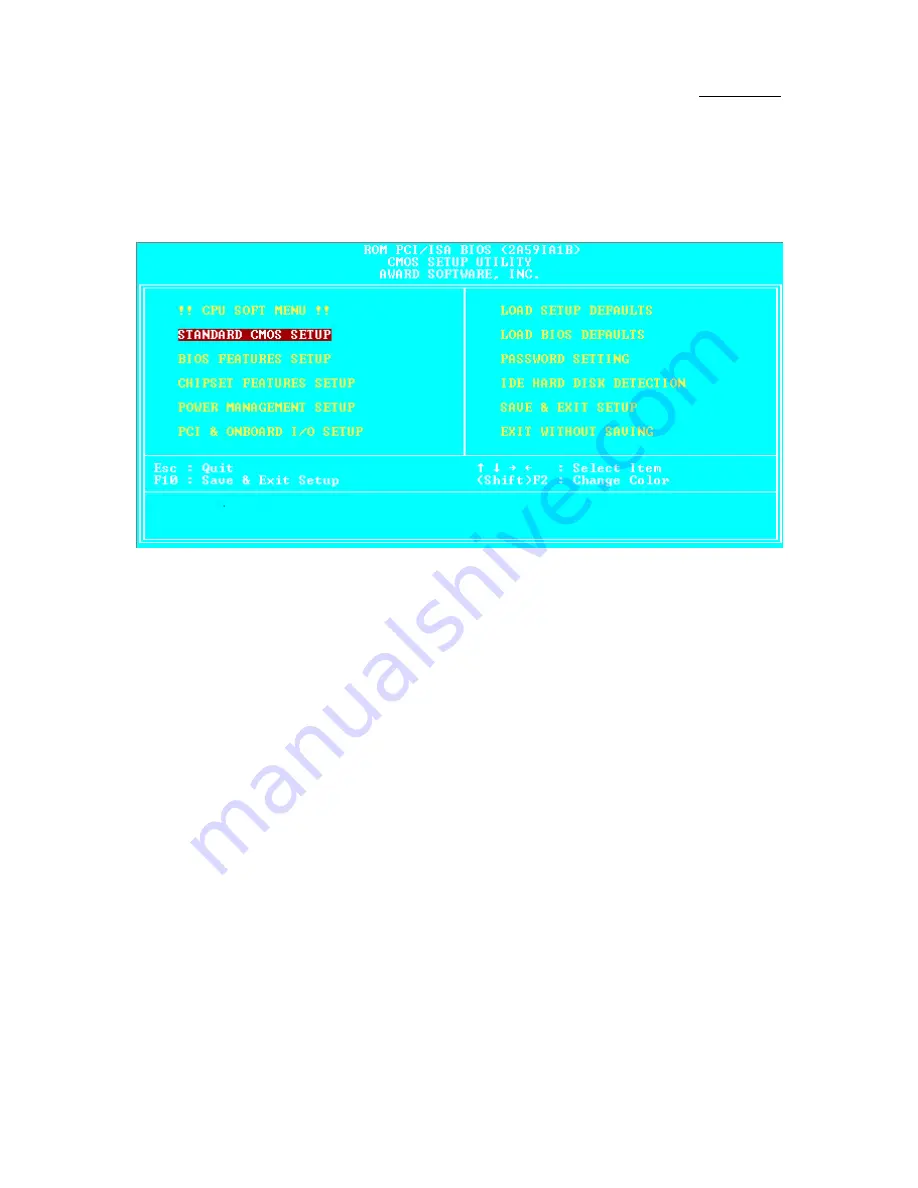
Fig 3 BIOS Setup main menu
In the BIOS Setup main menu of Figure 3, you can see several options. We
will explain these options step by step in the following pages of this chapter, but
let us first see a short description of the function keys you may use here:
l
Press
Esc
to quit the BIOS Setup.
l
Press
¡ô¡õ¡÷¡ö
(up, down, left, right) to choose, in the
main menu, the option you want to confirm or to modify.
l
Press
F10
when you have completed the setup of BIOS parameters to
save these parameters and to exit the BIOS Setup menu.
l
Press Page Up/Page Down or +/- keys when you want to modify the
BIOS parameters for the active option
.
CMOS DATA
Maybe you have heard somebody saying that their CMOS
DATA was lost. What is the CMOS? Is it important? The
CMOS is the memory used to store the BIOS parameters that
you have configured. This memory is passive. You can read its
data, and you can also store data in it. But this memory has to
be powered by a battery, in order to avoid any loss of its data
when the computer is turned off. Since you may have to
change the CMOS battery when it is out of power and indoing
so, you will loose all CMOS data, therefore, we recommend
that you write down all the parameters of your hardware, or to
put a label with these parameters on your hard disk.
Computer
knowledge
Содержание AX5
Страница 8: ...1 4 Chapter 1 n Layout diagram Fig 1 1 Layout diagram...
Страница 11: ...Introduction of AX5 PX5 TX5 Features 1 7 n Layout diagram Fig 1 2 Layout diagram...
Страница 15: ...Introduction of AX5 PX5 TX5 Features 1 11 n Layout diagram Fig 1 3 Layout diagram...
Страница 33: ...Installing the Mainboard 2 17 correction feature this mainboard does not support it...
Страница 42: ......
Страница 74: ......
Страница 80: ...Appendix A A 6...
Страница 90: ...Appendix C C 2...
Страница 92: ...Appendix D D 2...
Страница 104: ...Appendix F F 6...
Страница 106: ...Appendix F F 8...
Страница 110: ...H 2 Appendix H 2 License Notebook close the view 3 Question Click Yes...
Страница 111: ...How to install the Ultra DMA 33 drive H 3 4 Select Components Click INSTALL 5 Question Click Yes 6 Question Click Yes...
Страница 116: ...I 4 Appendix I Step 5 Click Next then wait a while until you see the installation complete screen...
Страница 118: ...I 6 Appendix I...


