SOTOX A™ MOBILE ANALY ZER | USER GUIDE
30 | EN
10. SUPERVISOR M AIN MENU
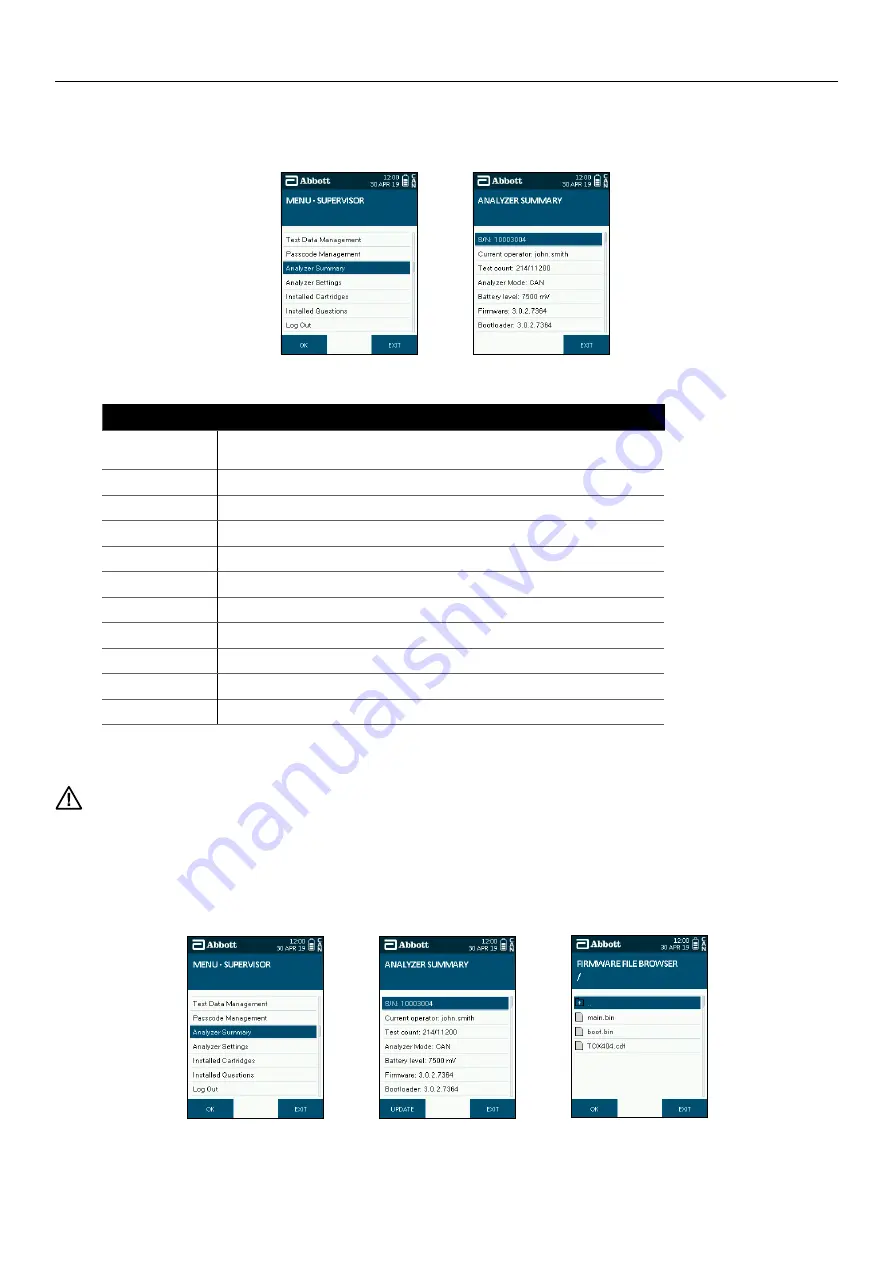
Step 1: From the Supervisor menu screen select the Analyzer Summary option.
Step 2: The Analyzer Summary screen will then be displayed.
The information detailed on the screen is:
SCREEN DISPLAY
S/N
Serial number of the analyzer.
Also stated on the label on the underside of the analyzer.
Current operator
The operator name/ID of the current user of the analyzer.
Test count
The number of tests completed expressed with the total test storage capacity.
Analyzer mode
Denotes the mode that the analyzer is set to. In this instance it will be CAN for Canada.
Battery level
Current battery level in mV.
Firmware
Version that is loaded on the analyzer.
Bootloader
Version that is loaded on the analyzer.
Servicing
Stated as either OK, due or overdue, with ‘due’ meaning within a calendar month of the due date.
Next service due
Date that the analyzer service is due.
Last PQC
Date of the last successfully completed PQC test.
Last NQC
Date of the last successfully completed NQC test.
10.3.1 Updating firmware
When firmware updates are available these may be provided by the manufacturer by way of a SD card.
Data may be lost during the updating process. Where possible please ensure that data is backed up prior to completing the update.
To update SoToxa™ Mobile Analyzer firmware using the SD card, follow these steps:
Step 1: Ensure that the SD card is inserted in the analyzer before starting this procedure.
Step 2: From the Supervisor menu, select the Analyzer Summary option.
Step 3: When in the Analyzer Summary screen, press the Update button on the bottom left of the screen.
Step 4: The analyzer will display the list of files and folders carried on the inserted SD card. To open a folder, highlight the folder using the five way
navigation key, then press the Enter button. To exit a folder, select the top folder marked with an arrow, then press the Enter button.
Step 1
Step 2
Step 2
Step 3
Step 4


