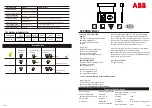
MOUNTING INSTRUCTIONS
3 of 4
2 of 4
WIRING INSTRUCTIONS
Dispart mounting plate
Mounting plate
Insert
fl
at screwdriver into slot on side of unit, pry off and remove
the mounting plate from unit.
Disconnect AC connector from PCBA.
a
b
Wall mounting or Ceiling mounting
Knock out appropriate center cable entry hole and mounting screw
hole on the mounting plate.
Route AC supply wire through center hole of mounting plate.
Fix mounting plate on the mount surface with screws and anchor nuts.
a
b
c
Connect the AC supply wire to terminal block. Refer to wiring
instruction showed below.
Connect battery male and female connector inside of mounting
bracket.
Remove the pictogram on the unit, select other pictogram you need
then insert into slot of panel.
Snap AC supply on PCBA and then snap fixture to mounting
plate.
Suitable cable 0.75-2.5mm²
Wiring connection
Connect battery
Change pictogram when necessary
Finish installation
Non-Maintained Wiring
Maintained Wiring
Maintained (default operation):
Connect L,N and leave jumper cable connected.
Non-maintained:
Connect L,N and remove jumper cable.
MOUNTING OPTIONS
Wall mounting
Ceiling mounting
PICTOGRAM STYLES
PRECAUTIONS
Carefully read this instruction leafet before installing or using the luminaire.
This leafet provides important information about the correct installation, use, maintenance and disposal
of this product. Please observe the following guidelines:
1. Installation must be in accordance with European installation requirements HD 60364 and additional local
regulations.
2. This product may not be modified in any way what so ever or used for a purpose or in an environment
other than for which it is designed. Failing to observe these guidelines will invalidate the warranty and the
CE-compliance of this product.
3. The luminaire is suitable for indoor use only
4. Before installing the luminaire, the supply must be isolated.
5.The luminaire should be connected to the voltage equivalent to that indicated on the type label
SERVICE & OPERATION
Normal Operation:
The green indicator light on face plate stays on. The LED will go out if the mains supply
fails, the internal charger malfunctions, or the unit is in test mode.
Battery:
Sealed Ni-Cad or Ni-Mh rechargeable battery pack. Battery should be replaced when the required
duration is no longer achieved. To avoid any damage to the fixture and ensure its performance, the battery
should be replaced with same brand and type.
Test Switch:
Press the test switch button, LED indicator will go out and the sign will be illuminate from its
battery pack.
WARNING:
The luminaire must, under no circumstances, be covered with insulating material or similar material only
Commissioning Test Behaviour
Initial connection of the mains supply will initiate a commissioning sequence where the battery will
remain on charge and test for an uninterrupted 60 hours. Any interruption of the mains supply during
this period will reset the counter to zero.
The sequence is : to charge for 24hours. Having fully charged the battery, then execute a duration test.
Upon successful completion of the duration test, the gear will perform another full charge period of
24hours. After this period, it is suggested to perform a function test and then check for successful
completion of the function and duration tests.
Therefore, after initial mains power on, it is best to leave the gear alone for 60 hours to allow the gear
to complete its pre-programmed commissioning testing. During the 60 hour period, any attempt
to have the gear perform a function or duration test will simply result in the requested test being
'pended'. Following the commissioning test it will then perform whatever tests are pended. Meaning
that if you had pressed "start duration test", at the end of commissioning, the gear will perform
another duration test and another subsequent charge period before normal operations could be
resumed.
Gear Behaviour After Battery Change (meaning Disconnect / Reconnect battery)
After changing the battery, the gear will perform a complete commissioning sequence, as described
above,irrespective of the condition of the battery.
Function test
A 5 second functional test is carried out at nominally 1 week interval.
Duration test
The gear switches to battery supply with mains supply off, and runs until the batteries can no longer
supply the lamp
The length of time to run out is recorded in memory.
A pass result indicates the battery powered the fitting and lamp for the rated period of this fitting.
A full rated duration test is carried out nominally at 52 weeks intervals.
In DALI mode, the start of the regular duration and function tests, is initiated by the attached controller.
If the DALI controller is not available, the gear will revert to its automated settings.
Ceiling mounting
Wall mounting
DALI Connection
Battery Connection
AC connector


