manualshive.com logo in svg
background image

21

20

L’interruttore si può manovrare soltanto se il pulsante

“PUSH BEFORE OPERATE” non è premuto, e cioè
soltanto quando l’interruttore è in una di queste tre
posizioni.

The circuit breaker can operate only when the "PUSH

BEFORE OPERATE" button is not pressed, i.e. only
when the CB is set to one of the following three positions.

Das Schalten des Leistungsschalters ist nur dann möglich,

wenn die Taste "PUSH BEFORE OPERATE" nicht
gedrückt ist, d.h. wenn sich der Leistungsschalter in
einer dieser drei Stellungen befindet.

Le disjoncteur ne peut être manœuvré que si le bouton

"PUSH BEFORE OPERATE" n'est pas enfoncé, c'est-à-
dire uniquement quand le disjoncteur est dans l'une de
ces trois positions.

El interruptor puede manipularse sólo si el botón "PUSH

BEFORE OPERATE" no ha sido pulsado; es decir, sólo
cuando el interruptor se encuentra en una de las
siguientes tres posiciones.

DISCONNECT

TEST

CONNECT

 21÷31                                                                                                                           

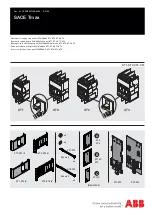
            Connection and disconnection of withdrawable-type CBs

ø 3mm

OPZIONALE ! DATI DEI CABLAGGI RIPORTABILI A CURA DEL CLIENTE
OPTIONAL ! WIRING DATA TO BE GIVEN BY CUSTOMER
OPTIONAL - DIE DATEN DER VERDRAHTUNG KÖNNEN VOM KUNDEN VERMERKT WERDEN.
OPTION ! INDICATION DES DONNÉES DES CÂBLAGES À LA CHARGE DU CLIENT
OPCIONAL ! DATOS DE LOS CABLEADOS REALIZABLES POR CUENTA DEL CLIENTE

aaaaaaaaaaaaaaa

Max ø 3,3mm

8mm

0,5 ÷

2

,5mm

2

ø 0.

11

0.3

1

Max ø 0.

12

22

÷

1

4 AWG

Содержание Emax X1 UL

Страница 1: ...rm specific type test on the installation Kabel oder isolierte Sammelschienen verwenden oder die spezifische Typprüfung auf der Installationdurchführen Utiliser un câble ou des barres isolées ou réaliser un test de type spécifique sur installation Utilizar un cable o barras aisladas o efectuar una prueba de tipo específico sobre instalacíon 1 5 Installation directions ...

Страница 2: ...5 4 X1 W VR X1 W HR X1 F HR X1 F VR 200 200 200 200 200 200 X1 F F 7 87 7 87 7 87 7 87 7 87 7 87 ...

Страница 3: ...g Ausschaltung Leistungsschalter Ouverture disjoncteur Apertura interruptor IInterruttore aperto molle scariche Circuit breaker open springs unloaded Leistungsschalter ausgeschaltet Federn entspannt Disjoncteur ouvert ressorts désarmés Interruptor abierto resortes descargados BIANCO WHITE WEISS BLANC BLANCO BIANCO WHITE WEISS BLANC BLANCO GIALLO YELLOW GELB JAUNE AMARILLO APERTO OPEN AUS STELLUNG ...

Страница 4: ...8 7 DISCHARGED DISCHARGED SPRING OPEN PUSH ON PUSH ON PUSH OFF PUSH OFF 1 2 F 9 IV 7 13 Disassembly sequence to install internal accessories ...

Страница 5: ...W 11 10 ...

Страница 6: ... 14 20 Connection to auxiliary circuits U1 U2 38 36 35 98 95 96 R1 48 45 R2 46 D1 D2 C1 C2 C13 C3 C12 C11 42 44 11 41 12 14 22 24 31 21 32 34 T9 T10 T6 T5 W4 W3 98S 95S W2 W1 K15 K14 K13 K12 K21 K11 K2 K1 T3 T2 T4 T1 T7 T8 ...

Страница 7: ...erdrahtungsbeispielfürfestenLeistungsschalter Exemple de câblage pour disjoncteur fixe Ejemplo de cableado para interruptor fijo 18 Esempio di cablaggio per parte fissa Wiring example for fixed part VerdrahtungsbeispielfürUnterteil Exemple de câblage pour partie fixe Ejemplo de cableado para parte fija D1 D2 D1 D2 19 ...

Страница 8: ...EFORE OPERATE n est pas enfoncé c est à dire uniquement quand le disjoncteur est dans l une de ces trois positions El interruptor puede manipularse sólo si el botón PUSH BEFORE OPERATE no ha sido pulsado es decir sólo cuando el interruptor se encuentra en una de las siguientes tres posiciones DISCONNECT TEST CONNECT 21 31 Connection and disconnection of withdrawable type CBs ø 3mm OPZIONALE DATI D...

Страница 9: ... partenza estratto Starting position disconnected Ausgangsstellung Trennstellung Position de départ débroché Posición de salida extraído DISCHARGED DISCHARGED SPRING SPRING OPEN PUSH ON PUSH ON PUSH OFF PUSH OFF 24 OK 25 ...

Страница 10: ...29 27 26 Posizione test Test position Prüfstellung Position de test Posición de prueba 28 Posizione di inserito Connected Betriebsstellung Position embroché Posición de insertado ...

Страница 11: ...rten Reihenfolge ausführen Zum Schluss die zwei in der nebenstehendenAbbildunggezeigtenVorgängeausführen Die Fail safe Vorrichtung gestattet das Ausfahren nur bei entspanntenEinschaltfedern Pourdébrocherlapartiemobiledelapartiefixe refaireàl inverse lesopérationsdécritessurlesfig 26 30 Pourfinir effectuer les deux opérations illustrées sur la figure ci contre Le dispositif Fail Safe ne permet le d...

Страница 12: ...34 35 37 36 ...

Страница 13: ...2 Y F F 0 98 1 97 11 02 4 13 4 08 0 24 2 76 2 76 2 76 10 55 10 55 5 28 5 81 8 11 7 17 4 92 6 89 7 17 8 11 0 98 2 76 2 76 1 97 4 08 4 67 9 33 0 57 0 39 0 39 3 81 4 92 4 02 8 03 0 12 _ 7 60 0 94 0 39 0 08 4 82 9 65 1 38 9 65 4 82 5 51 2 76 ø 0 22 M5 6 89 0 24 S TA N D A R D R O N IS P R O F A L U X K IR K C A S TE L L B 2 0 8 2 1 6 2 2 4 2 4 5 2 4 3 8 1 9 8 5 0 8 8 2 9 6 5 9 5 7 C O N M O S TR IN A ...

Страница 14: ... 76 25 0 98 ø 11 ø 0 43 44 1 73 16 5 0 65 29 1 14 20 0 79 1 85 1 93 ø0 35 3 92 3 _ 0 12 _ 4 06 6 30 9 06 8 62 11 38 8 11 10 87 42 W HR VR 11 02 8 27 4 08 10 75 0 98 1 73 ø0 43 2 32 7 16 4 92 6 89 2 76 2 76 2 76 5 84 5 80 4 92 2 32 4 67 9 33 0 43 3 15 117 9 21 11 97 ø0 22 M5 7 60 4 02 8 03 8 58 1 73 4 29 ø 0 4 3 ø 0 22 M5 70 140 0 69 R0 39 2 07 1 56 7 58 10 33 2 41 1 38 4 82 9 65 0 73 2 32 1 83 0 0...

Страница 15: ...44 5 144 5 ø 4 165 5 ø4 103 151 226 153 75 8 19 241 263 206 R min 200 0 64 26 25 144 5 160 75 278 5 X X X X X X Y Y Y Y Y Y F Senza mostrina Whithout Flange 9 49 8 90 5 94 10 35 5 69 5 69 ø 0 1 5 10 10 5 69 6 52 10 96 1 03 16 25 ø0 16 6 33 6 33 4 06 6 05 6 05 R min 7 87 208 8 11 for F only F HR VR W HR VR F F ...

Страница 16: ...tallationsvorschriften 1 5 Schaltsequenz 6 DemontagesequenzfürdenEinbauinternerZubehöreinrichtungen 7 13 Anschluss an die Hilfsstromkreise 14 20 EinschiebenundherausfahrenderLeistungsschalterinausfahrbarerAusführung 21 31 Befestigung am Boden 32 39 Maßtabellen 40 44 Prescriptions pour l installation 1 5 Séquencesdemanœuvre 6 Séquence de démontage pour installation des accessoires internes 7 13 Con...

Отзывы: