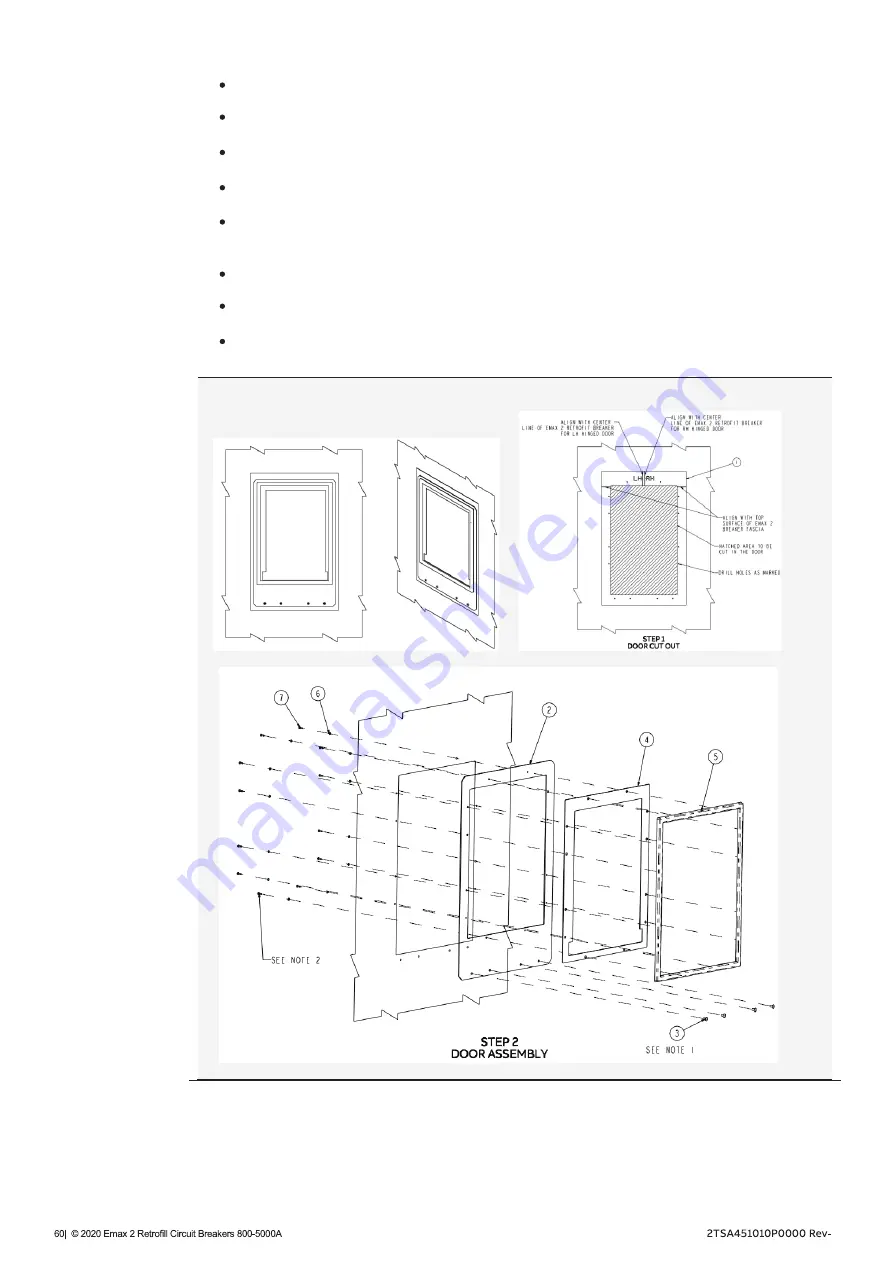
OEM Adaptor (Show as Example)
Figure 59
Rack out & Remove the existing legacy WavePro breaker from the LVS.
Unpack the new door Adaptor kit assembly
Modify the door cut out as per the new door cutout template.
Check the through-door racking with the new door assembly.
Insert the new retrofitted Emax 2 Retrofill circuit breaker into the compartment and slide
the breaker into the disconnected condition.
Close the door and secure it to the compartment.
Rack-in the new retrofitted Emax 2 Retrofill Breaker.
For detail instructions refer document
2TSE431967R1000
,
2TSE431968R1000
&
2TSE431996R1000
C
Содержание Emax 2 Retrofill
Страница 36: ...11 14 22 21 31 34 42 41 C2 C1 51 54 62 61 71 74 82 81 91 94 02 01 45 48 R1 R2 C ...
Страница 38: ...C ...
Страница 43: ...NOTES 1 WP WavePro fixed connection point C ...
Страница 51: ...ONLY for 3200A Figure 48 Steps in Exploded Views for 3200A WPS 32 WPH 32 WPX 32 C ...
Страница 52: ...ONLY for 3200A Figure 49 Steps in Exploded Views for 4000A WPS 40 WPX 40 C ...
Страница 53: ...Figure 50 Steps in Exploded Views for 5000A WPS 50 WPX 50 ONLY for 3200A C ...
Страница 65: ...Figure 64 Wiring of WP 4000A breaker with FAN control unit C ...
Страница 74: ...Figure 75 Figure 76 WPF 16 with special 2500A Fuse WPF 16 2500A Fuse Tang Positions 74 C ...
Страница 77: ...2TSA451010P0000 ECN000239455 Rev C ...


