


24 Mechanical installation
8.
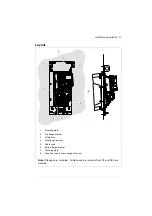
Grounding
• For safe reason,make protective earthing for the flange.
Optional steps:
• If you wish to install the power cable shelf lower on the bottom bracket, first
remove the cover and lead-through plate.
• Then detach the power cable shelf and attach it to the bottom bracket with M4
nuts.
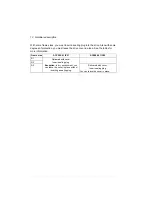
Frame R3:
2 × M4 nut 1.5 N·m
Note: Use the uninstalled screw from drive for grouding
Frames R1...R2:
2 × M4 nut 1.5 N·m
2 × M4 × 8 Combi screw 1.5 N·m
Содержание ACX580-01 R1
Страница 1: ...ABB drives Supplement ACX580 01 R1 R3 Flange mounting kit installation ...
Страница 4: ......
Страница 12: ...12 Hardware description ...
Страница 30: ...30 Dimension drawings ACX580 01 frame R1 Flange mounting kit 3AXD50000131310 ...
Страница 31: ...Dimension drawings 31 Hood is needed for UL Type 12 drives 3AXD50000131242 ...
Страница 32: ...32 Dimension drawings Attaching points and hole dimensions 3AXD50000038098 ...
Страница 33: ...Dimension drawings 33 ACX580 01 frame R2 Flange mounting kit 3AXD50000131327 ...
Страница 34: ...34 Dimension drawings Hood is needed for UL Type 12 drives 3AXD50000130863 ...
Страница 35: ...Dimension drawings 35 Attaching points and hole dimensions 3AXD50000038111 ...
Страница 36: ...36 Dimension drawings ACX580 01 frame R3 Flange mounting kit 3AXD50000131143 ...
Страница 37: ...Dimension drawings 37 Hood is needed for UL Type 12 drives 3AXD50000130870 ...
Страница 38: ...38 Dimension drawings Attaching points and hole dimensions 3AXD50000038117 ...
Страница 40: ...Contact us www abb com drives www abb com drivespartners 3AXD50000119189 RevA EN 2017 10 10 ...


