background image

26

A B B  A B I LIT Y ™

  N AV EO ® P R O  G AT E WAY

8 Installation

8.1  How to install the product

The product is intended for professional use and must be installed by qualified personnel only.
The product must be installed in a secured location, accessible to authorized personnel only 
(for example in a cabinet / technical compartment).

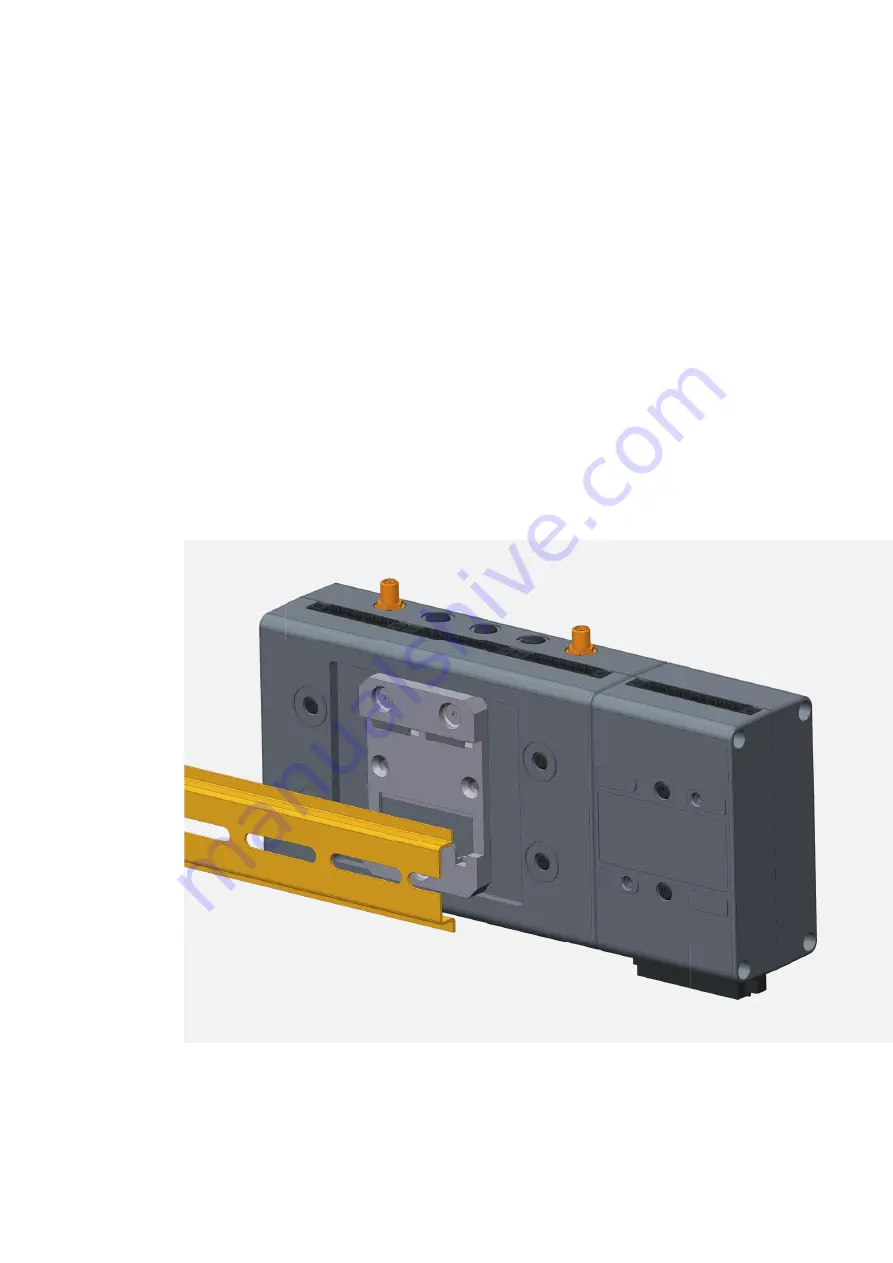
By default, Naveo®Pro Gateway comes with a DIN rail mounting clip fastened on the bottom side. 
You can use this to install the Naveo®Pro Gateway.
Optionally, you can replace the DIN Rail Mounting Clip with the Mounting bracket (optionally available). 

See also:
• 

"How to install or remove the Product from a DIN Rail" on page 29

Содержание Ability Naveo Pro GW 1.0

Страница 1: ... OPER ATION MANUAL ABB Ability Naveo Pro Gateway ...

Страница 2: ... and control the entire emergency lighting installation whilst keeping a record of all activity safely in the cloud Naveo Pro offers you a transparent and proactive way to inspect and maintain systems using only your smartphone or iPad tablet ...

Страница 3: ...ay Commissioning 033 12 Luminaire Commissioning Trademarks All trademarks registered trademarks logos trade names products names contained in this document are the property of their respective owners Intended Audience of this Document This document is intended for system integrators skilled persons with a thorough knowledge in linking together physically or functionally different computing systems...

Страница 4: ...nce 19 4 9 WEEE Compliance 19 5 Interfaces overview 20 5 1 Front sideiInterfaces overview 20 5 2 Rear side interfaces overview 20 5 3 Led indicators overview 21 6 Interfaces in detail 22 6 1 Wi Fi and Bluetooth 22 Section ref Page No 6 1 1 Wi Fi specification 22 6 1 1 1 2 4 GHz TX Output Power 22 6 1 1 2 5 GHZ TX Output Power 23 6 1 2 Bluetooth specifications 23 6 1 3 BLE specifications 23 6 1 4 A...

Страница 5: ... with sufficient training and experience in electric environment IEV 195 04 01 to enable them to perceive the risks and avoid the hazards potentially created by electricity IMPORTANT in this manual the tasks are specifically indicated that can be performed by competent or expert persons in an electrical environment All the remaining tasks described in the manual must be performed by trained person...

Страница 6: ...mmended by ABB or not has to check thoroughly that either personal safety or installation safety devices are not compromised by the installation The safety procedures for this device have been written only for qualified expert or trained persons and is not intended to be a substitute for a suitable course or experience For products provided with communication the purchaser the installer or the fin...

Страница 7: ...ore accessing the device in its location do not commence work on the device without disconnecting all circuits and checking that they are fully disconnected with a suitable measuring instrument It is the sole responsibility of the customer to provide and continuously ensure a secure connection between the product and the customer network or any other network The customer is required to establish a...

Страница 8: ...ious injury the following message is used To indicate a potentially hazardous situation which if not avoided could result in minor or moderate injury the following message is used WARNING Sign if necessary TEXT THAT EXPLAINS THE HAZARD AND THE CONSEQUENCES OF NOT AVOIDING IT Text that explains how to avoid this hazard NOTICE Sign if necessary Text that explains how to avoid damaging the supported ...

Страница 9: ...ure that the power points and plugs are in good condition before using them 6 Do not overload the power points and plugs 7 Make sure that the product maintains a proper grounding connection 8 Use a power supply that meets the product requirements and complies with the relevant standards and regulations 9 Connect power after the installation of the system has been completed 10 Never connect or disc...

Страница 10: ...ignal Positive signal in differential pair Negative signal Negative signal in differential pair 3 3 3 3 V signal level 5 5 V signal level NC No Connection Reserved Use is reserved to ABB Convention Description I Signal is an input to the system O Signal is an output from the system IO Signal may be input or output P Power and Ground A Analog signal NC No Connection Reserved Use is reserved to ABB ...

Страница 11: ...nding use cases This product features following range of connections Wi Fi Bluetooth and a fast Ethernet port The product is intended for professional use and must be installed by qualified personnel only The Naveo Pro Gateway must Be installed in a secure location only accessible to authorised personnel and not exposed to atmospheric agents Be used indoors only Be used with appropriate interconne...

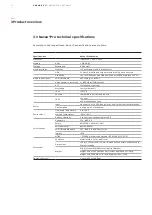
Страница 12: ...rs Temperature inside the product LEDs 1x Power 4x Customized Function Power Input Nominal 12 or 24 VDC Range 9 to 30 VDC with transient protection Consumption 4 W typical 15 W maximum Environment Operating Temperature 0 to 40 C Storage Temperature 20 to 85 C Relative Humidity 5 to 95 non condensing at 40 C Certifications Regulatory FCC ISED CE Safety EN 62368 1 2014 A11 2017 Environmental RoHS3 R...

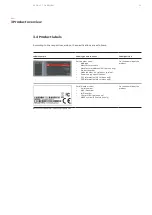
Страница 13: ...urer name Manufacturer address EU versions only Product number Model number xx product version Power supply specifications FCC information US versions only SED information NA versions only On the underside of the product Serial Number Label Serial number MAC ID number IMEI number CE mark EU versions only WEEE symbol EU versions only On the underside of the product Note These labels are for indicat...

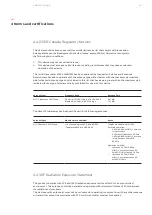
Страница 14: ...s relating to the making available on the market of radio equipment 4 3 FCC Marking Some versions of the product described in this document are FCC marked for more information see Technical Specifications on page 12 ABB is not responsible for the use of this product together with equipment for example power supplies personal computers etc that are not FCC marked and not compliant with the requirem...

Страница 15: ...xposure limits set forth for an uncontrolled environment The antenna should be installed and operated with minimum distance of 20 cm between the radiator and your body This device and its antenna s must not be co located or operating in conjunction with any other antenna or transmitter except in accordance with FCC multi transmitter product procedures The Naveo Pro Gateway has been certified with ...

Страница 16: ...uarantee that interference will not occur in a particular installation If this product does cause harmful interference to radio or television reception which can be determined by turning the product OFF and ON the user is encouraged to try to correct the interference by one or more of the following measures Reorient or relocate the receiving antenna Increase the separation between the product and ...

Страница 17: ...es Reorient or relocate the receiving antenna Increase the separation between the product and the receiver Connect the product into an outlet on a circuit different from that to which the receiver is connected Consult the dealer or an experienced radio TV technician for help 4 Norms and certifications Channel Number Frequency MHz Europe ETSI North America FCC 36 5180 Indoor Usage Only Indoor Usage...

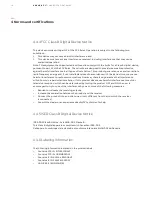
Страница 18: ...50 MHz 5250 MHz U NII 1 covering 20 MHz channels 36 40 44 48 and 40 MHz channels 38 46 Dynamic Frequency selection DFS as master or slave is not supported by the Naveo Pro Gateway 4 6 Antennas list One antenna is supplied with the Naveo Pro gateway for Bluetooth and a separate antenna can be ordered as an accessory for gateway WiFi connection if ethernet port direct connection is not being used Se...

Страница 19: ...EEE Compliance In compliance with the Directive 2012 19 EU of the European Parliament and of the Council of 4 July 2012 on waste electrical and electronic equipment WEEE the symbol on the left shown on the product or within its literature indicates separate collection for electrical and electronic equipment EEE that has been placed on the market after 2005 The product at the end of its life cycle ...

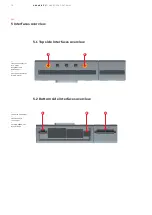
Страница 20: ...w 5 2 Bottom side interfaces overview 1 Power IN connector 2 Ethernet ETH 1 connector 3 CIS COM BUS Line for Luminaire 1 2 3 5 1 Top side interfaces overview 1 2 1 Antenna connector for 2 4GHz WiFi Bluetooth Antenna port 2 Antenna connector for 5GHz Wi Fi ...

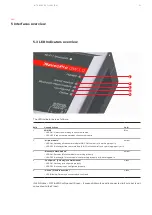
Страница 21: ...not working properly or is Amber 3 Bluetooth Mesh module LED ON Gateway BT Mesh module is working properly LED OFF Gateway BT Mesh module is not working properly or is not plugged in Amber 4 Configured Gateway is commissioned LED ON Gateway is configured properly LED OFF Gateway is not configured properly Green 5 Online Cloud connection LED Blinking Gateway is connected to the Cloud Green The LED ...

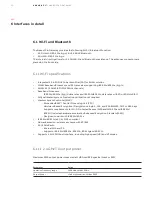
Страница 22: ...ISO Fully calibrated system Production calibration not required Medium Access Controller MAC Embedded ARM Central Processing Unit CPU Hardware Based Encryption Decryption using 64 128 and 256 Bit WEP TKIP or AES Keys Supports requirements for Wi Fi Protected Access WPA and WPA2 0 and IEEE Std 802 11i includes hardware accelerated Advanced Encryption Standard AES Designed to work with IEEE Std 802 ...

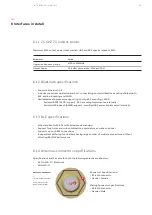
Страница 23: ...ompliant with BT and BLE dual mode standard Support for all roles and role combinations mandatory as well as optional Supports up to 10 BLE connections Independent buffering for LE allows having large number of multiple connections without affecting BR EDR performance 6 1 4 Antennas connectors specifications Specifications are the same for both the following antennas connectors 2 4 GHz Wi Fi Bluet...

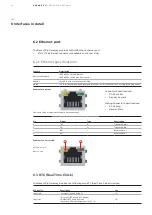
Страница 24: ...as integrated magnetics Pin Signal Type Description 1 TX O Transmit Data 2 TX O Transmit Data 3 RX I Receive Data 6 RX I Receive Data Connector Specifications RJ 45 socket Gender Female Mating Connector Specifications RJ 45 plug Gender Male Connector Pinout pins not listed are not connected Ethernet connector Ethernet connector LED A Yellow Activity B Green Link RTC device Description Use dev rtc0...

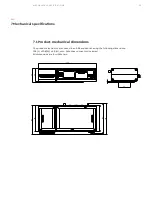
Страница 25: ...fications 4 198 44 100 102 90 90 108 48 40 7 1 Product mechanical dimensions The product electronics are housed in an ABS enclosure having the following dimensions 198 L x 108 W x 48 H mm Antennas connectors included All dimensions are in millimeters ...

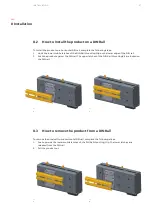
Страница 26: ...ed location accessible to authorized personnel only for example in a cabinet technical compartment By default Naveo Pro Gateway comes with a DIN rail mounting clip fastened on the bottom side You can use this to install the Naveo Pro Gateway Optionally you can replace the DIN Rail Mounting Clip with the Mounting bracket optionally available See also How to install or remove the Product from a DIN ...

Страница 27: ...e of the DIN rail 2 Push the product against the DIN rail The upper latches of the DIN Rail Mounting Kit are locked on the DIN rail 8 3 How to remove the product from a DIN Rail To remove the product from a horizontal DIN rail complete the following steps 1 Push upwards the lower mobile latches of the DIN Rail Mounting Clip The lower latches are released from the DIN rail 2 Pull the product out 1 ...

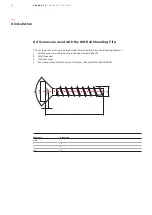
Страница 28: ... 3 screws that hold in place the DIN Rail Mounting Clip have the following features 1 Phillips type H cross flat countersunk head screw KA35x12 2 Fully threaded 3 Stainless steel 4 Example of Manufacturer and Part Number Bossard BN 13580 2000997 Reference Value mm ΦDK 7 3 T 1 3 L 12 ΦD 3 5 L T 90 ØDK ØD ...

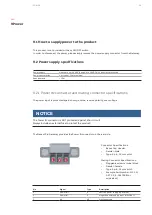
Страница 29: ...Power supply Nominal 12 or 24 VDC Range 9 to 30 VDC with transient protection Power consumption 4 W typical 15 W maximum Peak demand 15 W NOTICE The Power IN connector is NOT protected against short circuit Always include an external fuse to protect the product Connector Specifications Base strip Header Gender Male Type 3 pin 3 5 mm pitch Mating Connector Specifications Pluggable screw terminal bl...

Страница 30: ...s of life and or damage the equipment or other property To avoid injuries and safely supply power to the product complete the following steps 1 Observe all the instructions for safety installation and operation 2 Make sure your hands are dry 3 Make sure that all the cables used Are in good condition before using them Meet the product requirements and comply with the relevant standards and regulati...

Страница 31: ...ble and not damaged 3 Verify that all the locking parts for example screws bolts nuts are correctly fastened 10 4 How to clean the product To clean the product complete the following steps 1 Never use detergents aerosol sprays solvents or abrasive sponges 2 To remove dust from the case of the product use a dry lint free cloth 3 To remove the dirt use water based non flammable cleaner products 10 M...

Страница 32: ...ice files and overlay into Google Maps in the Map view as you install 7 This will add your luminaires to the organisation and to a precise position on the building plan that can be located by Google Maps 8 Select the Gateway from the dropdown 11 2 Existing installations with a Naveo DCP 1 Download and open the NaveoPro app on your phone 2 Create an organisation name for the building in the App 3 W...

Страница 33: ...33 NOTES Notes ...

Страница 34: ...ed particulars shall prevail ABB AG does not accept any responsibility whatsoever for potential errors or possible lack of information in this document We reserve all rights in this document and in the subject matter and illustrations contained therein Any reproduction disclosure to third parties or utilisation of its contents in whole or in parts is forbidden without prior written consent of ABB ...

Страница 35: ......
Страница 36: ...Way Foleshill Enterprise Park Coventry West Midlands CV6 5NX Sales Tel 44 0 333 999 9900 Sales Fax 44 0 333 999 9901 E Mail lv enquiries gb abb com new abb com low voltage Copyright 2020 ABB All rights reserved Specifications subject to change without notice ...

Отзывы: