background image

18

AastraLink RP Phone User Guide

Getting Started

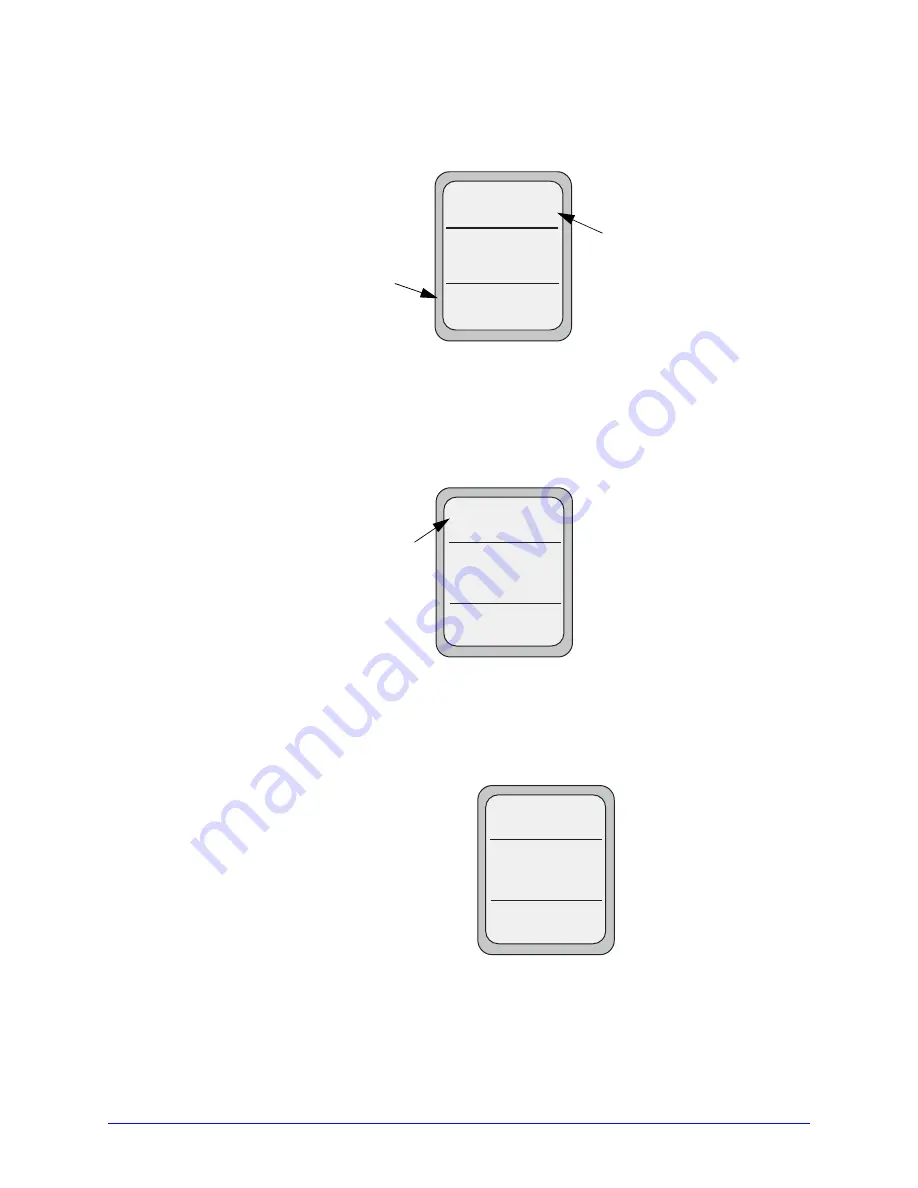
Idle Screen With Softkeys Configured 6757i CT RP

If you or your System Administrator have configured softkey functions on your 
phone, the labels for those functions display on the screen. For example, in the 
following illustration, "

Home

" was configured as a speeddial key on the bottom set of 

softkeys and "

Do Not Disturb

" (DND) was configured on the top set of softkeys. 

You can configure up to 10 functions on the top set of softkeys. If you have additional 
functions configured on the top softkeys that do not display on the main idle screen, 
"

More

" displays at the top right of the screen. Pressing the 

More

 softkey toggles 

between the first screen and a second screen of softkeys configured on your phone. 

Off-Hook Screen 6757i CT RP

When you pickup the handset, the screen displays as follows::

This screen displays the following default softkeys located on the bottom left of the 
screen:

More

 softkey also displays at the bottom right of the screen if you have configured 

softkeys other than the default softkeys. 

S

ervices

Dir
Callers

Icom

L1

John Smith

Sat  Jan 1  12:18am

Home

DND

More

Speeddial Softkey

"Do Not Disturb"

Softkey

Idle Screen

L1

John Smith

Sat  Jan 1  12:18am

Home

More

HR
Support

Speeddial Softkeys

Idle Screen

• Dial

• Conference

• Transfer

S

ervices

Dir
Callers

Icom

L1

John Smith

Dial
Conf
Xfer

More

>

Содержание Link RP CT Cordless

Страница 1: ...3 6757i CT RP 6753i RP CT Cordless 6751i RP Go odbye Servi ces Ho ld Redia l De lete Save Speaker Mute Go odbye Ho ld Redia l Mute Op tions Line 1 Line 2 Mute Line 1 Line 2 Line 3 Go odbye Ho ld Redia...

Страница 2: ......

Страница 3: ...bute transcribe translate or reduce to electronic medium or machine readable form or language derive source code without the express written consent of the Seller and its Suppliers or disseminate or o...

Страница 4: ......

Страница 5: ...Assistant 29 Removing Assistant 29 Phone Options via the Aastra Web UI 30 Finding Your Phone s IP Address 30 Accessing the Aastra Web UI 30 Basic Phone Features 34 Dialing a Number 34 Using Handsfree...

Страница 6: ...ssages 86 Handset Keys 86 Multifunction Handset LED Indicator 87 Battery Charging 88 Volume Control 88 Directory List on the Cordless Handset 89 Callers List on the Cordless Handset 91 Making Calls fr...

Страница 7: ...ateway Installation Guide AastraLink RP Solution Quick Start Guide Aastra 6751i RP 6753i RP and 6757i CT RP Phone Installation Guides AastraLink RP Administrator Guide The AastraLink RP 500 Base Unit...

Страница 8: ...Administrator Guide describes how to configure the features of the AastraLink RP Solution including the administrator level settings on the phones These guides along with release notes system updates...

Страница 9: ...of a regular business phone allowing you to make and receive calls transfer conference and more using your AastraLink RP Solution Aastra 6751i RP Features 3 line LCD screen 1 call appearance line Supp...

Страница 10: ...to 8 call appearance lines Full duplex speakerphone for handsfree calls Headset support modular connector Expansion modules optional attach to the right side of the phone providing 36 additional soft...

Страница 11: ...ogrammable keys at top of screen 6 context sensitive keys at bottom of screen 3 call appearance lines with LEDs Supports up to 9 call lines Full duplex speakerphone for handsfree calls Headset support...

Страница 12: ...Guide Phone Models Phone Features 6757i CT RP Cordless Handset 5 line backlit display screen 2 multi functional softkeys Programmable function key supports up to 14 functions Vibration Alerter Headse...

Страница 13: ...ime you restart your phone The phone displays the following startup screens OR Note Do not unplug or remove power to the phone while it is checking or installing firmware and configuration information...

Страница 14: ...is not in use The second display line displays the following temporary messages if an event occurs No Service DHCP Failed Restarting New IP Obtained Network Disconnected Connected Note Since the Netwo...

Страница 15: ...e wall jack The phone should automatically detect when the connection is reconnected and displays the Network Connected prompt temporarily If changes have been made to your phone settings using the Mi...

Страница 16: ...installing firmware and configuration information When the configuration update is complete the phone displays the following screens ending with the Idle screen The 6757i CT RP phone is now ready to b...

Страница 17: ...creen lists your name SIP screen name and day date and time In the above screen the L1 indicates John Smith is configured on Line 1 The idle screen also displays the following default softkeys located...

Страница 18: ...dle screen More displays at the top right of the screen Pressing the More softkey toggles between the first screen and a second screen of softkeys configured on your phone Off Hook Screen 6757i CT RP...

Страница 19: ...one should automatically detect when it is reconnected and displays the Network Connected prompt for a few seconds If not the phone may have been disconnected by the System Administrator using the Mic...

Страница 20: ...All models Redials up to 100 previously dialed numbers Pressing the Redial key twice simultaneously redials the last dialed number Volume control key All models Adjusts the volume for the handset head...

Страница 21: ...buttons also let you scroll through menu selections such as the Options List Pressing the LEFT and RIGHT arrow keys lets you view the different line call appearances While in the Options List these ke...

Страница 22: ...another number 6 CONFERENCE Begins a conference call with the active call Note Keys 1 and 2 Save and Delete are preset and cannot be changed The other keys are programmable and can be changed to perfo...

Страница 23: ...llowing 1 Locate the AastraLink RP system CD which was supplied with the AastraLink RP 500 base unit 2 Insert the CD into the CD drive of your computer Note If the Autoinstall window does not open use...

Страница 24: ...n one base unit to choose from contact your System Administrator to determine which is correct 3 Enter the default password 9999 and click Log On Note The Assistant password is also used for voicemail...

Страница 25: ...itional phone settings See the following sections for more details Configuring Voicemail on page 40 Forwarding Calls on page 42 Call Notification on page 48 Contacts List in Assistant on page 44 Recor...

Страница 26: ...user to edit list opens 3 Click the name of the user that you want to edit and then click OK 4 Click the Identification tab if it is not displayed 5 Click the Record Name button The Specify Spoken Nam...

Страница 27: ...played 4 Click the Record Name button The Specify Spoken Name dialog appears 5 Click the Use audio recorded on a phone button 6 Click the Record New button The Record Audio Using a Phone window opens...

Страница 28: ...s not exceed 10 seconds To upload a prerecorded sound file to the base unit do the following 1 Click the Phone System button 2 In the Tasks pane under Users click Edit user Select the name of the user...

Страница 29: ...one System Administrator for a newer version of the Assistant software Note When upgrading to a newer version of Assistant your existing settings are maintained To upgrade your Assistant software do t...

Страница 30: ...e following procedure to find your phone s IP address 1 Press the key and select Options List from the menu for model 6751i RP or press the key for models 6753i RP and 6757i CT RP 2 Select Phone Statu...

Страница 31: ...program select Settings Phone Settings and proceed to step 2 below Using Your Web Browser 1 Open your web browser enter the phone s IP address or host name into the address field and press Enter The f...

Страница 32: ...e User Guide Phone Options via the Aastra Web UI The Network Status window displays for the IP phone you are accessing as shown here for model 6751i RP 3 You can logout of the Aastra Web UI at any tim...

Страница 33: ...he phone and reset the user password Keypad Speeddial model 6751i RP Allows you to assign a speeddial number to a specific digit on the phone s keypad for speed dialing purposes See Speeddial Keys 675...

Страница 34: ...oing one of the following Lifting the handset Pressing Pressing Pressing a line call appearance button 2 At the dial tone enter the number you wish to call When your party picks up a timer appears on...

Страница 35: ...Your phone must be in either the Speaker or Speaker Headset audio mode You can set your desired audio mode using the Headset Settings option from the Options list For more information see the section...

Страница 36: ...dset audio mode by accessing the Options list under option Headset Settings 2 Plug the headset into the jack Press the key to obtain a dial tone or to answer an incoming call Note Depending on the aud...

Страница 37: ...d OFF The Auto Answer field is enabled by default turned ON 3 To disable the Microphone Mute field turn ON uncheck the check box 4 To disable the Auto Answer field turn OFF uncheck the check box 5 Cli...

Страница 38: ...ialed number and use 25 to scroll through the list to view the other numbers 2 To dial the displayed number do one of the following Press again Press or Lift the handset Press any line key Note Press...

Страница 39: ...appearance button for the incoming call Note For models 6753i RP and 6757i CT RP the audio mode setting you have selected in the options list under Headset Settings determines if the call goes to hand...

Страница 40: ...il can be retrieved from your phone extension from other phones in the AastraLink RP system or from outside of the office Configuring Voicemail You can specify how you want to retrieve your voice mess...

Страница 41: ...oicemail for the primary extension number of the phone that you re using If you want to check voicemail for another extension number press the star key and then enter the extension number using the ke...

Страница 42: ...one are stored on the base unit for up to 30 days from the time a caller leaves you a voice message not from the time you save a voice message Voicemail files older than 15 days may be deleted if the...

Страница 43: ...own call forwarding options 6 Click OK in the User Properties dialog box Call Transfer You transfer calls by pressing the Response Point button on your phone and using voice dialing to say the name o...

Страница 44: ...oint button and say Retrieve and then say the call number For example say Retrieve call 1 Note If you re retrieving a call from the same phone where you parked it and only one call is parked you can s...

Страница 45: ...import contacts from a contact store using Assistant do the following 1 On the Settings menu click Contacts The Contacts tab opens 2 Click Import and the Import Contacts dialog appears 3 Follow the st...

Страница 46: ...e storage space on the base unit has reached full capacity In this case contact System Administrator for assistance To add contacts to the Contacts list in Assistant do the following 1 On the Settings...

Страница 47: ...if the limit for the phone system has been reached Likewise if you want to add contacts but your personal limit of 1100 has been reached you must delete contacts that you use infrequently before addi...

Страница 48: ...Windows XP or Windows Contacts for Windows Vista if any You can also set the incoming call notification on your computer to play a sound when a new call appears To set your call notifications using As...

Страница 49: ...er of the name for example press 7 for the letter P Continue to press the dial pad number to access other letters on the same key for example press 7 three times for Ron If there are multiple entries...

Страница 50: ...he Redial List button 2 From the Callers List or Redial List scroll through the list to find the name and number you want to save to your Directory 3 Press the Save key 4 Press the Directory Key or fo...

Страница 51: ...en letters press 4 4 To backspace and erase a mistake press 3 or press the Delete Key 5 Press the Save Key to finish For model 6751i RP do the following 1 Press the Services Key and scroll to the Dire...

Страница 52: ...ers once you have saved the number If you don t want to change the number or name just press the Directory Key or the Goodbye Key at any time to exit 4 Press the Save Key to finish Deleting Items from...

Страница 53: ...Callers List Your telephone logs the number and name if available of the caller when they last called and the number of times they tried to reach you When the Callers List is full the oldest call reco...

Страница 54: ...plan to call the number and need to add a prefix To edit an entry in the Callers List before dialling the number do the following 1 Press the Callers List Key or for model 6751i RP press the Services...

Страница 55: ...t 2 Press 25 to find the item you want to delete 3 Press the Delete Key 4 Press the Delete Key again at the prompt to erase the item Deleting all Callers List entries Use the following procedure to de...

Страница 56: ...logon to the Aastra Web UI 2 Click Directory The Directory window opens 3 In the Callers List field click A File Download message displays 4 Click OK 5 Enter the location on your computer where you w...

Страница 57: ...n the IP phones are US Default also used in Canada United Kingdom Italy Germany France Europe generic tones Australia When you configure the country s tone set the country specific tone is heard on th...

Страница 58: ...6751i RP 2 Select Tones 3 Select Set Ring Tone 4 Select the type of ring tone Tone 1 through Tone 5 or Silent 5 Select Set and then press 2 6 Select Tone Set 7 Select the country for which you want t...

Страница 59: ...line configuration 1 In the Ring Tone section select a line for which you want to set ring tone 2 Select a value from the LineN field Note See the Ring Tone Sets on page 57 for valid values For both g...

Страница 60: ...phone settings Note Not all custom settings apply to all phone models Note The Network Settings and SIP Settings options are administrator level functions only and are not accessible by the user Under...

Страница 61: ...l line keys for a total of 9 lines The system Administrator must assign the additional line to your phone using the Administrator software and you must configure the line through the Aastra Web UI The...

Страница 62: ...ilable on models 6753i RP and 6757i CT RP When you use the Conference key to initiate a conference call the following screen displays In a conference call the call timer moves to the left You use the...

Страница 63: ...wing 1 Begin with active calls on two different lines 2 Press the Conference key A new line opens 3 Press the line key of the call you wish to conference with 4 Press the Conference key again The two...

Страница 64: ...key on the keypad for 3 seconds A screen displays with the prompt Enter number 2 Enter a phone number or extension to assign to that speeddial key The following example illustrates the screen display...

Страница 65: ...numbers on each keypad key entry 6 Press the Save key to finish Creating a Speeddial Key Using the Aastra Web UI To set speeddial keys using the Aastra Web UI do the following 1 From within the Assist...

Страница 66: ...up to 20 programmable functions Note Additional programmable keys are available through expansion modules See Model M670i and M675i Expansion Modules on page 75 You can program these softkeys for call...

Страница 67: ...Features 6757i CT RP Bottom Softkeys 6753i RP Programmable Keys There are 2 preset and 4 programmable keys on the 6753i RP phone located to the left of the paper label Save Key Delete Key Programmable...

Страница 68: ...ed for do not disturb on the phone This option is do not disturb in the Aastra Web UI XML Indicates the programmable key is configured to accept an XML application for accessing customized XML service...

Страница 69: ...and the cursor automatically advances To insert a space between letters press 4 To backspace and erase a mistake press 3 or the Delete key You can save up to 16 letters and numbers on each programmab...

Страница 70: ...dialing 6 In the Line field select a line for which to apply this programmable hard key Valid values are 1 through 9 and global 7 Click to save your changes 8 Click Operation Reset 9 In the Restart P...

Страница 71: ...k to save your changes 6 Click Operation Reset 7 In the Restart Phone field click to restart the IP phone Setting a Flash Key If you have a model 6753i RP or 6757i CT RP phone you can set a programmab...

Страница 72: ...nd logon to the Aastra Web UI 2 Click Programmable Keys for model 6753i RP or Softkeys and XML for model 6757i CT RP 3 Select the key to set as an XML key 4 In the Type field select XML to apply to th...

Страница 73: ...he previous entry 3 At the Enter Number prompt use the dial pad key to enter the number 4 Press the Save key 5 At the Enter Name prompt use the dial pad keys to select the letters Continue to press th...

Страница 74: ...our changes 6 Click Operation Reset 7 In the Restart Phone field click to restart the IP phone Deleting a Programmable Key To delete a programmable key function using the Aastra Web UI do the followin...

Страница 75: ...additional softkeys You can configure the softkeys using the Aastra Web UI as you do for the programmable keys on the phone The M670i provides 36 additional softkeys on a AastraLink RP Phone The M675i...

Страница 76: ...port The AastraLink RP phones support several different languages You can have the IP Phone UI and the Aastra Web UI display a specific language as required When you set the language to use all of the...

Страница 77: ...ge you select displays a check mark indicating this is the current language for the IP Phone UI The change is dynamic When you exit the Options Menu the phone displays all menu items in the language y...

Страница 78: ...for selection The available languages are dependant on the language packs currently loaded to the IP phone by your System Administrator English is the default language and cannot be changed or removed...

Страница 79: ...hat you can use for handling calls 6757i CT RP Handset Key Descriptions Function Function Description 1 Receiver 2 Volume key During Ringing Adjusts ringer volume During a call Adjusts receiver volume...

Страница 80: ...n be short cutted by pressing the digits within a one second time span Pressing the y key quits the Menu and return to the idle mode or call mode Intercom The 6757i CT RP supports intercom function be...

Страница 81: ...i CT RP handset A checkmark beside the ring tone number indicates the currently selected ring tone For more information about changing ring tones on the handset see Using Your 6757i CT RP Cordless Han...

Страница 82: ...er to lock the keypad keys This prevents accidental activation of the phone To lock the keys from the key lock option page Press Change softkey to turn Key lock ON or OFF The screen displays Key lock...

Страница 83: ...nterface applies the functions to all paired handsets Key Function Description Default Key Line 1 Line 1 key Selects line one Handset Key 1 Line 2 Line 2 key Selects line two Handset Key 2 Line 3 Line...

Страница 84: ...ricted to intercom calls only If all 12 programmable functions have been programmed to None the user is presented with a List empty message when the feature key is pressed For security reasons the use...

Страница 85: ...elect the function for that handset key from the Type field 5 Click to save the function you selected to the handset key The key programming information is sent to the 6757i CT RP Base Station and to...

Страница 86: ...short ring burst flash ring b Battery Charge State 4 bars for battery full and the battery icon flashes when charging m Reception Radio Link On Within Range Ready for use OFF Out of range no radio li...

Страница 87: ...nnects you to the voice activated dialing features of the AastraLink RP Solution Use the 6757i CT RP Handset Response Point key just as you would the 6757i CT RP Base Unit Response Point key For a lis...

Страница 88: ...d on the charger stand The battery icon will not flash and the handset does not charge every time it is placed on the stand If a defective battery is replaced then the battery Icon is not identified u...

Страница 89: ...llow the user to enter pause characters the pause key is the 0 digit key in alphanumeric editing mode Characters appear in the following order 0 p 1 Key In the alphanumeric mode the 1 digit key access...

Страница 90: ...he soft key from the idle mode as shown 2 Press the Add soft key 3 Enter the Number Address information Please refer to Entering Characters and Numbers on page 89 4 Press Save to advance to the name e...

Страница 91: ...mber of the caller and the time the call was received Also shown are two soft keys Options and Line Options allow the user to save to the handset Directory or delete the record Dialing from Callers Li...

Страница 92: ...th the base as extensions to a call This is just like an analog system with extension phones going off hook to join a call in progress However because this system is actually intended for use in an en...

Страница 93: ...ess caller is on an external call he can press the Public feature key to make the call public At that point up to three other handsets can join in on the call If any of those joining handsets presses...

Страница 94: ...e paired to a single 6757i CT RP base Note When performing the handset pairing it is recommended that the handset be within 3 feet of the 6757i CT RP base In order to pair your handset to a base stati...

Страница 95: ...eing paired is within close proximity to the base It is recommended that the handset be within 3 feet from the 6757i CT RP base Note It is recommended that both steps 6 and 7 be executed at the same t...

Страница 96: ...g removed is out of range from the base the unpairing is only performed local to the device where the removal process was initiated If the unpairing is only successful from the local device the unpair...

Страница 97: ...e of unpairing one of the following screen is displayed on the base Failed Handset Removal Successful Handset Removal 5 If required on the 6757i CT RP cordless handset press Select Done Handset Pairin...

Страница 98: ...softkey for Remove Upon success or failure of unpairing one of the following screen is displayed on the handset Successful Removal Failed Removal Note Unpairing of the handset returns it to factory de...

Страница 99: ...bers in your area The following table describes the default emergency numbers on the IP phones You can set the emergency dial plan using the Aastra Web UI To specify the numbers to use on your phone f...

Страница 100: ...Inline power over Ethernet you can obtain an additional accessory the a PoE inline power injector to provide power over Ethernet locally to your phone See the Aastra Phone Model Installation Guide fo...

Страница 101: ...sed by one of the following Your voicemail settings are not configured properly or your e mail address was entered incorrectly Verify that the Receive messages as attachments to e mail checkbox is sel...

Страница 102: ...act calls you For example the phone number for the contact may not have the area code The phone number entered for the contact may conflict with someone else s bypass entry for the same number The pho...

Страница 103: ...r consequential damages including but not limited to loss damage or expense directly or indirectly arising from the customers use of or inability to use this telephone either separately or in combinat...

Страница 104: ......

Страница 105: ...AastraLink RP phone models 9 Assistant Call Forwarding tab 42 contact list 44 Contacts tab 45 installing 23 Properties tab 25 starting 23 uninstalling 29 using 23 voicemail 40 Voicemail tab 40 B batt...

Страница 106: ...programming 84 features 12 features key list 79 finding IP address 83 icons 86 idle mode 85 intercom 80 key descriptions 79 key lock 82 key panel 79 language 81 LED indicator 87 making calls 92 menu...

Страница 107: ...assword Aastra Web UI 31 Assistant 24 41 phone directory about 49 accessing 49 deleting items 52 editing 52 saving names and numbers 49 phone features 3 way calling 62 advanced 60 basic 34 call park 4...

Страница 108: ...numbers 49 setting line keys 61 speakerphone using 35 speed dial 68 speeddial prefix for 63 setting 63 starting up the phone 13 15 system requirements 7 V voicemail 39 40 configuring 40 indication 41...

Страница 109: ......

Страница 110: ...e Troubleshooting section and still have problems please visit our Web site at www aastra com or call 1 800 574 1611 for technical assistance Microsoft Response Point is a trademark of Microsoft Corpo...

Отзывы: