


14 Model 57i IP Phone Installation Guide
Installation and Setup
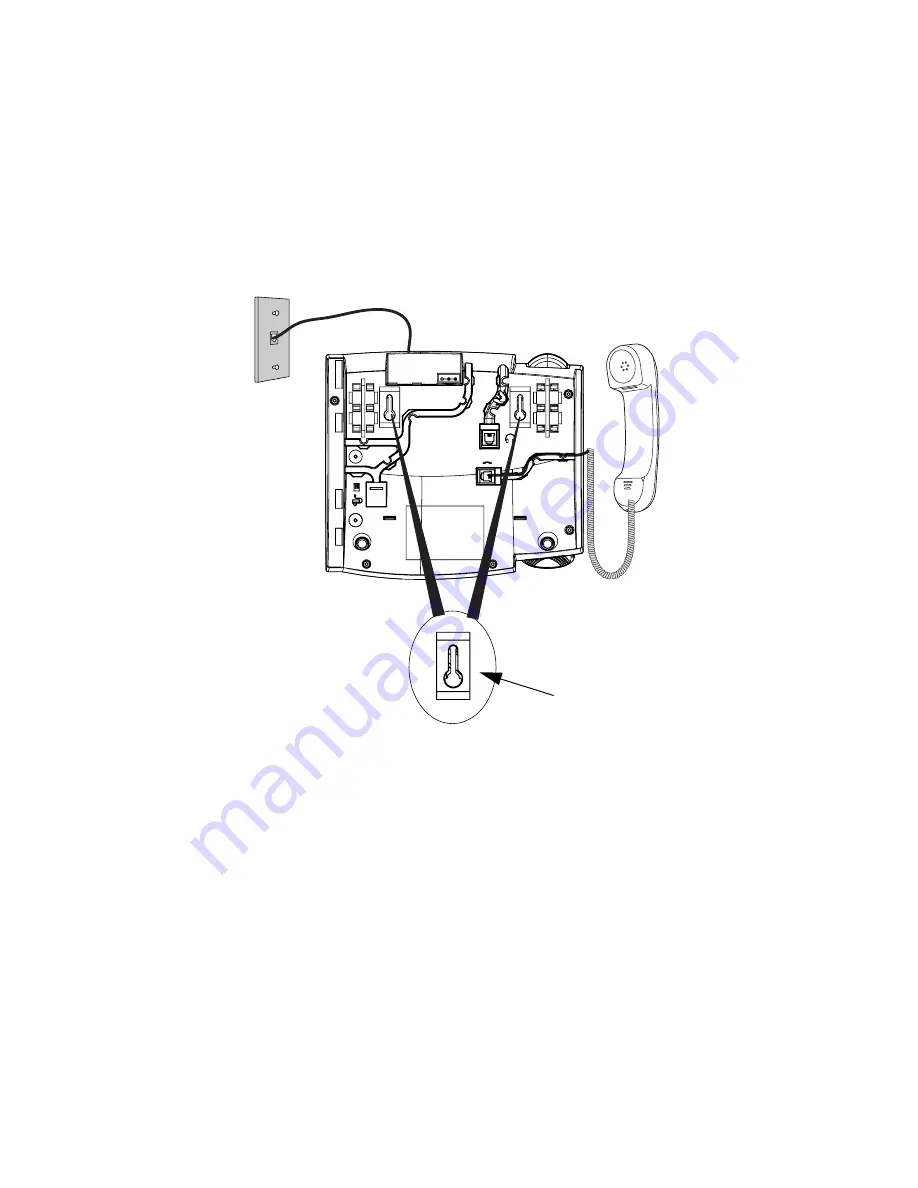
Install on the Wall
The 57i IP phone has two pre-drilled wall mounting holes on the back of
the phone. Using the provided wall mount drilling template, locate and
mark the position for the mounting screws on the wall. Depending on the
wall type, you may need to use wall anchors. Both the screws and wall
anchors are included with your phone.
Place the wall mount holes on the phone over the screw heads on the wall
and pull down to lock the phone in.
Note: You may wish to purchase a short Ethernet cable from a local supplier for a
wall installation. Also, if 802.3af compliant in-line power is not provided on
your network, and you are installing the 57i on a wall using a PoE in-line
power injector, you may also wish to use an equivalent flat Ethernet cable
rather than the one provided.
Wall Mount Holes


