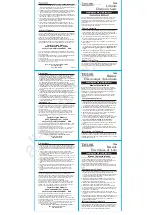
background image

 18

7. CALIBRATION 


This function adjusts the scale for accurate weighing. 
Perform calibration in the following cases. 


  When the scale is first used. 

  When the scale has been moved. 

  When the ambient environment 

has changed.


  For regular calibration.


The CAL switch 
is inside 


7-1. Preparation 



 Prepare a calibration weight (conforming to OIML class F1) 

before starting calibration. 



 A calibration weight is not required for performing zero 

calibration only. 



 When a calibration weight is not available, the gravity 

acceleration correction can be performed to compensate the 
scale. 


1. Turn the power ON and warm up the scale for at least 

30 minutes with nothing on the pan. 


2. Press and hold the CAL switch until 


Cal


appears, and release the switch. 

 
3. 

 Cal 0 

  appears. 


To change the calibration weight value, proceed to 
Step 4. 
 
To use the calibration weight value stored in memory or 
perform zero calibration only, proceed to Step 5. 
 

4. Press the  PRINT  key. The display shows the 

calibration weight value in “grams” that is stored in 
memory. Use the following keys to change the value. 


 MODE   key 

To select the digit to change the 
value. The selected digit blinks. 


 RE-ZERO  key  To set the value of the selected 

digit. 


 PRINT  key 

To store the value and return to 
Step 3. 




 Use a calibration weight of more than 2/3 of the 

weighing capacity (of the R2 range for the EK-30KL). 



 The calibration weight value is stored in memory 

even after the power is turned OFF. 

Loosen the screws 
to remove the cover

Press and hold 
the CAL switch

Release the CAL 
switch 

Set using the
relevant keys


Содержание EK-L Series

Страница 1: ...EK L Series Precision Bench Scale EK 15KL EK 30KL INSTRUCTION MANUAL 1WMPD4002971...

Страница 2: ...nt has been tested and has been found to comply with the limits of Class A computing device pursuant to Subpart J of Part 15 of FCC rules These rules are designed to provide reasonable protection agai...

Страница 3: ...mode pcs 13 5 7 Percent mode 15 6 COMPARATOR 16 6 1 Setting example 16 7 CALIBRATION 18 7 1 Preparation 18 7 2 Zero calibration 19 7 3 Calibration using a calibration weight 19 7 4 Gravity accelerati...

Страница 4: ...ID number 30 10 2 GLP report 31 11 MAINTENANCE 35 11 1 Notes on maintenance 35 11 2 Error codes 35 12 SPECIFICATIONS 37 12 1 Specifications 37 12 2 Other weighing units 37 12 3 Option 37 12 4 External...

Страница 5: ...ator function The backlight LCD provides ease of use even in dark locations RS 232C serial interface is equipped as standard for connection to a printer or personal computer Using the serial interface...

Страница 6: ...rity slot Battery cover AC adapter jack RS232C terminal A security cable is not provided and must be prepared by the user Grounding terminal Leveling foot Calibration switch cover The CALswitch is ins...

Страница 7: ...r Turns on or blinks when the ACAI function is being performed Does not turn on when the ACAI function is disabled Weighing units The weighing units stored in memory turn on Battery indicator Changes...

Страница 8: ...stall the scale on a solid and level surface Do not install the scale in direct sunlight Do not install the scale near heaters or air conditioners Use a stable AC power source Do not install the scale...

Страница 9: ...located on the underside of the display Use a stable power source Use the AC adapter provided with the scale AC adapter Using the sealed lead acid battery A commercially available sealed lead acid bat...

Страница 10: ...adapter to an electrical outlet Insert the AC adapter plug into the AC adapter jack 3 Recharging starts automatically Recharge the battery periodically even if the scale is not used for a long period...

Страница 11: ...the NET and ZERO indicators turn on 2 Press the ON OFF key to turn the power OFF Auto power off function The auto power off function automatically turns the power OFF when zero is displayed for approx...

Страница 12: ...its available is the same as above while skipping the units that are not available It is possible to store the weighing units that will be actually used from the units available It is also possible to...

Страница 13: ...within 2 of the weighing capacity around the power on zero point The ZERO indicator turns on When the weight value exceeds 2 of the weighing capacity the scale is tared to zero and the ZERO and NET i...

Страница 14: ...or R1 or R2 turns on to indicate which range the weight value belongs to When the weight value exceeds the maximum value of the R1 range the weighing range changes automatically to the R2 range When t...

Страница 15: ...er of samples 5 10 25 50 or 100 4 When using a tare container place the container on the weighing pan and press the RE ZERO key Confirm that the right side of the number of samples shows zero 5 Place...

Страница 16: ...improves the accuracy of the unit mass by increasing the number of samples as the counting process proceeds 8 After setting the unit mass in Step 6 add a few more samples on the pan Then the ACAI ind...

Страница 17: ...100 0 4 Place the sample to be set as the 100 reference mass on the pan 5 Press the MODE key to store the 100 reference mass Remove the sample When the 100 reference mass is too light lo appears in t...

Страница 18: ...alues are common to each of the weighing counting and percent modes An example is shown below Upper limit value 001010 101 0 g 1010 pcs 101 0 Lower limit value 000990 99 0 g 990 pcs 99 0 6 1 Setting e...

Страница 19: ...o appears after end 7 With Cp lo displayed press the PRINT key Enter the lower limit value using the following keys MODE key To select the digit to change the value The selected digit blinks RE ZERO k...

Страница 20: ...old the CAL switch until Cal appears and release the switch 3 Cal 0 appears To change the calibration weight value proceed to Step 4 To use the calibration weight value stored in memory or perform zer...

Страница 21: ...and finish the procedure press the ON OFF key to turn the power OFF or press the CAL switch 7 3 Calibration using a calibration weight 6 Place the calibration weight with the same value as displayed o...

Страница 22: ...the scale will be used 1 In the weighing mode press and hold the CAL switch until Cal appears and release the switch 2 Cal 0 appears 3 Press the MODE key The display shows the gravity acceleration val...

Страница 23: ...ores the settings per class and goes to the next class 1RE ZERO key Selects a parameter 8 2 Entering the function setting mode With the power turned OFF press and hold the RE ZERO key and press the ON...

Страница 24: ...nction setting mode func appears 2 Press the PRINT key to display poff 0 3 Press the RE ZERO key to display poff 1 4 Press the MODE key several times to display aCai 1 5 Press the RE ZERO key to displ...

Страница 25: ...key several times to display Unit 3 Press the PRINT key 4 Press the MODE key to change a weighing unit 5 Press the RE ZERO key to select the weighing unit The STABLE indicator turns on when the weigh...

Страница 26: ...ift 0 Dot pnt Decimal point type 1 Comma Selects a decimal point type 0 No comparison Comparator function disabled 1 Compares all data 2 Compares all stable data 3 Compares plus data except those near...

Страница 27: ...ndicator turns on 2 Turns off 10 seconds after the STABLE indicator turns on 3 Turns off 30 seconds after the STABLE indicator turns on 4 Turns off 60 seconds after the STABLE indicator turns on func...

Страница 28: ...scale using commands from a personal computer Set the parameters of the data output mode prt and data format bps and btpr as necessary Windows Communication Tools Software WinCT to communicate with a...

Страница 29: ...N C 5 GND Signal ground 6 DSR Data set ready 7 RTS Request to send 8 CTS Clear to send 9 Used internally Signal names of the scale side are the same as the DTE side with TxD and RxD reversed Scale DCE...

Страница 30: ...g a decimal point and a polarity sign Eight units are available g Weight data gram k g Weight data kilogram P C Counting data pcs Percentage data o z Weight data decimal ounce l b Weight data decimal...

Страница 31: ...than 4d of the R1 range for the EK 30KL The next output will be performed after the weight data returns below 4d Auto print mode B Set the data output mode of the function list to prt 3 The scale outp...

Страница 32: ...r the function setting mode func appears 2 Press the MODE key several times to display id 3 Press the PRINT key Enter the ID number using the following keys MODE key To select the digit to change the...

Страница 33: ...e function setting info 2 and pUse 0 Calibration report 1 Perform calibration according to 7 3 Calibration using a calibration weight 2 end appears when the calibration is complete 3 glp appears and c...

Страница 34: ...If necessary change the value of the calibration weight as described in Step 4 of 7 1 Preparation 4 With nothing on the pan press the RE ZERO key The zero point is measured and the measured value with...

Страница 35: ...orded as the GLP report Title block and End block are added at the beginning and at the end of a group of weight values Title block 1 In the weighing mode press and hold the PRINT key until start appe...

Страница 36: ...CRLF End block 3 Press and hold the PRINT key until recend appears and release the key The scale outputs the End block 4 The scale returns to the weighing mode after end AD 8121 format info 1 General...

Страница 37: ...tected an excessive upward force Check for anything trapped under the edge of the weighing pan Unit mass 100 reference mass error The unit mass 100 reference mass is too light in the counting percent...

Страница 38: ...AC adapter error The output voltage of the AC adapter is too high Check if the AC adapter is correct for your local voltage and receptacle type Stability error The weight value is not stable and the s...

Страница 39: ...non condensing Power supply AC adapter or optional lead acid battery Battery operating hours Approximately 100 hours at 25 C with backlight off Weighing pan size 300 mm x 210 mm Mass approximately 4 2...

Страница 40: ...38 12 4 External dimensions Unit mm...

Страница 41: ...s2 Ottawa Paris 9 807 m s2 9 810 m s2 Copenhagen 9 816 m s2 Rio de Janeiro 9 788 m s2 Cyprus 9 797 m s2 Rome 9 803 m s2 Frankfurt 9 811 m s2 San Francisco 9 800 m s2 Glasgow Havana 9 816 m s2 9 788 m...

Страница 42: ...40 World map...

Страница 43: ...13...

Страница 44: ...50420 Fax 44 1235 550485 A D AUSTRALASIA PTY LTD 32 Dew Street Thebarton South Australia 5031 AUSTRALIA Telephone 61 8 8301 8100 Fax 61 8 8352 7409 A D KOREA Limited 6 33 817 150 749 817 Manhattan Bld...

Отзывы: