9
3-5. Test printing
To start test printing, turn the power on while pressing and holding the
key, and
then press and hold the
key.
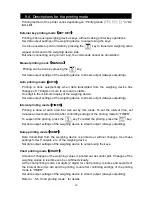
By performing test printing, the status of the function settings can be confirmed.
Printout example
* To stop printing, turn the power off.
3-6. Connecting to the weighing device
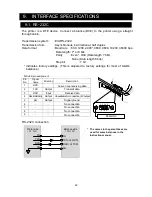
Use the RS-232C cable to connect the printer to the balance or scale.
* Depending on the balance or
scale models, there are
three types of pin: D-sub9
pin, D-sub25 pin or Din7 pin.
Use the cable that matches
the specific type to connect
the printer.
RS-232C cable
D-sub9 pin
AD-8127
Balance rear side
1
2
----------------------------
*[ PRINTER SETUP ]*
VERSION :V3.13(2016/11/25)
USER MODEL : AND
PRINT MODE : EXT.KEY
PRINT FORMAT : WEIGHT
PRINT FORMAT2: +/- PRINT
US PRINT : NOT PRINT
DATE FORMAT : Y/M/D
SUB FORMAT : DEL
LINE FEED : 1 LINE
USER CODE : 00000001
TOTAL MODE : TIME PRINT
CODE DIRECTION : L <- R
CODE PRINT : PRINT
NO.PRINT : PRINT
INTERFACE : SERIAL(RS-232C)
CURRENT LOOP
PROTOCOL : 2400bps,E,7,1
CURRENT TIME/DATE :
2016/12/15 14:38:42
----------------------------
Содержание AD-8127
Страница 1: ...AD 8127 Multi Printer INSTRUCTION MANUAL 1WMPD4003327A...
Страница 27: ...25 12 1 External dimensions Unit mm 174 141 87 23 91 27 4 62 69 122 60 3...
Страница 29: ...27 MEMO...
Страница 30: ...28 MEMO...


