


E P I C B o a r d
E P I C - Q M 5 7
Chapter 2 Quick Installation Guide
2-10
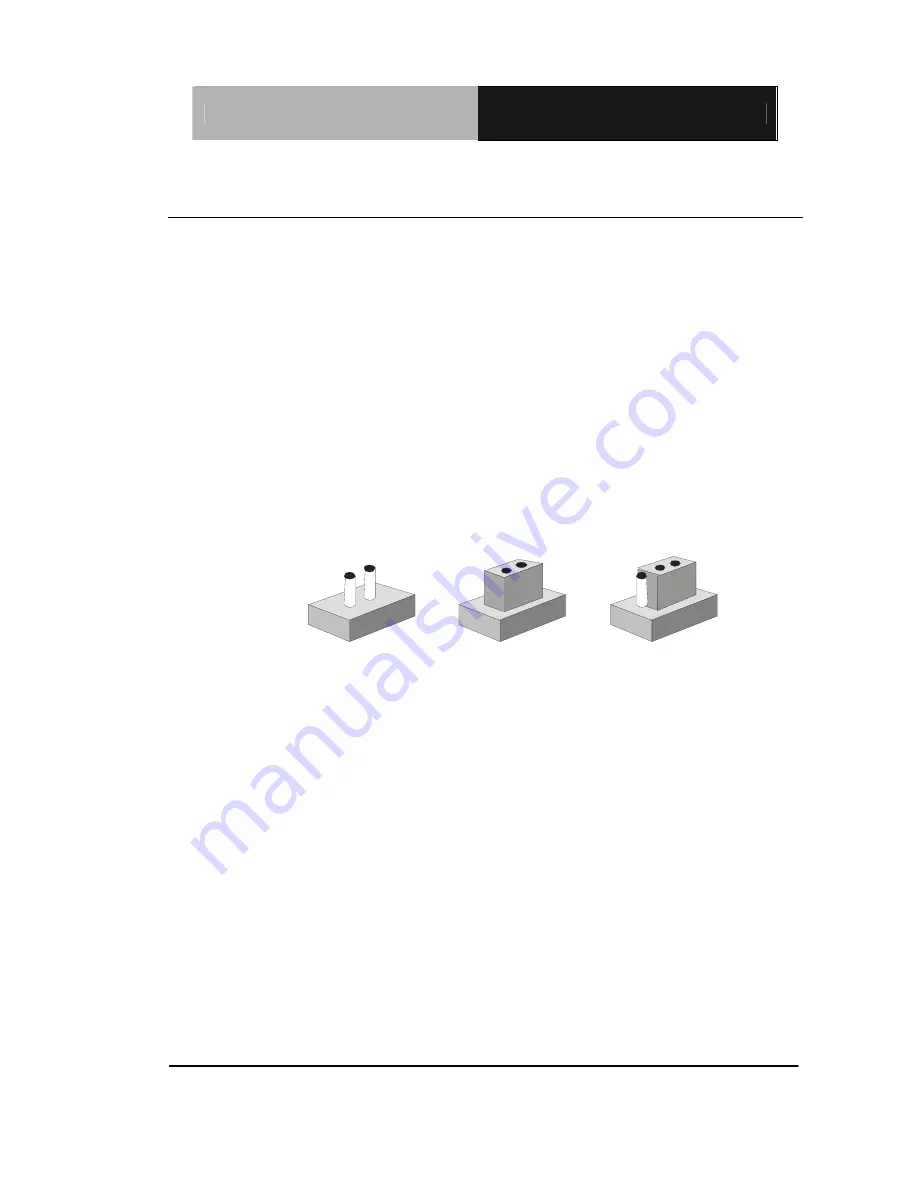
2.6 Setting Jumpers
You configure your card to match the needs of your application by
setting jumpers. A jumper is the simplest kind of electric switch. It
consists of two metal pins and a small metal clip (often protected by a
plastic cover) that slides over the pins to connect them. To “close” a
jumper you connect the pins with the clip.
To “open” a jumper you remove the clip. Sometimes a jumper will have
three pins, labeled 1, 2 and 3. In this case you would connect either
pins 1 and 2 or 2 and 3.
1 2
3
Open Closed Closed 2-3
A pair of needle-nose pliers may be helpful when working with jumpers.
If you have any doubts about the best hardware configuration for your
application, contact your local distributor or sales representative before
you make any change.
Generally, you simply need a standard cable to make most
connections.
Содержание EPIC-QM57
Страница 8: ...EPIC Board E P I C Q M 5 7 Chapter 1 General Information 1 1 Chapter General 1 Information...
Страница 13: ...EPIC Board E P I C Q M 5 7 Chapter 1 General Information 1 6 z Audio Line in Line out Mic in CD in...
Страница 14: ...EPIC Board E P I C Q M 5 7 Chapter 2 Quick Installation Guide 2 1 Chapter Quick Installation 2 Guide...
Страница 17: ...EPIC Board E P I C Q M 5 7 Solder Side Chapter 2 Quick Installation Guide 2 4...
Страница 18: ...EPIC Board E P I C Q M 5 7 Chapter 2 Quick Installation Guide 2 5 2 3 Mechanical Drawing Component Side...
Страница 19: ...EPIC Board E P I C Q M 5 7 Chapter 2 Quick Installation Guide 2 6 Solder Side...
Страница 31: ...EPIC Board E P I C Q M 5 7 Chapter 2 Quick Installation Guide 2 18 1 WAKE 2 3 3Vaux...
Страница 37: ...EPIC Board E P I C Q M 5 7 Chapter 3 Award BIOS Setup 3 1 Award BIOS Setup Chapter 3...
Страница 41: ...EPIC Board E P I C Q M 5 7 Chapter 4 Driver Installation 4 1 Driver Installation Chapter 4...
Страница 55: ...EPIC Board E P I C Q M 5 7 Appendix B I O Information B 1 I O Information Appendix B...
Страница 56: ...EPIC Board E P I C Q M 5 7 Appendix B I O Information B 2 B 1 I O Address Map...
Страница 57: ...EPIC Board E P I C Q M 5 7 Appendix B I O Information B 3...
Страница 58: ...EPIC Board E P I C Q M 5 7 Appendix B I O Information B 4 B 2 1 st MB Memory Address Map...
Страница 59: ...EPIC Board E P I C Q M 5 7 Appendix B I O Information B 5 B 3 IRQ Mapping Chart B 4 DMA Channel Assignments...
Страница 60: ...EPIC Board E P I C Q M 5 7 Appendix C Mating Connector C 1 Mating Connector Appendix C...
Страница 63: ...EPIC Board E P I C Q M 5 7 Appendix D RAID AHCI Settings D 1 RAID AHCI Settings Appendix D...
Страница 69: ...EPIC Board E P I C Q M 5 7 Appendix D RAID AHCI Settings D 7 Step 11 Choose Y Step 12 Choose 5 Exit...
Страница 70: ...EPIC Board E P I C Q M 5 7 Appendix D RAID AHCI Settings D 8 Step 13 Choose Y Step 14 Setup OS...
Страница 71: ...EPIC Board E P I C Q M 5 7 Appendix D RAID AHCI Settings D 9 Step 15 Press F6 Step 16 Choose S...
Страница 73: ...EPIC Board E P I C Q M 5 7 Appendix D RAID AHCI Settings D 11 Step 19 Setup is starting Windows...
Страница 77: ...EPIC Board E P I C Q M 5 7 Appendix D RAID AHCI Settings D 15 Step 7 Press F6 Step 8 Choose S...
Страница 79: ...EPIC Board E P I C Q M 5 7 Appendix D RAID AHCI Settings D 17 Step 11 Setup is loading files...


